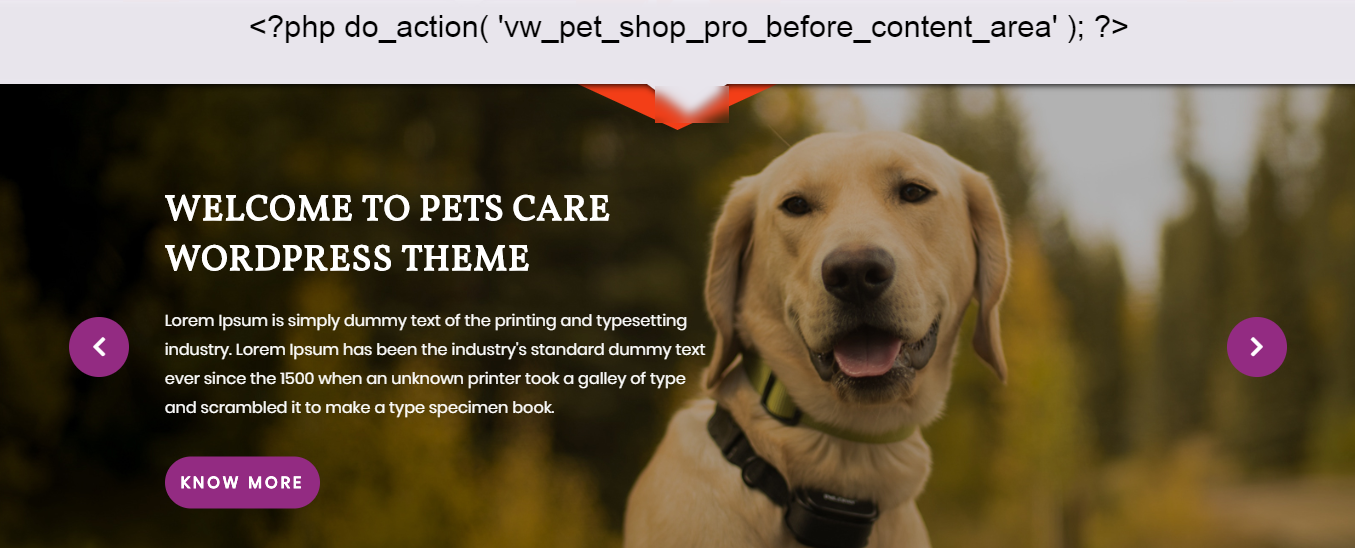
Introduction
We appreciate you purchasing our WordPress theme. This guide demonstrates various steps of the full configuration and management process for a WordPress website.
What is WordPress CMS?
WordPress is an open source website creation utility that uses PHP and MySQL as its foundation. It is a robust blogging tool and a totally free content management system (CMS). With this CMS, you can create reliable online applications and webpages. To manage it, you hardly need any technical expertise or information. WordPress has emerged as the most widely used website development software accessible due to its many benefits, including its simplicity and adaptability. Learn More
What is a Wordpress Template?
For webpages built using the WordPress CMS, a WordPress template serves as the skin. A WordPress template is very simple to setup. You can quickly alter the appearance of your WordPress website by installing a new template. A WordPress template comes with all the necessary source files, which you are free to modify and expand however you see fit.
Help and Support
Click here for support:
File Structure
The template package that you got is divided into various folders. Let's examine the contents of each folder:
-
Screenshots
-contains template screenshot. Not for production.
- theme -contains wordpress theme files
- "vw-pet-shop-pro" -this folder contains all the necessary files for the theme.
- "license.txt" -contains license details
- "readme.txt" -contain information about theme images path, font use and usage script
Template Installation
The process of installing a template is very straightforward and easy.
Within the WordPress interface, all activation procedures can be completed. It facilitates a quick and comfortable procedure.
There are two methods to complete the installation process.
1-To install a theme using WordPress admin, follow these steps:
First, log in to your WordPress admin dashboard.
1.Next, navigate to the "Appearance" menu and select "Themes."
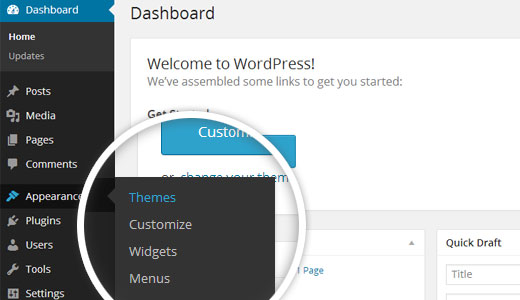
2. Once you are on the themes page, click on the "Add New" button located at the top of the page.

3. Click on upload theme button.

4. Click the "Browse" button, select the vw-Pet-Shop-post-pro.zip theme, and then click the "Install Now" button.

5. WordPress will now proceed with installing your selected theme, and upon completion, you will see a success message that includes options to activate the theme or preview it live. Congratulations! Your theme has been successfully installed and set up.
2-Install a Theme using FTP
The theme can be uploaded using FTP, which is your second installation choice. To use this technique, first log into your website using FTP and navigate to the wp-content/themes folder. Simply extract the Total folder from the theme file you got and upload it to your server.

then sign in to your WordPress website and go toAppearance >> Themes to activate Total.
Section Color/Font Pallette
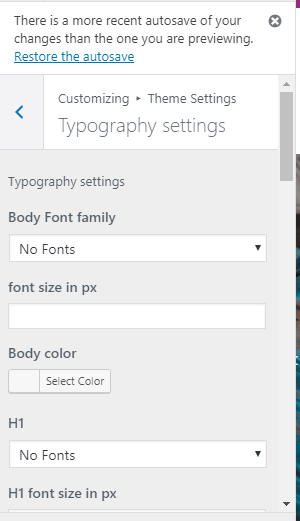
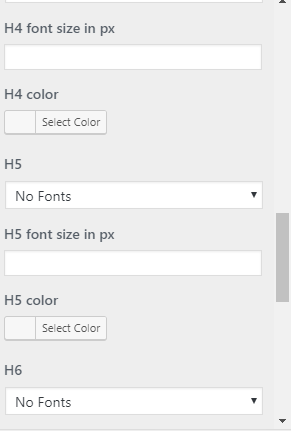
The procedure of changing the colour or font is very simple. These choices are available in all customizer sections. It is a full image that demonstrates the font and colour palette. You can change the colour and font of the headings, paragraphs, and buttons with a single look or click.
Depending on the amount of options available in each section, there is an option to change the colour scheme for the headings, title/text, paragraph, button text, and button background.
Default Color/Font settings
Theme Wizard
* The version just got this new function added. (1.2.2)
To import content using Theme Wizard, adhere to these procedures.
1) Go to Dashboard >> Getstarted
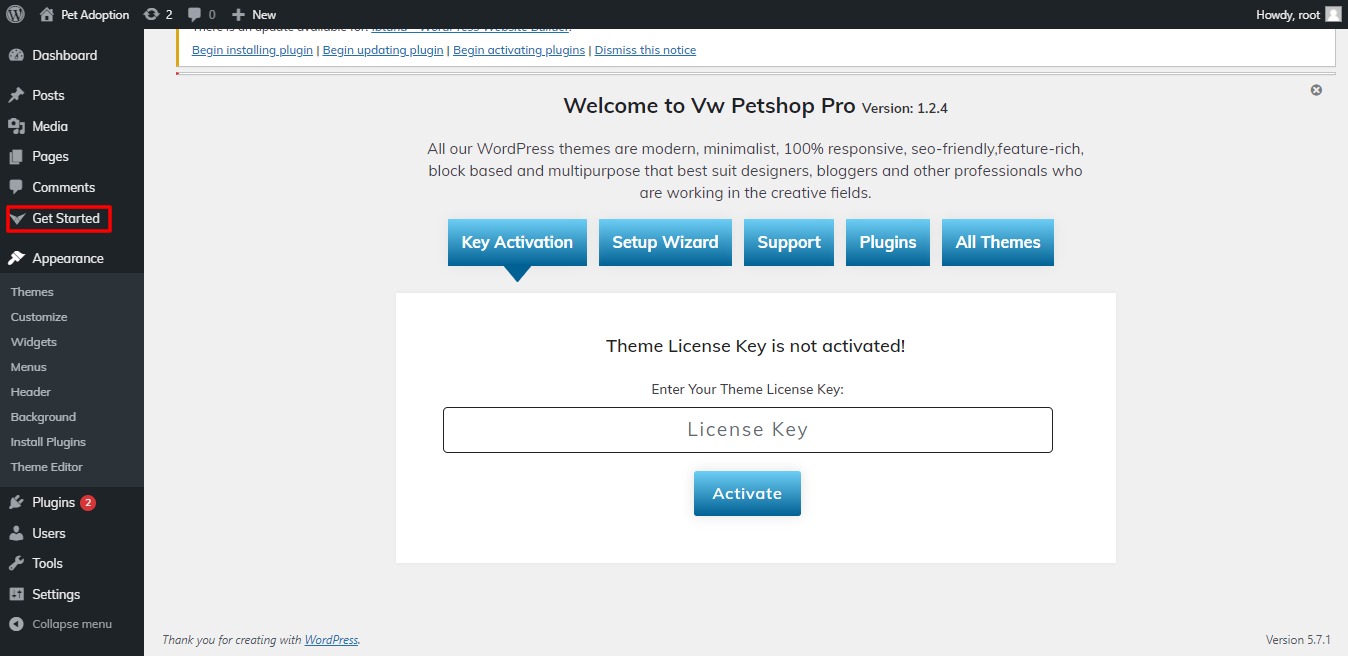
2) Insert your key.
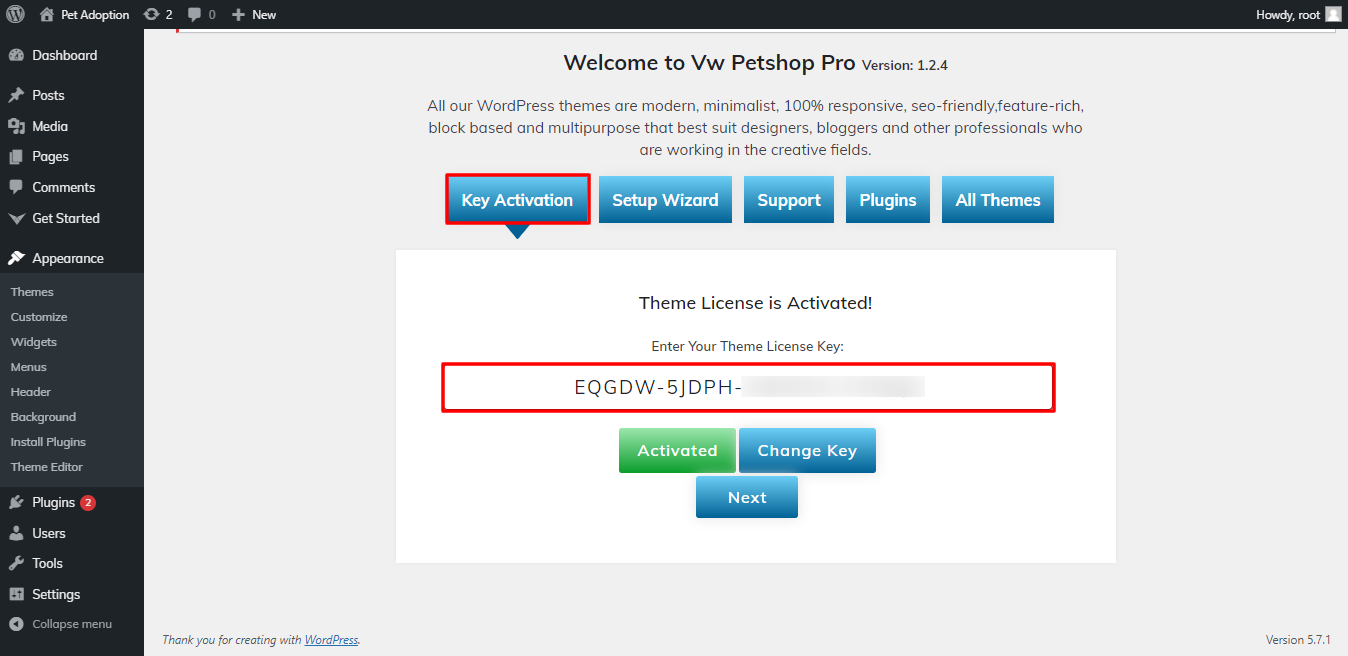
Refer video for Licence key activation:
3) CLick on Wizard and then start now.

4) Install Plugins.
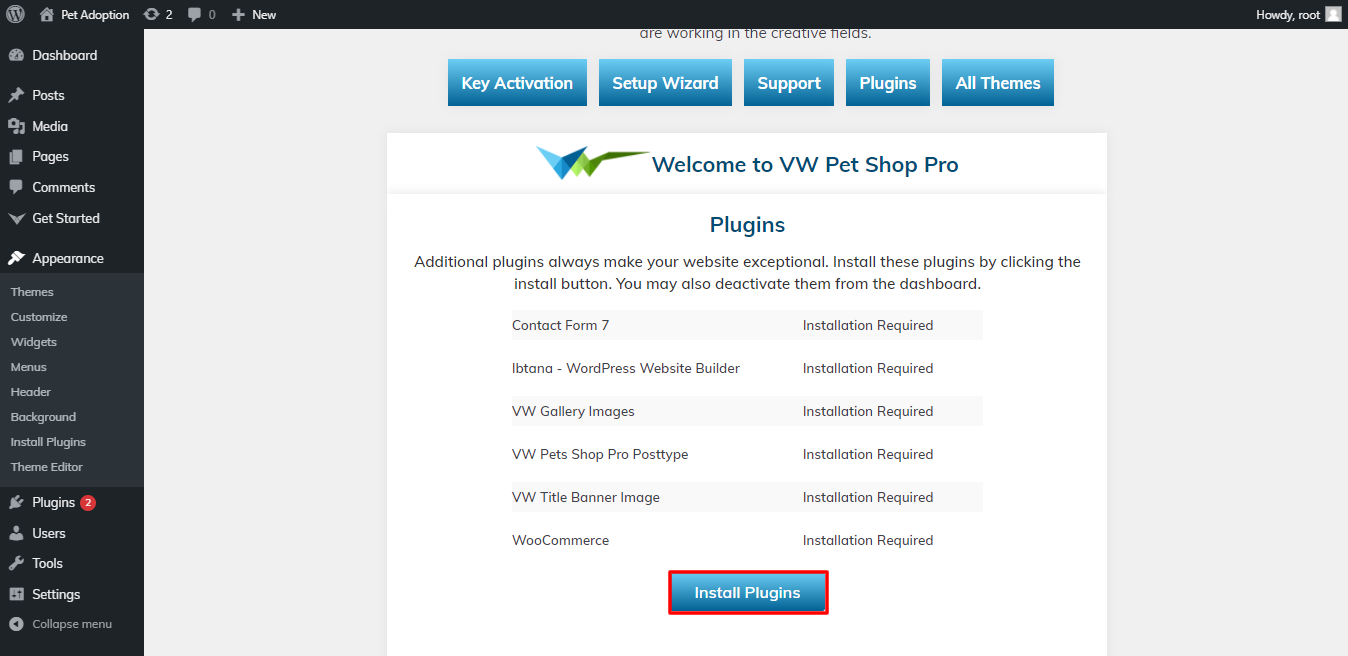
5) Import your demo content based on Customizer and Gutenberg.
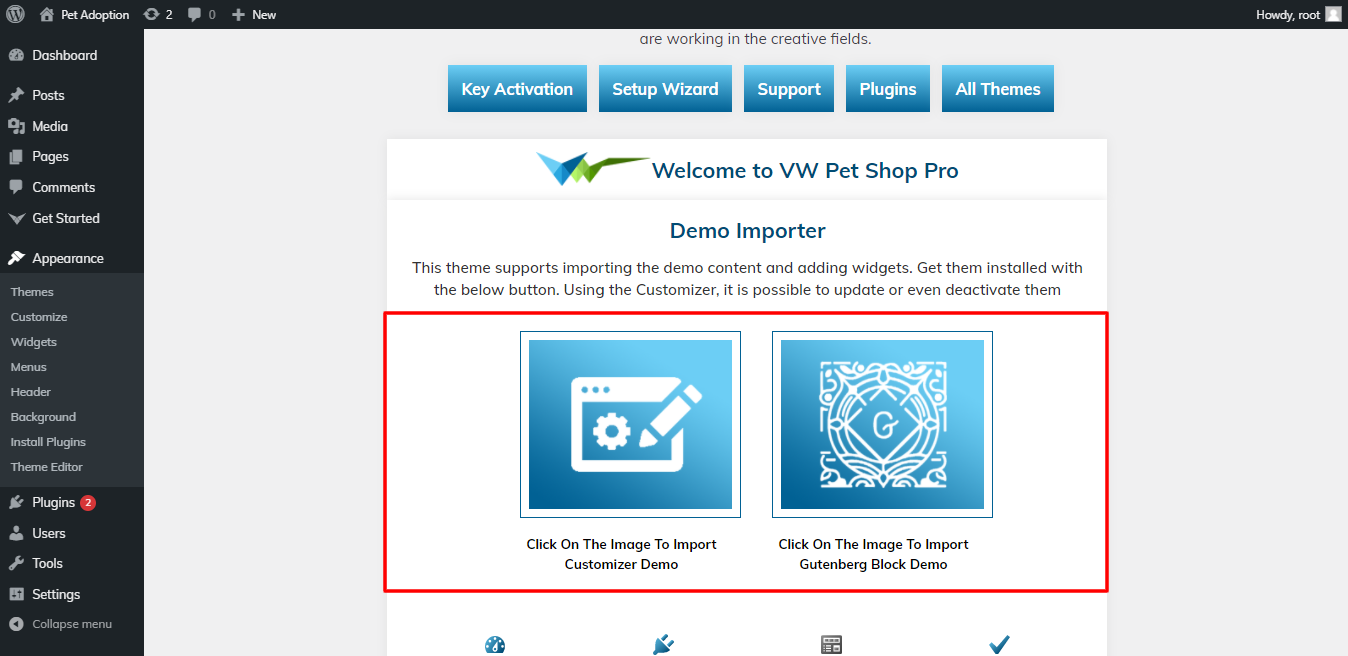
For setting up your demo content based on, you can turn to this video.
Theme Setup
The index page with the most recent post will be visible when you visit your site after activating the theme. You must now configure the home page template so that it displays the entire demo area on your front page.
Setup Home Page Template
Set up your home page by following these steps.
- 1. To set a template for a new page, navigate to the Dashboard, click on Pages, and then select Add New Page.
Give the page a name, such as "Home," or any other desired label. Next, choose the "home-page" template from the dropdown menu of available templates.
- 2. Set the front page: Go to Setting -> Reading --> Set the front page display static page to home page
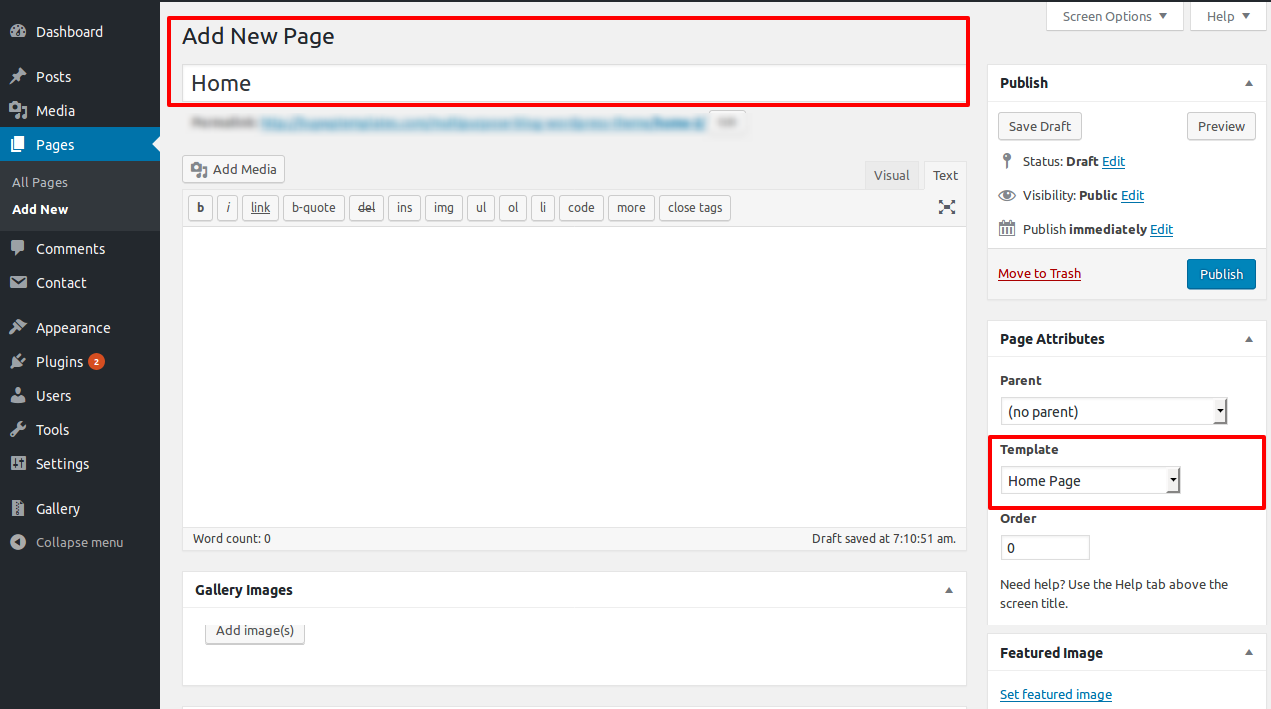

When you're finished, you can view the entire demo collection on the front screen.
Setup Header Section

In order to proceed with Header,
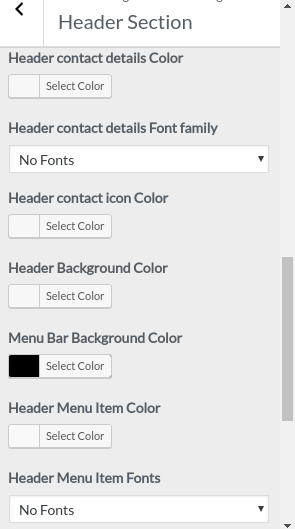
Go to Appearance >> Customize >> Theme Settings >>Header Settings
For help setting up a header, see the images below.
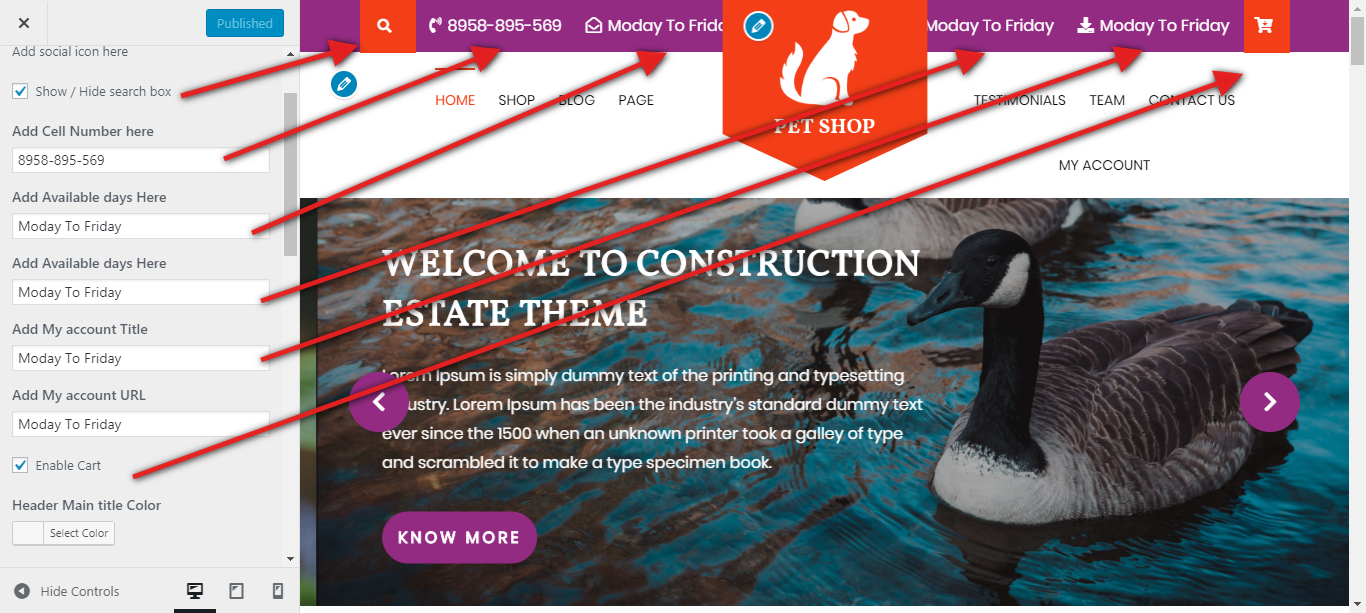
To complete the heading setup, adhere to these instructions.
- Header Contact Details Color : You can choose the font colour for the contact information here.
- Header Contact Details Font Family: You can choose the typeface family for the contact information here.
- Header Contact Icon Color: Here, you can change the Contact Icon's icon colour.
- Header Background Color: Here, you can change the header's backdrop colour.
- Menu Bar Background Color: Here, you can change the menu bar's backdrop colour.
- Header Menu Item Color: Here, you can change the colour of the Home, About, Contact, and other menu elements.
- Header Menu Item Fonts: You can choose the font family for the menu elements such as Home, About, Contact, etc. here.
Menu Section

to continue with the Menu Section.
Go to Appearance >> Customize >> Site Identity.
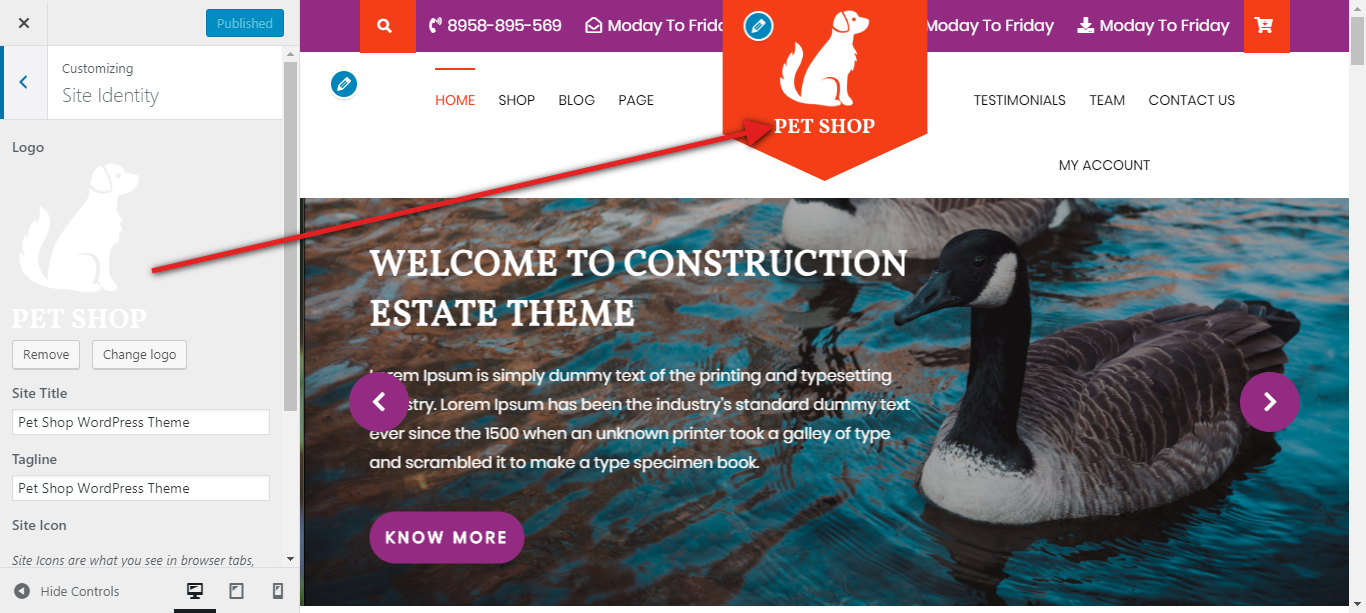
You must make pages for menus and then add to them in menus.
For improved comprehension, refer to the screenshot.
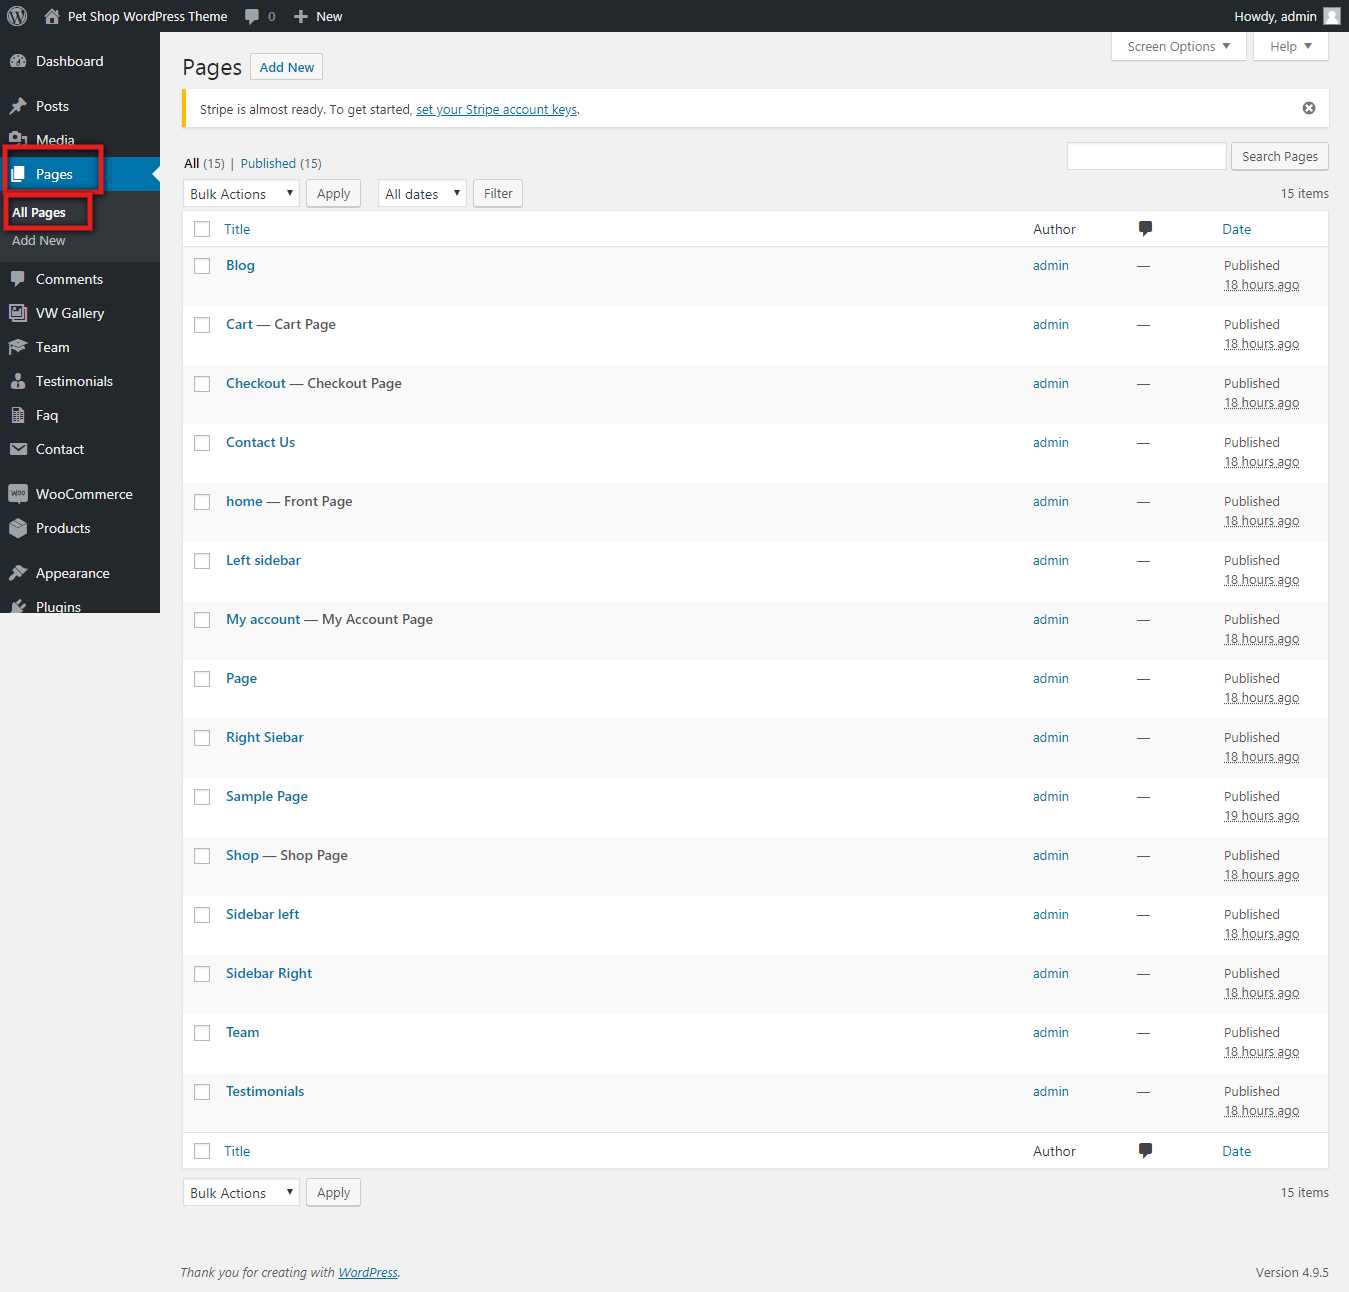
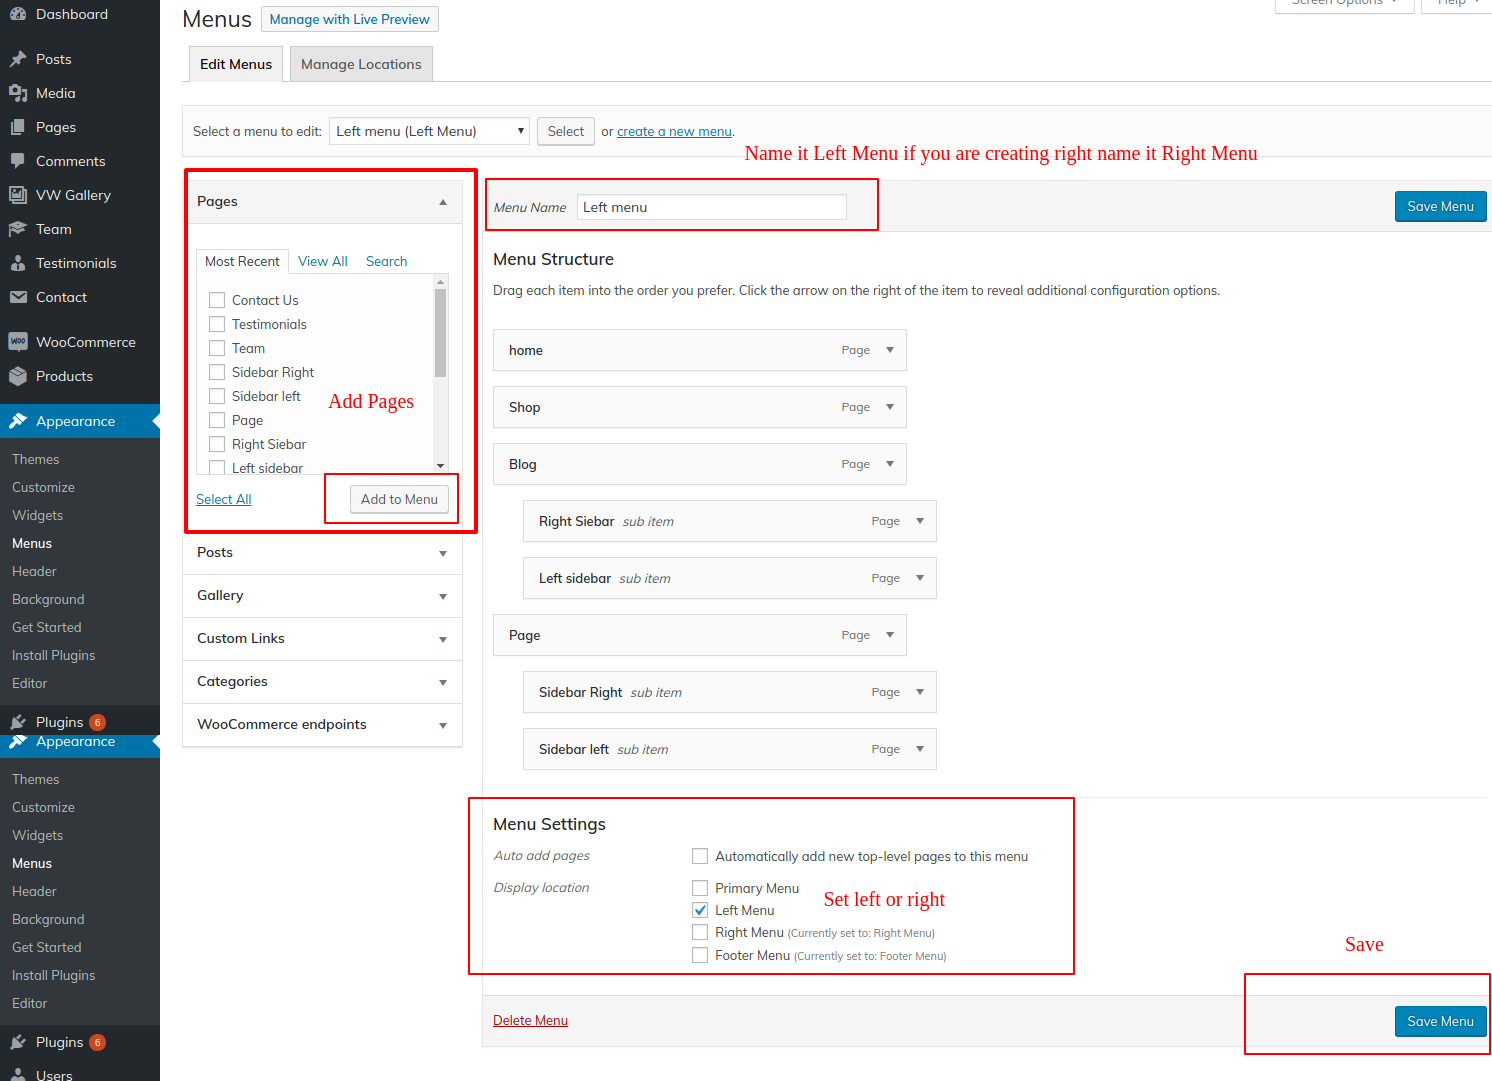
Dashboard >> Appearance >> Menus.
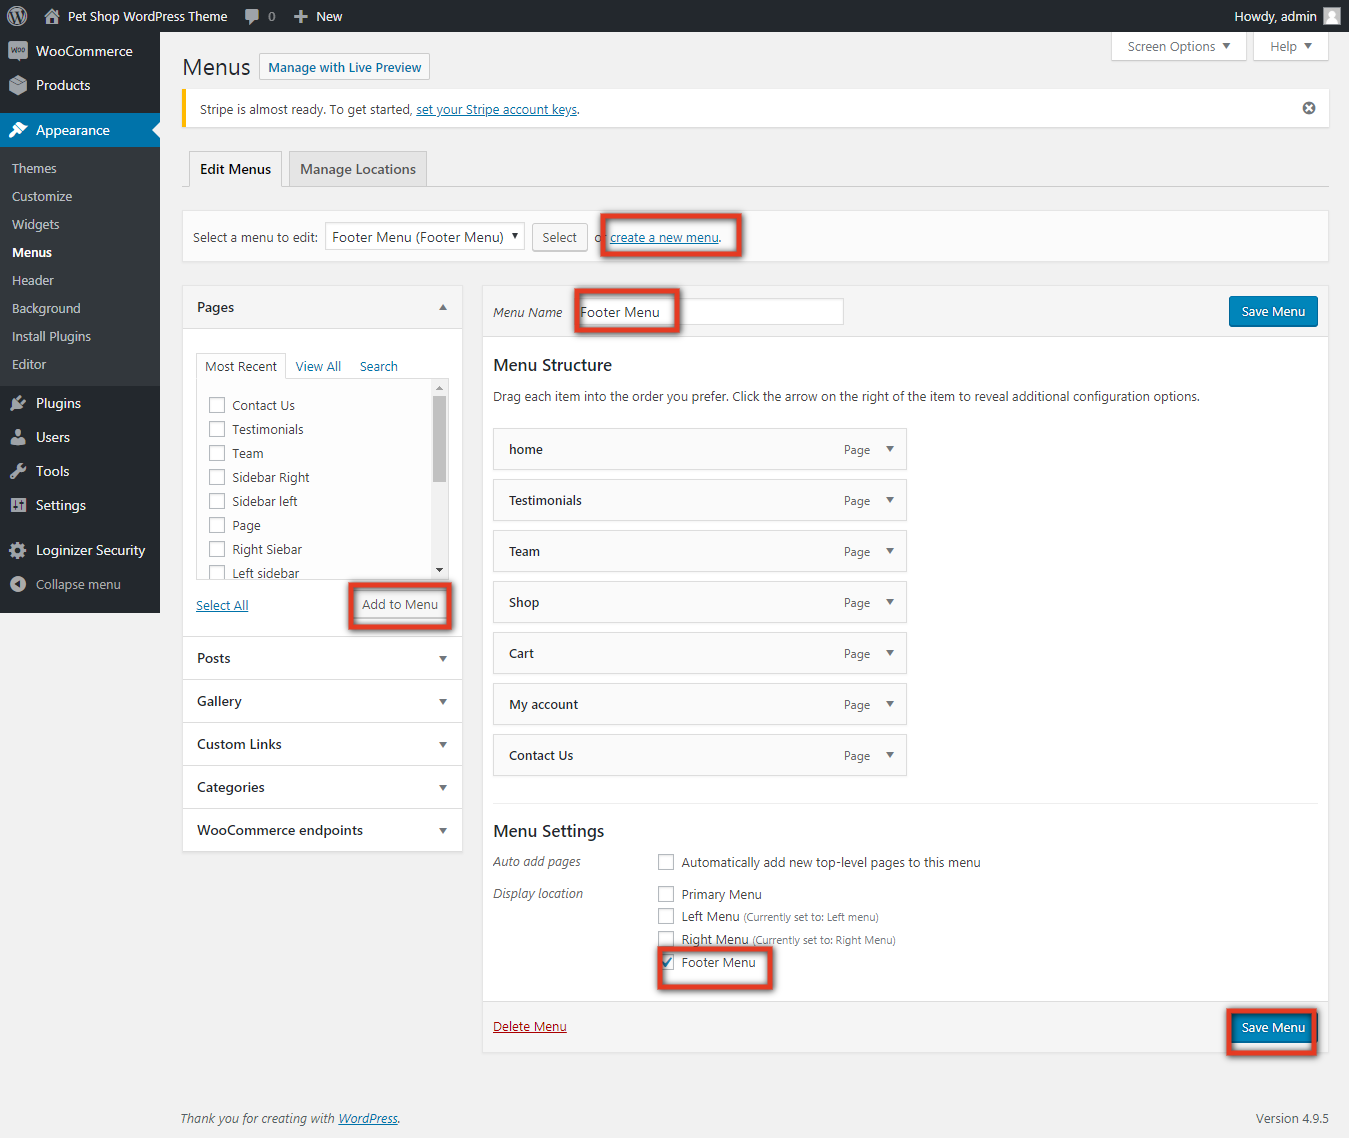
1. You must first build a menu. Here, we'll walk you through the stages to creating a left menu. The same steps must be repeated for the correct selection.
2. Create a menu and give it the names "Left Menu" and "Right Menu" respectively.
3. Use the left side to add items to that menu.
4. All of the pages are mentioned there. Then select "Left Menu" in the "Menu settings" section at the bottom. Check the "Right Menu" checkbox if you are making a right menu.
5. Save the adjustments. On the front end, you will see your left selection and right menu.
The fact that this option is exclusive to the desktop is crucial in this situation. You will need to build a separate menu for mobile because the menu layout is different in the mobile version. Review the actions listed below.
1. Make a menu and give it the moniker "Primary Menu."
2. Use the left side to add items to that menu.
3. All of the pages are enumerated there. After that, select "Primary menu" from the checkbox under "Menu settings" at the bottom.
4. Save the adjustments. You'll see the mobile-specific variation of your main menu.
Setup Slider

In order to proceed with slider.
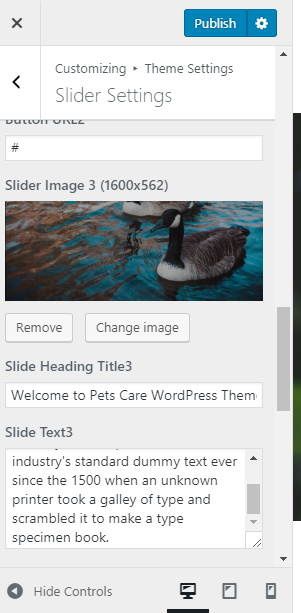
Go to Appearance >> Customize >> Theme Settings >>Slider Settings
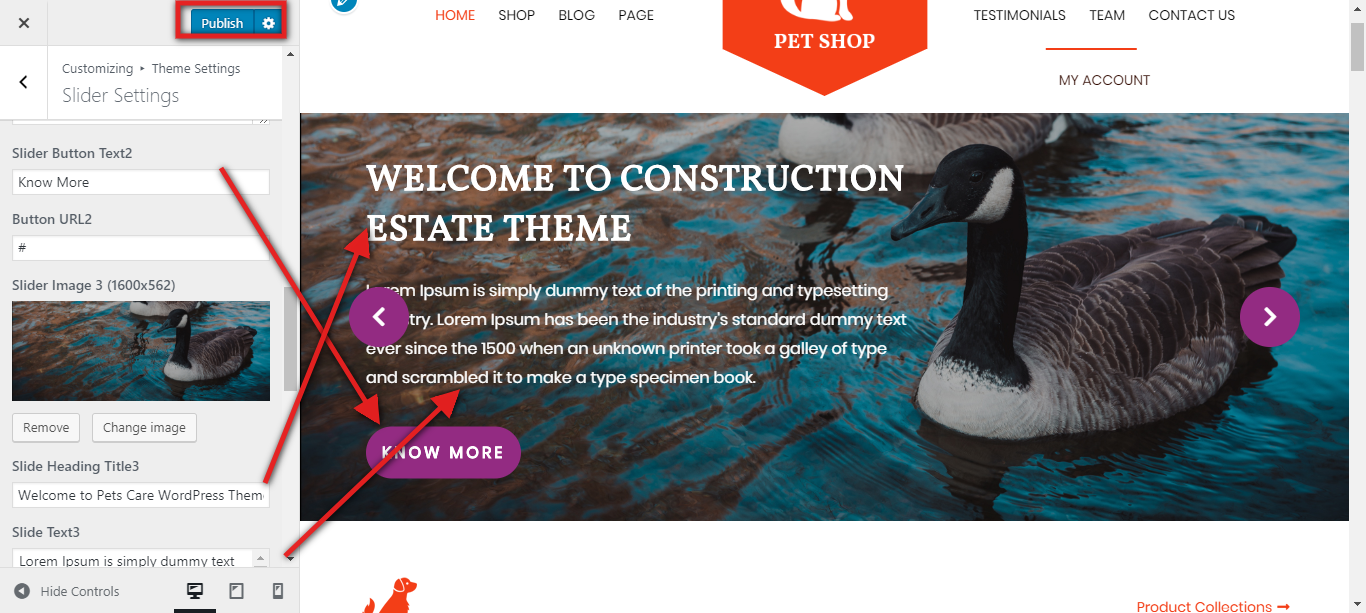
- Do you want this section: If you don't want this area, you can deactivate it here; if you do, just leave it enabled. Here, Enable and deactivate options are offered.
- Slider Image1: Here, you can choose whether the first slider image will appear on the screen. Similar to setting slider Image1, you can also set slider Image2, slider Image3, and so forth based on how many slides you want to display.
- Slide Heading Title1: The description for slider 1 can be modified here.
- Slide Text1: Here, you can choose how the words will appear on slider 1. Similar options are available to input the text for Slide2, Slide3, and so forth.
- Slider Button Text1: You can type the content you want to appear on Slider1's button here.Similar options will be available to input text for the buttons on the sliders 1, 2, etc.
- Button URL1: The URL for the slider1 icon can be entered here. Similarly, you can specify urls for buttons on sliders 2, 3, and so forth.
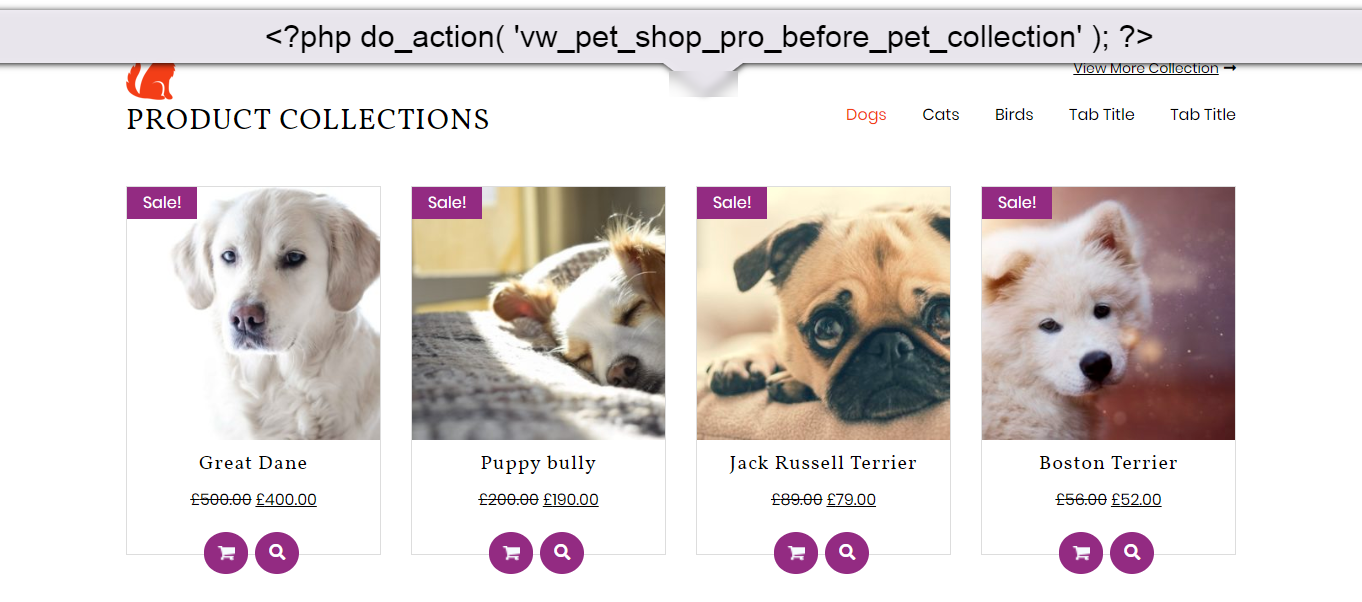
Product Collection
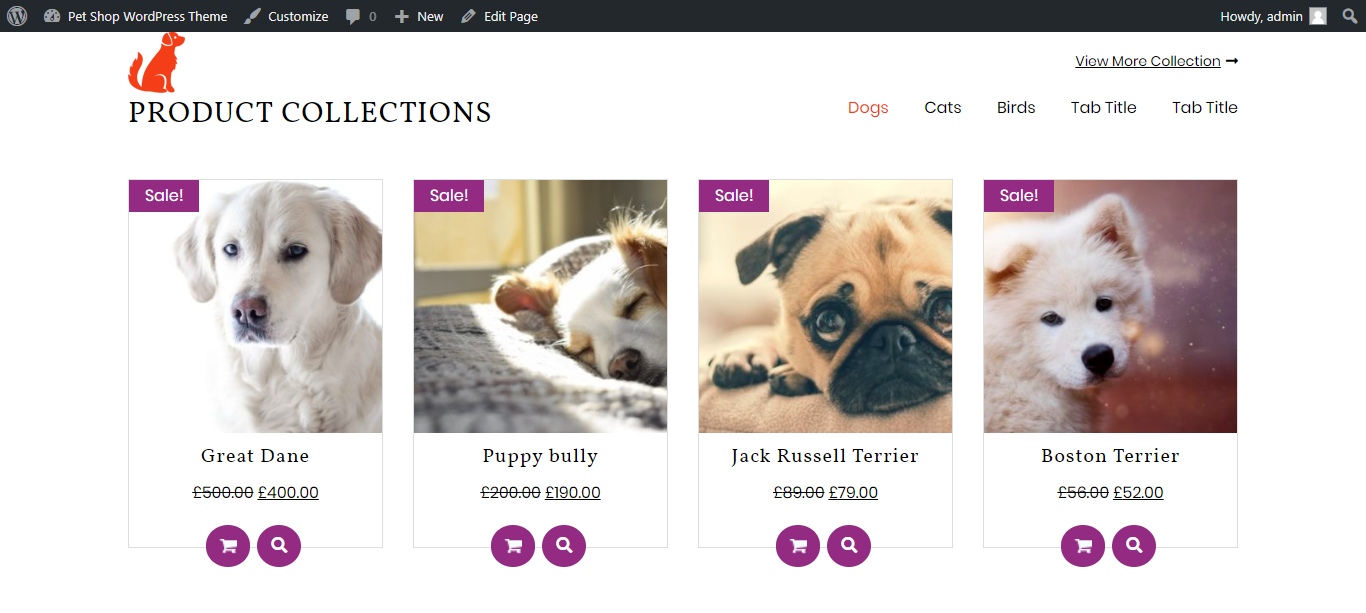
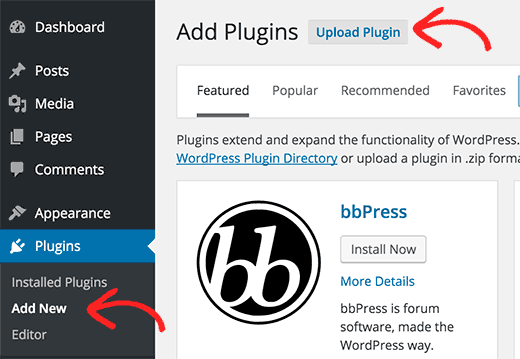
1. You must install a component for the Product Collection Section.
2. First, look at the part on plugins.
3. To access the part on product collection,
4. You must first establish categories.
5. The procedures for making groups.
6. Dashboard >> Posts >> Categories >> Add new.
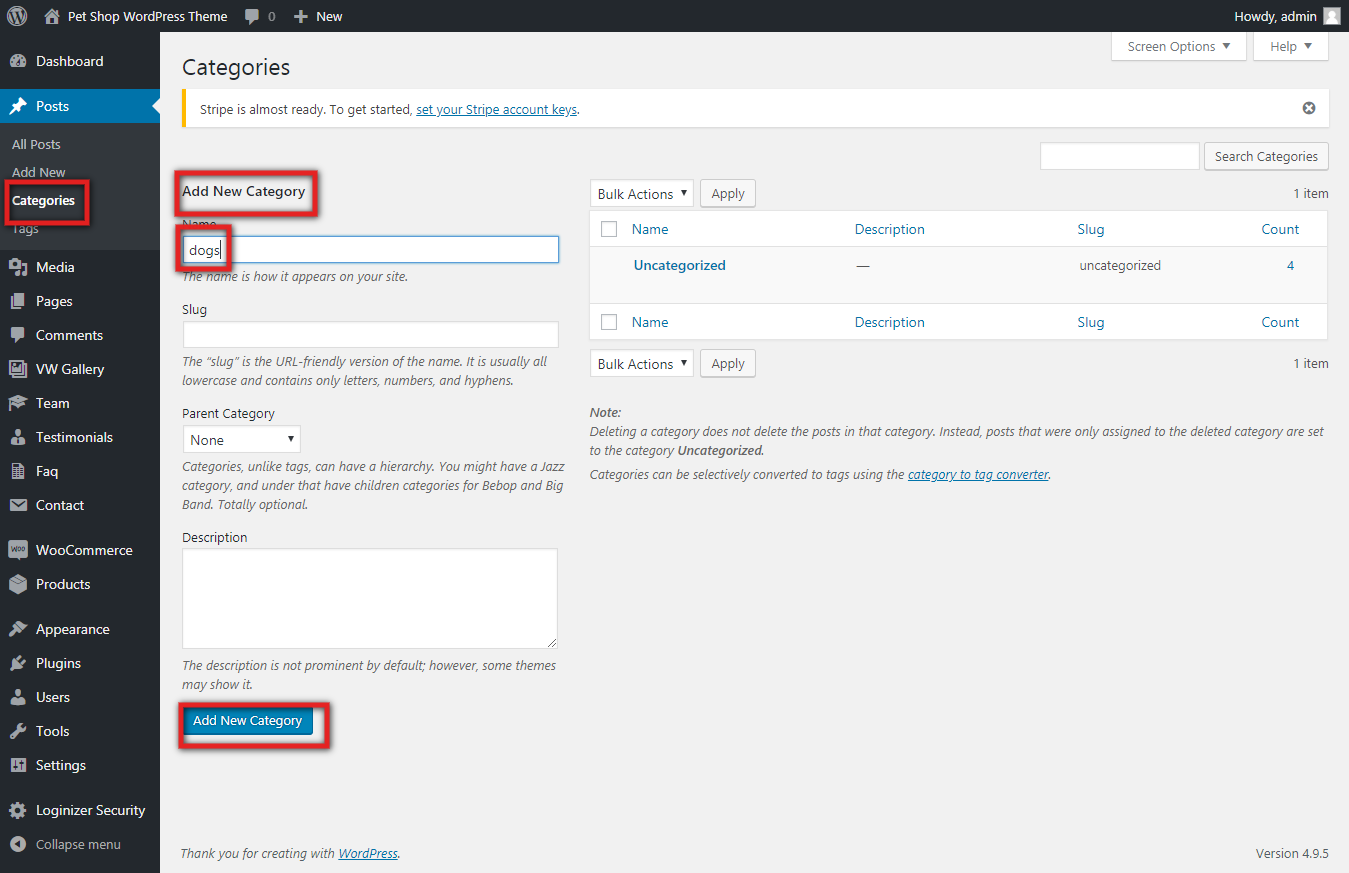
Repeat this process if you want to add more groups.
Dashboard >> Products >> Add new.
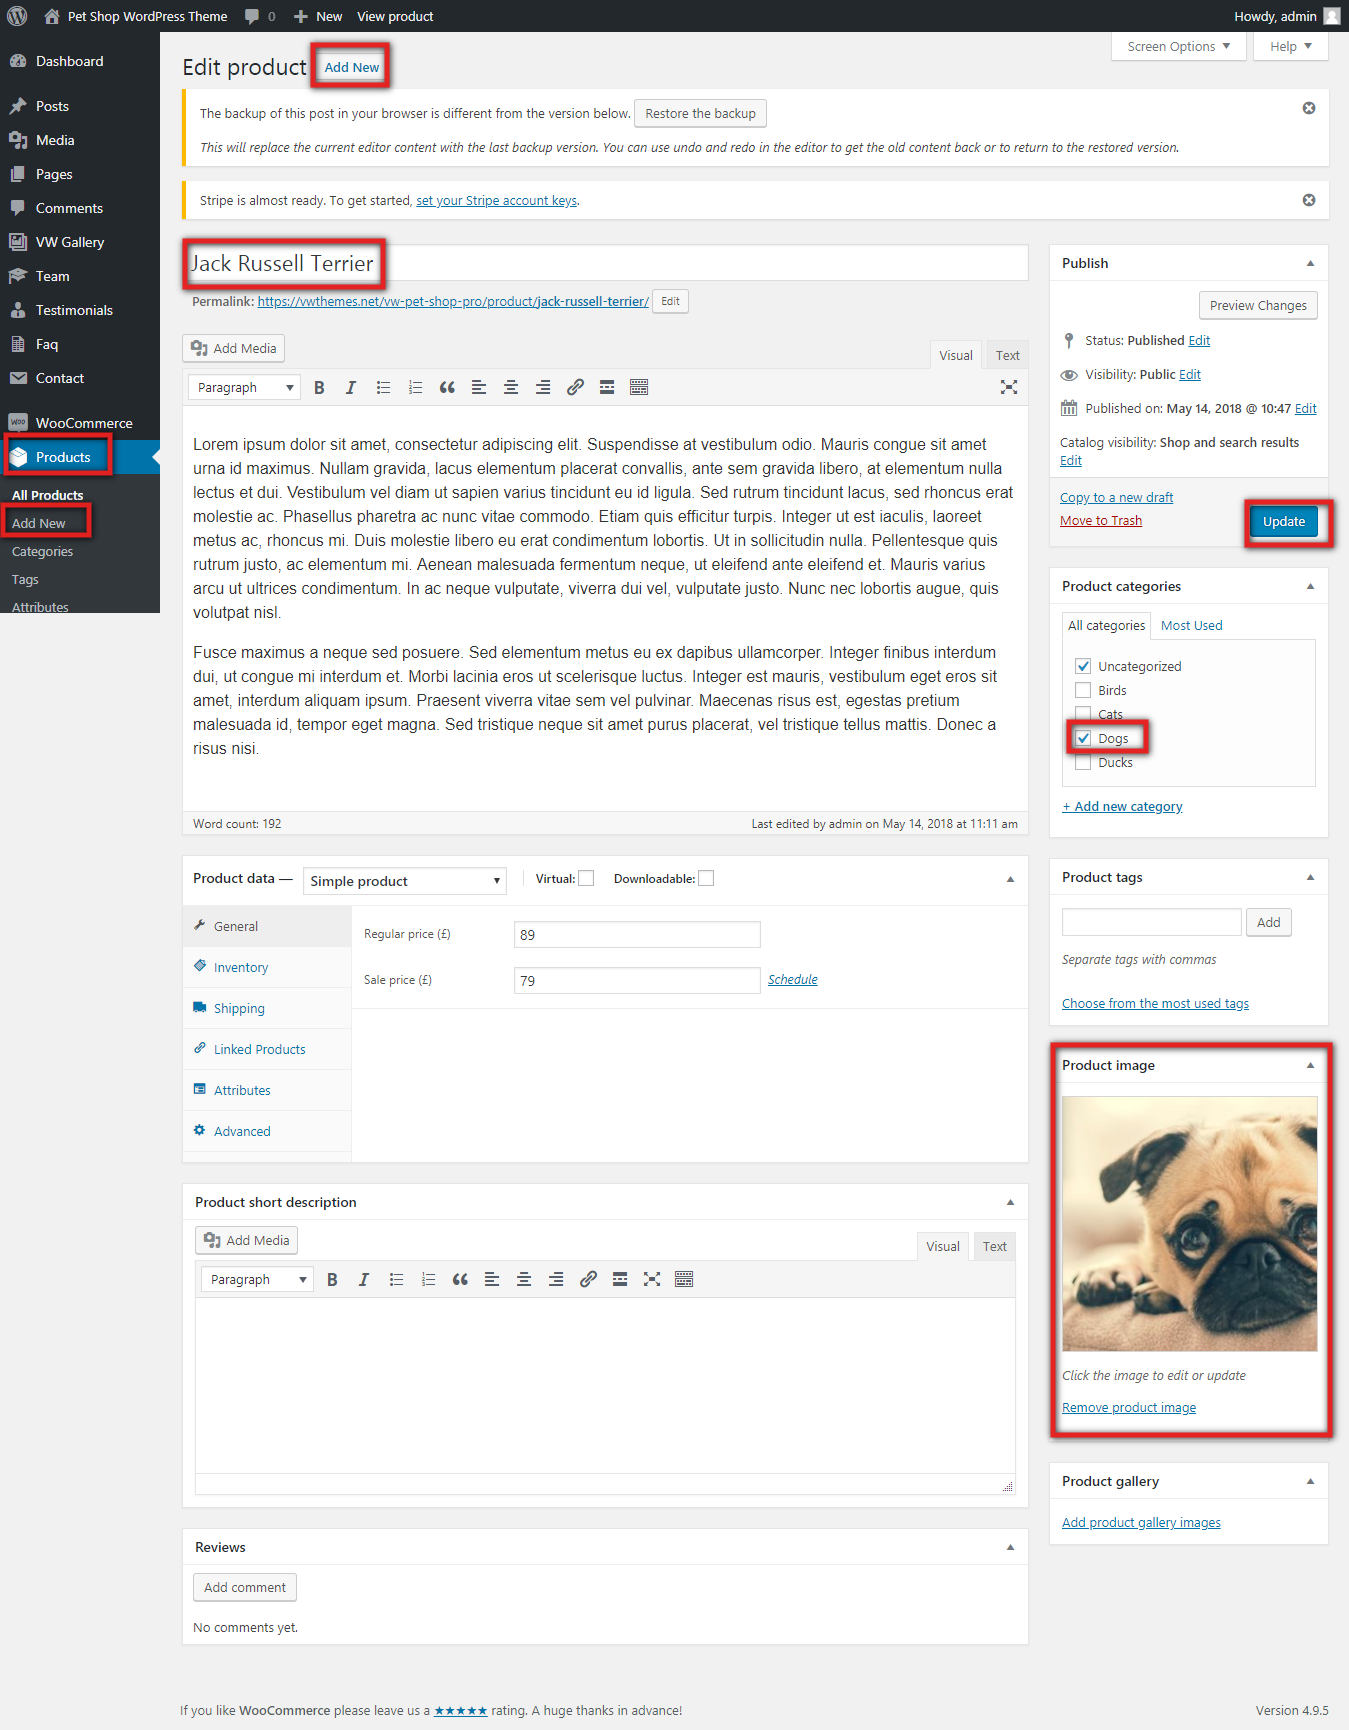
the customised portion, then.
Go to Appearance >> Customize >> Theme Settings >> Product Collection.
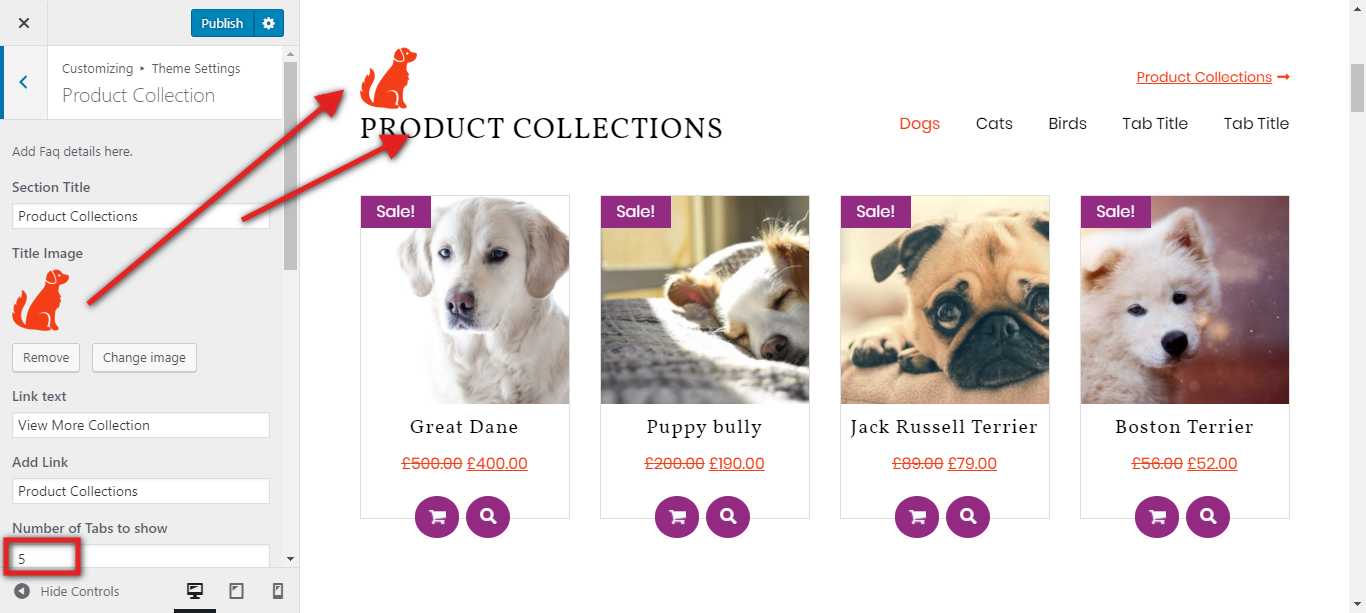
To further configure this area, please see the screenshots below:
- Do you want this section:If you don't want this area, you can deactivate it here; if you do, just leave it enabled. Here, Enable and deactivate options are offered.
- Background Color: The colour of this section's backdrop can be changed here.
- Background Image: If you want to select a background image for this area rather than a background color, you can do so here.
- Button Text Color: You can choose the text colour that will be presented on the button here.
- Button Background Color: Here, you can change the button's backdrop colour.
- Button Text Fonts: You can choose the typeface family for the button text here.

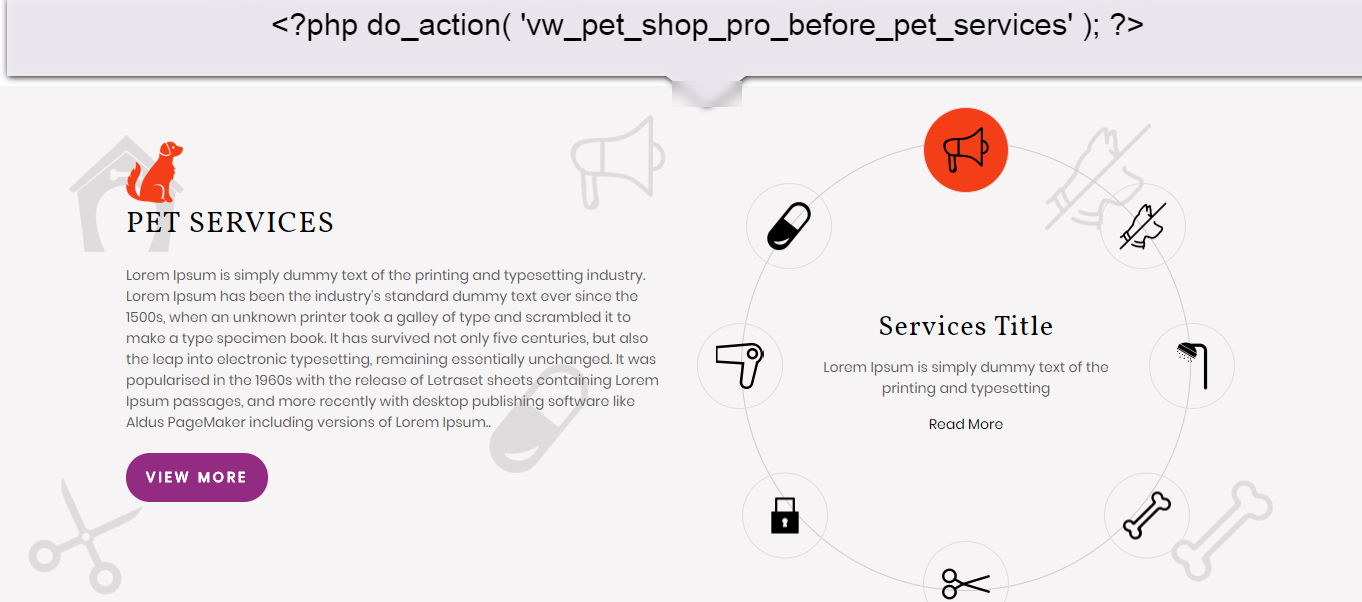
Setup Pet Services Section
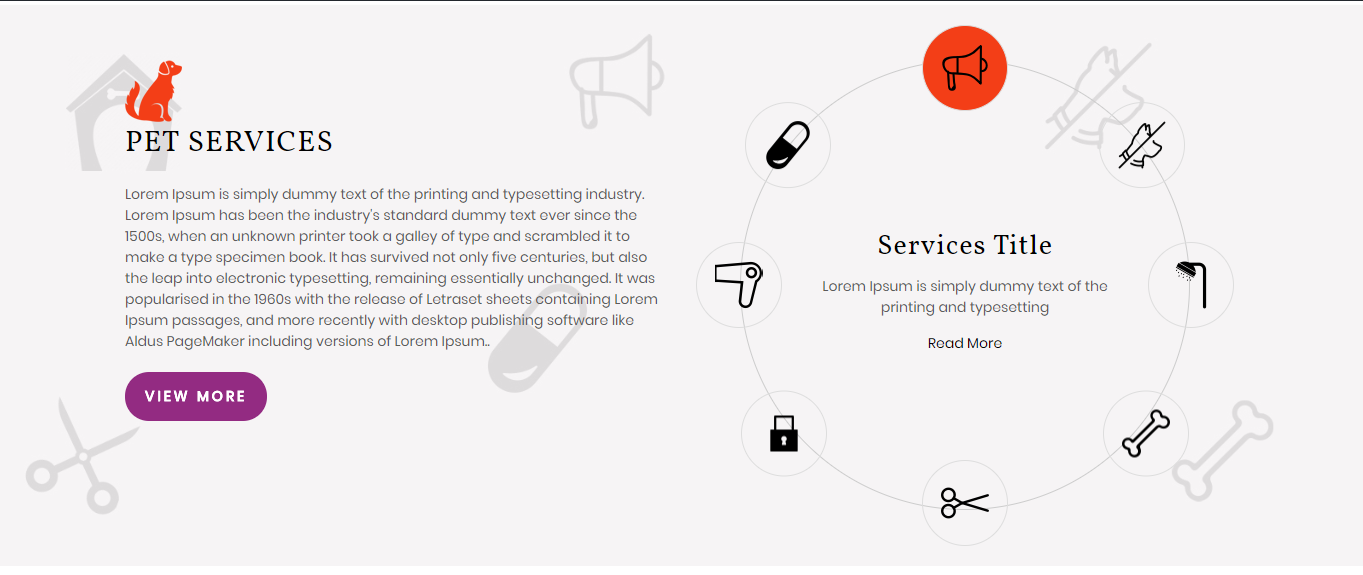
To continue with the Pet Services Section,
Go to Appearance >> Customize >> Theme Settings >> Pet Services
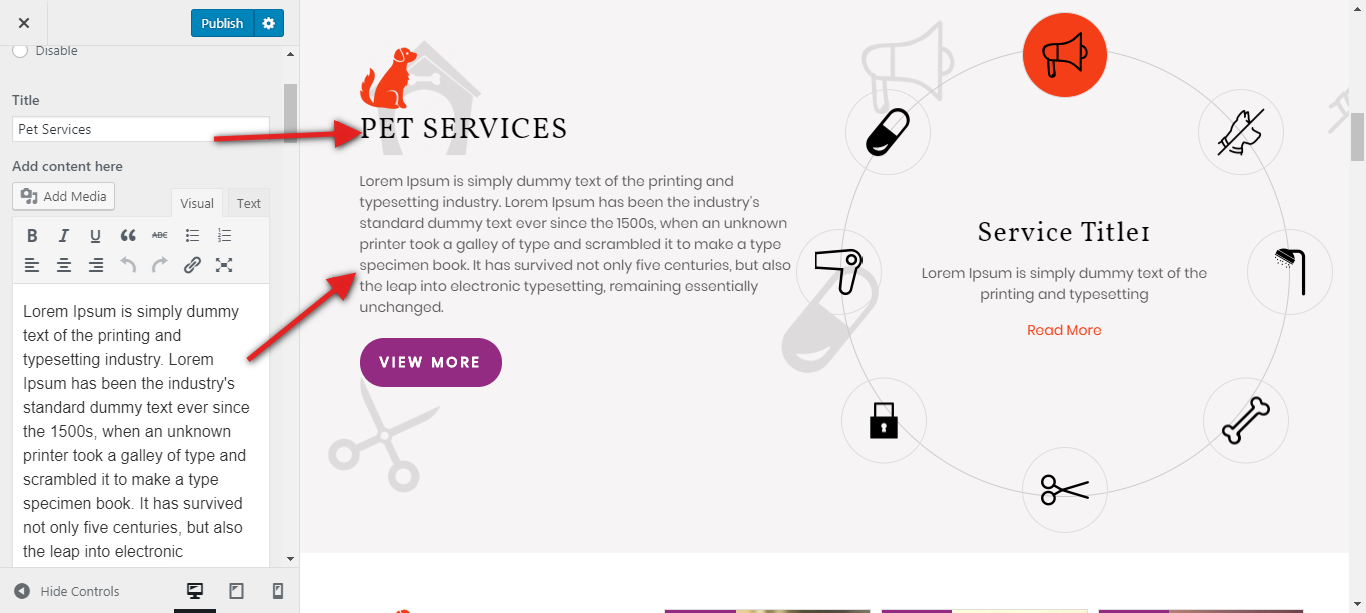
To set up this area, please refer to the screenshots below:
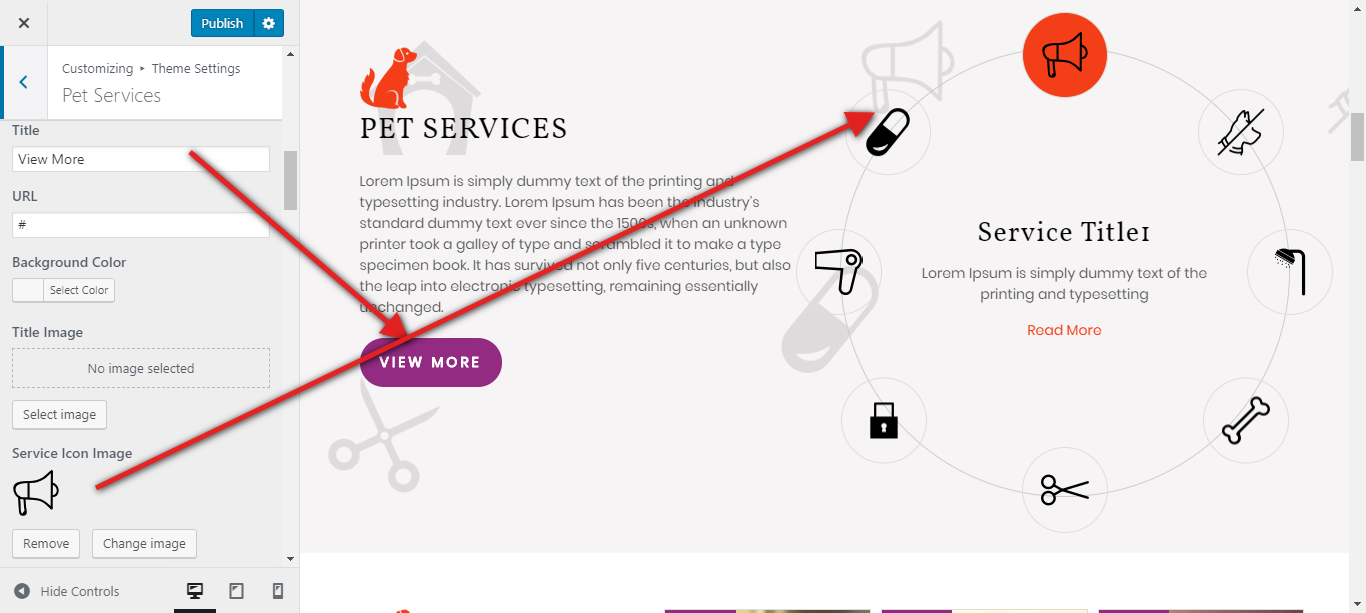
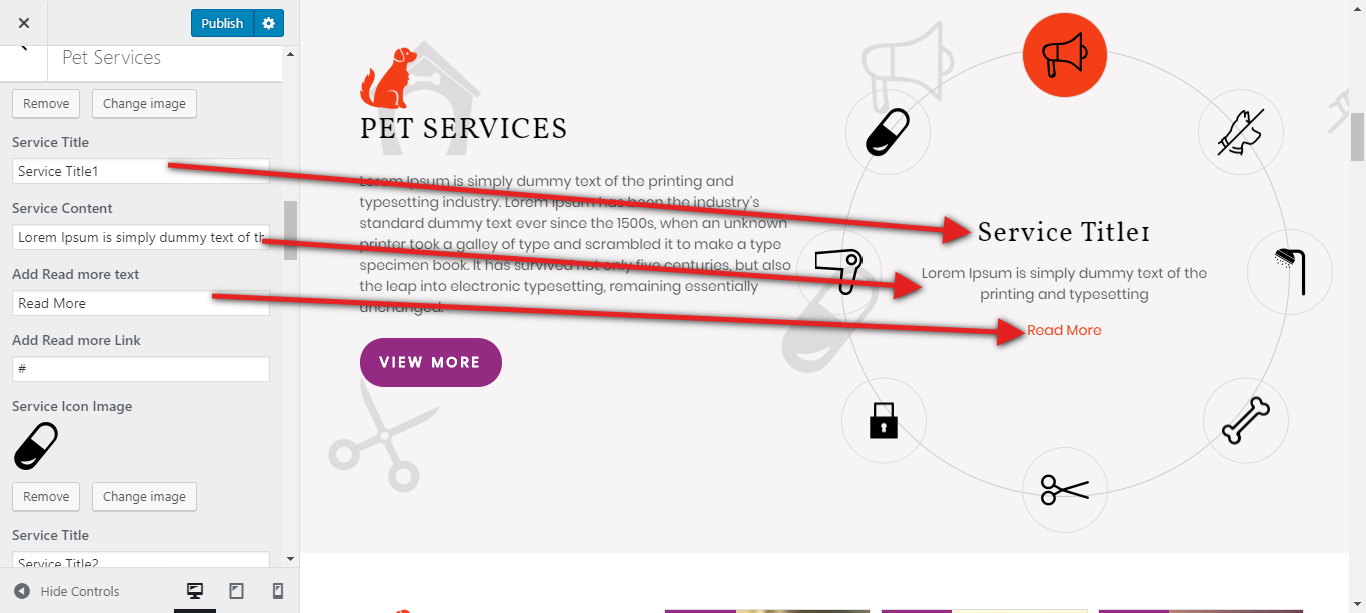
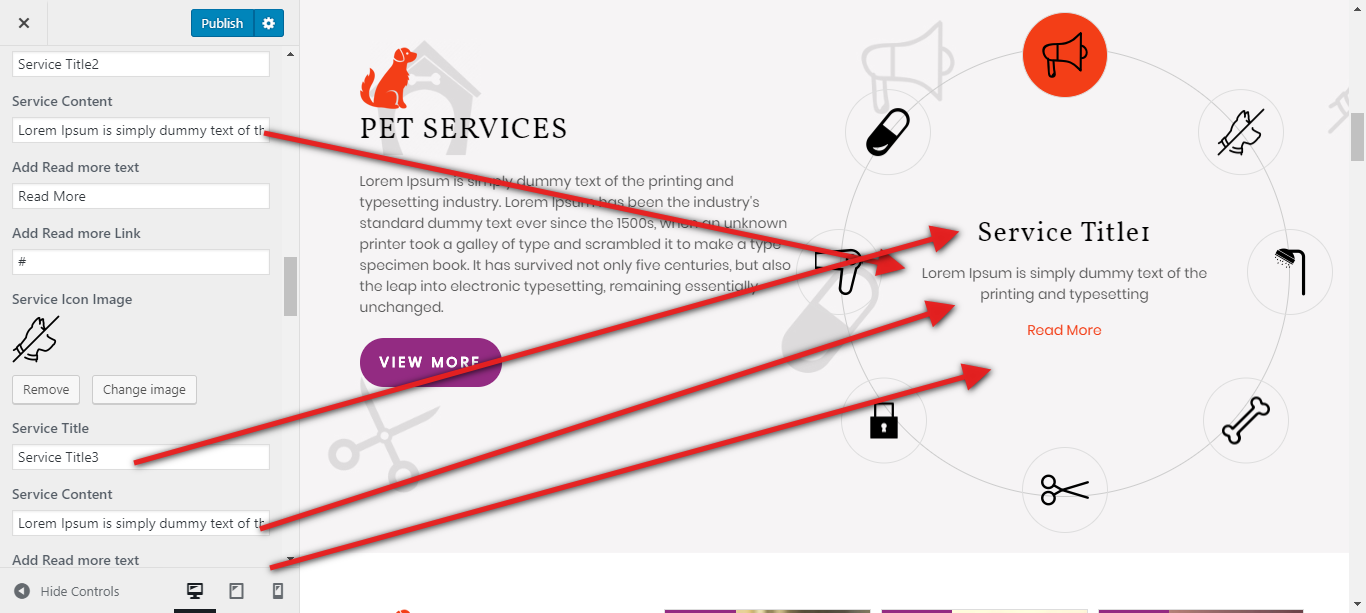
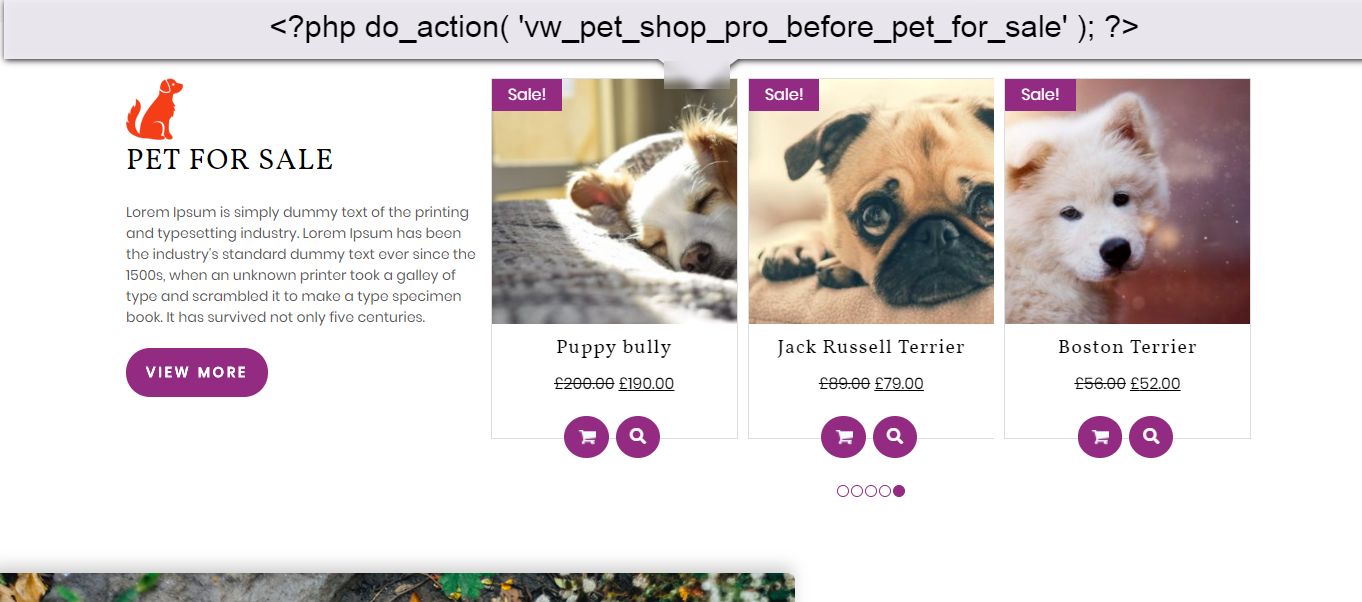
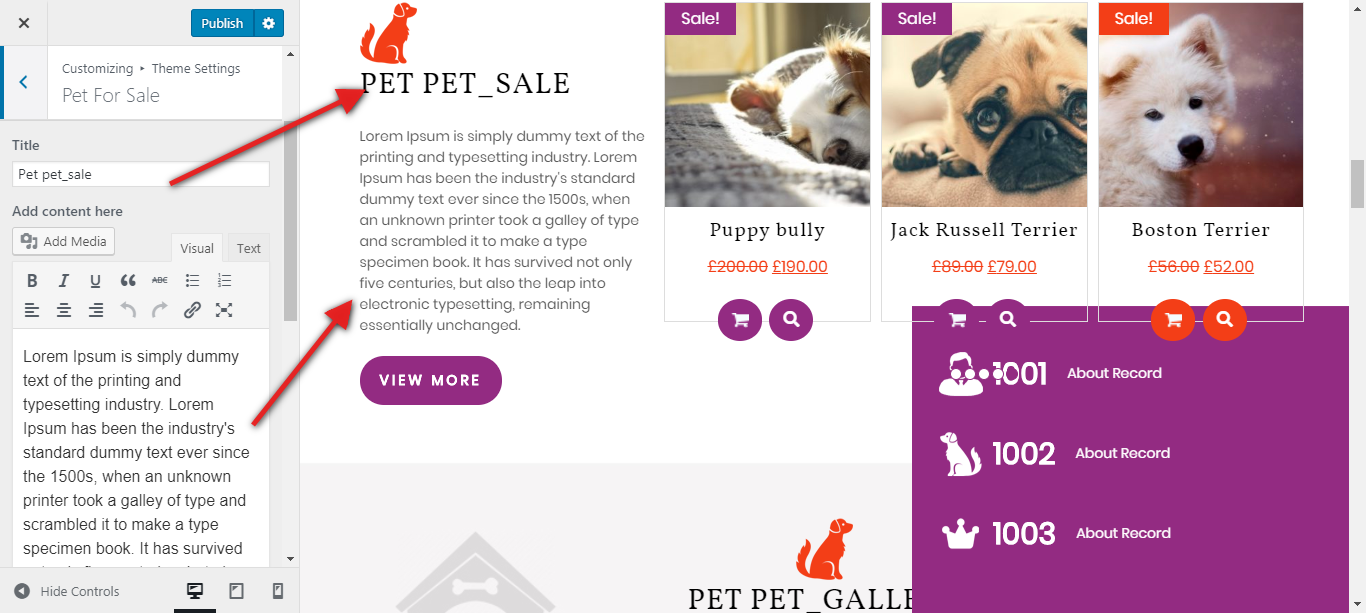
Pet for Sale
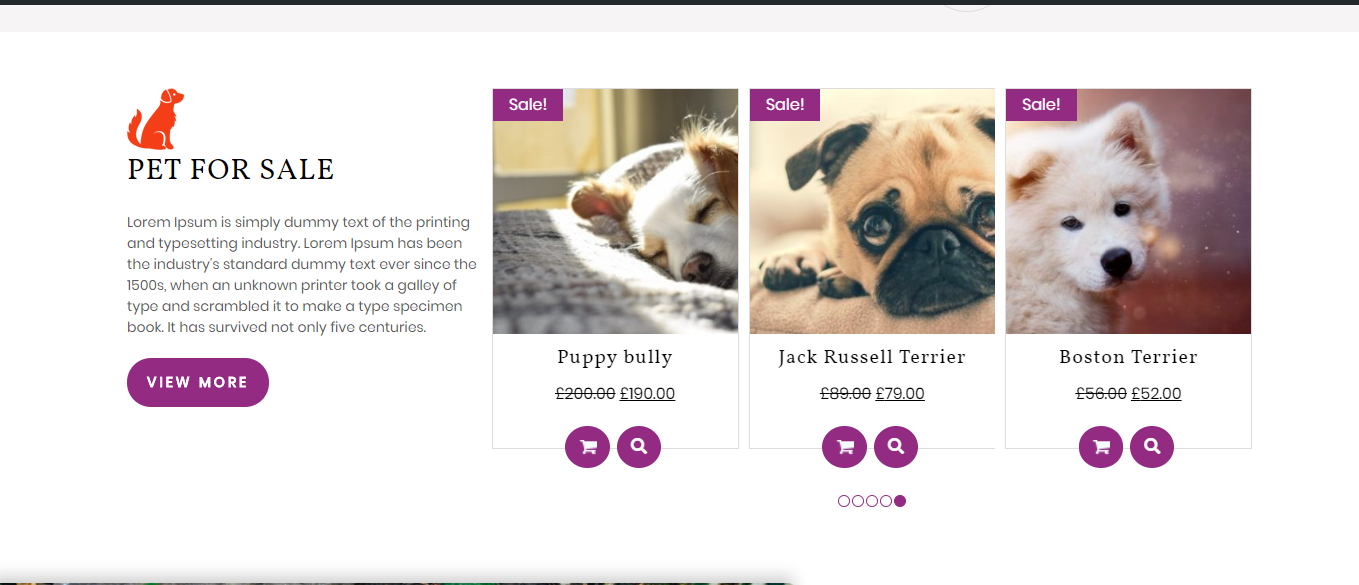
To continue with Our Pet for Sale,
Go to Appearance >> Customize >> Theme Settings >> Pet for Sale
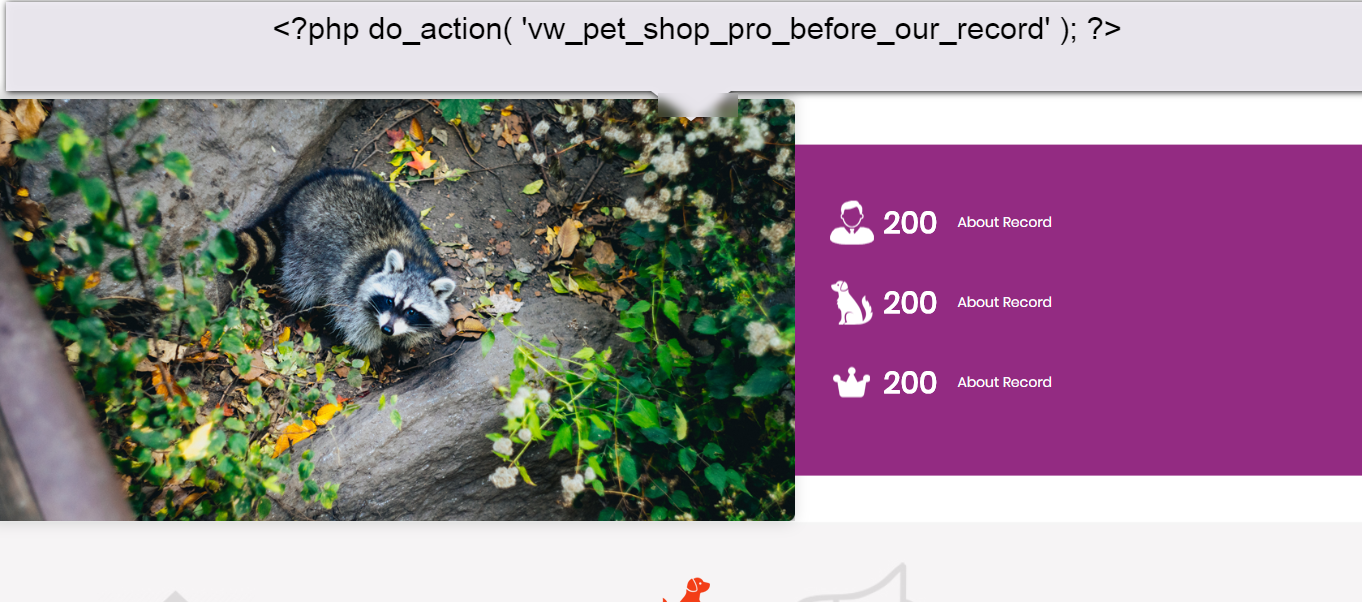
Our Record Section
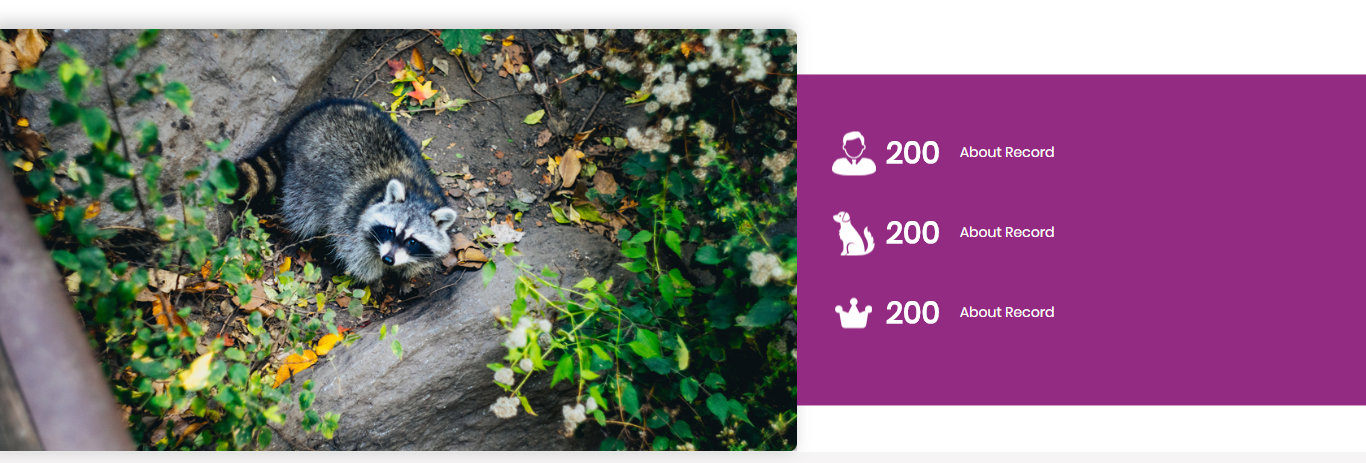
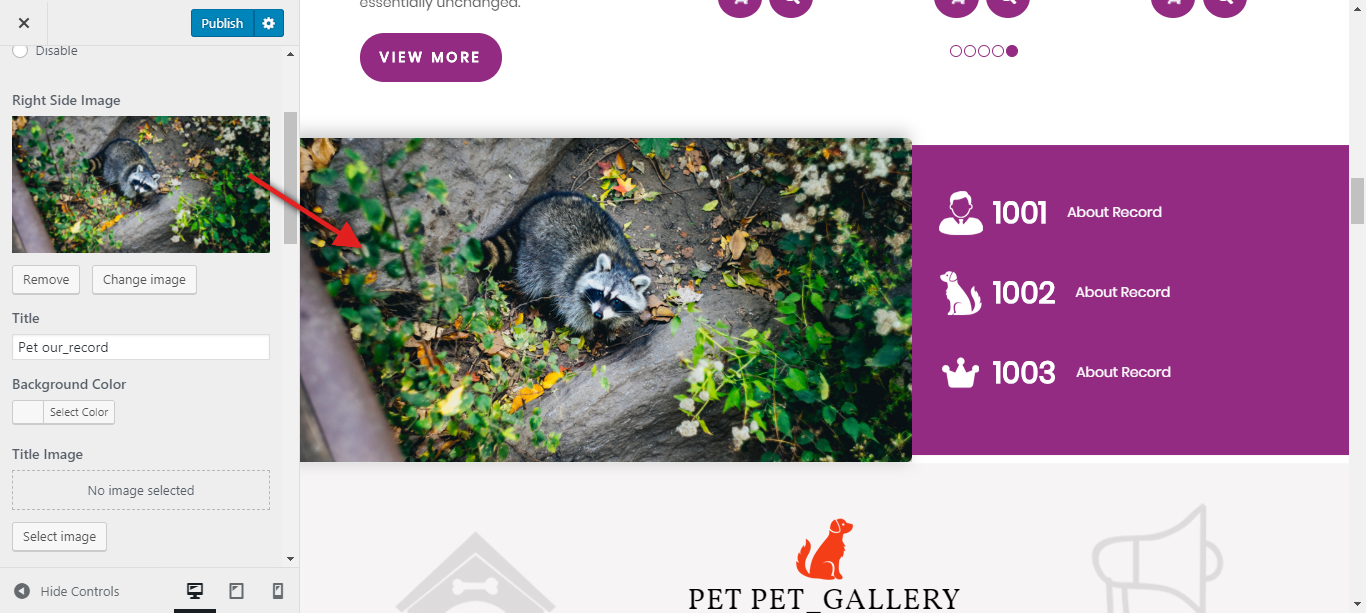
To continue with the Record Section,
Go to Appearance >> Customize >> Theme Settings >> Our Record
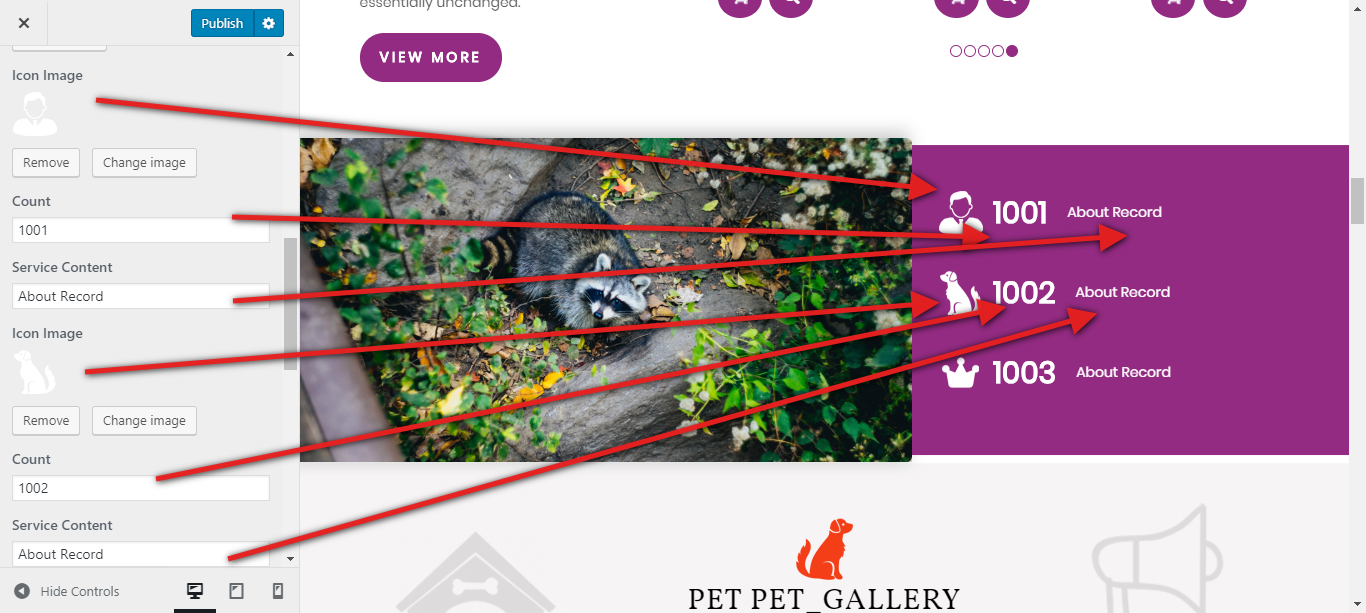
The image and text choices are the same for tabs 2 and 3, as seen in the screenshot above.
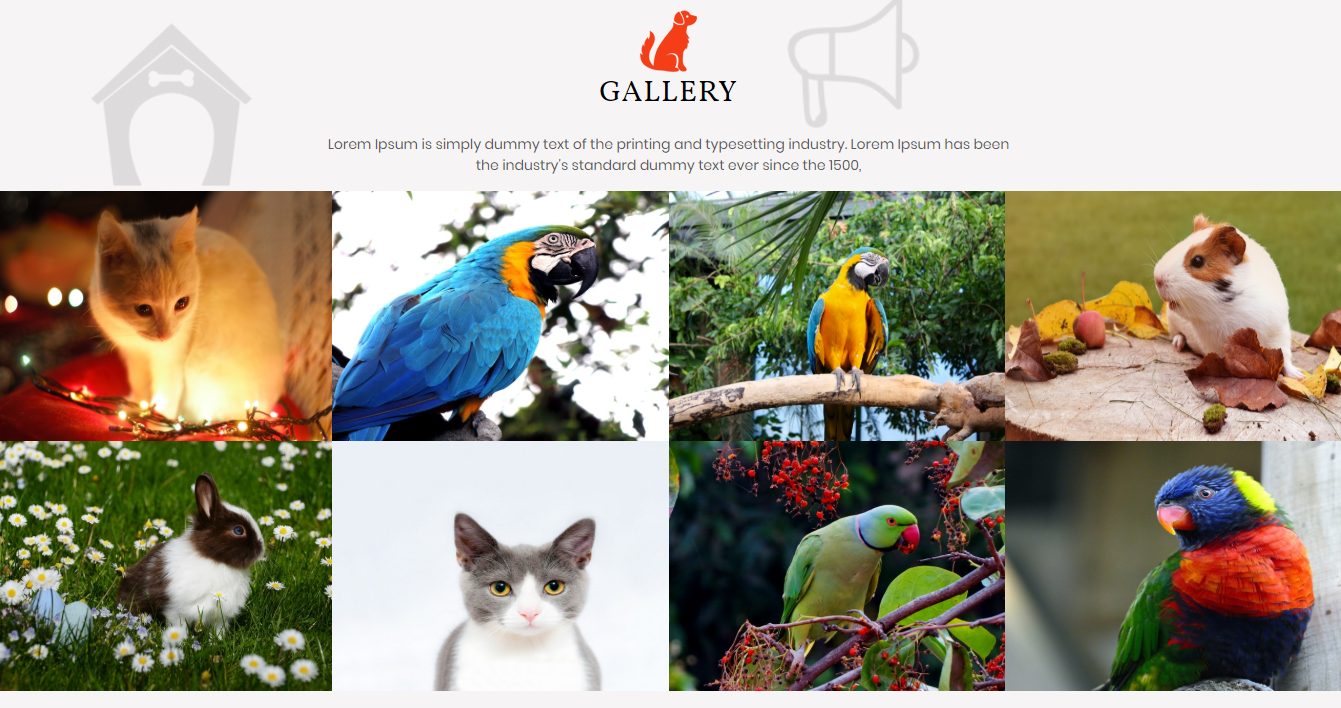
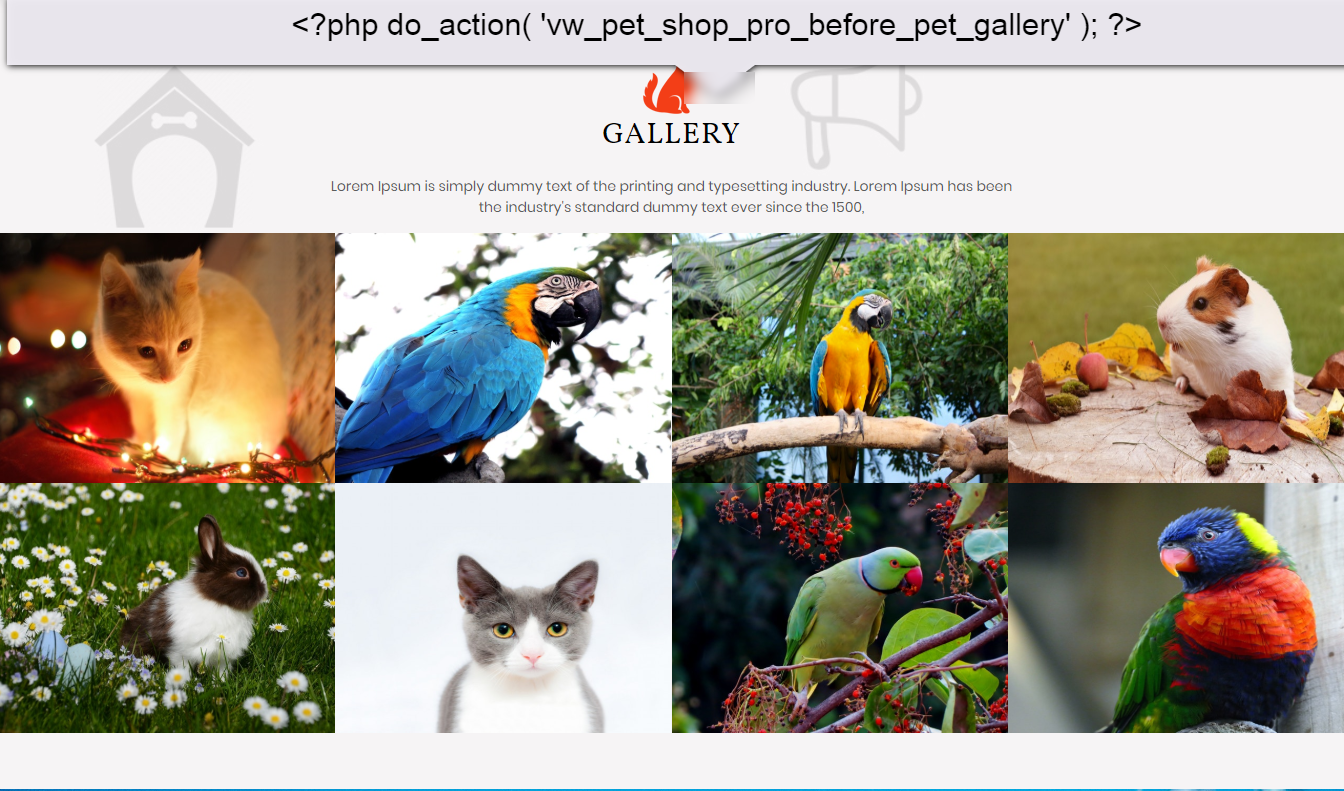
Setup Pet Gallery Section
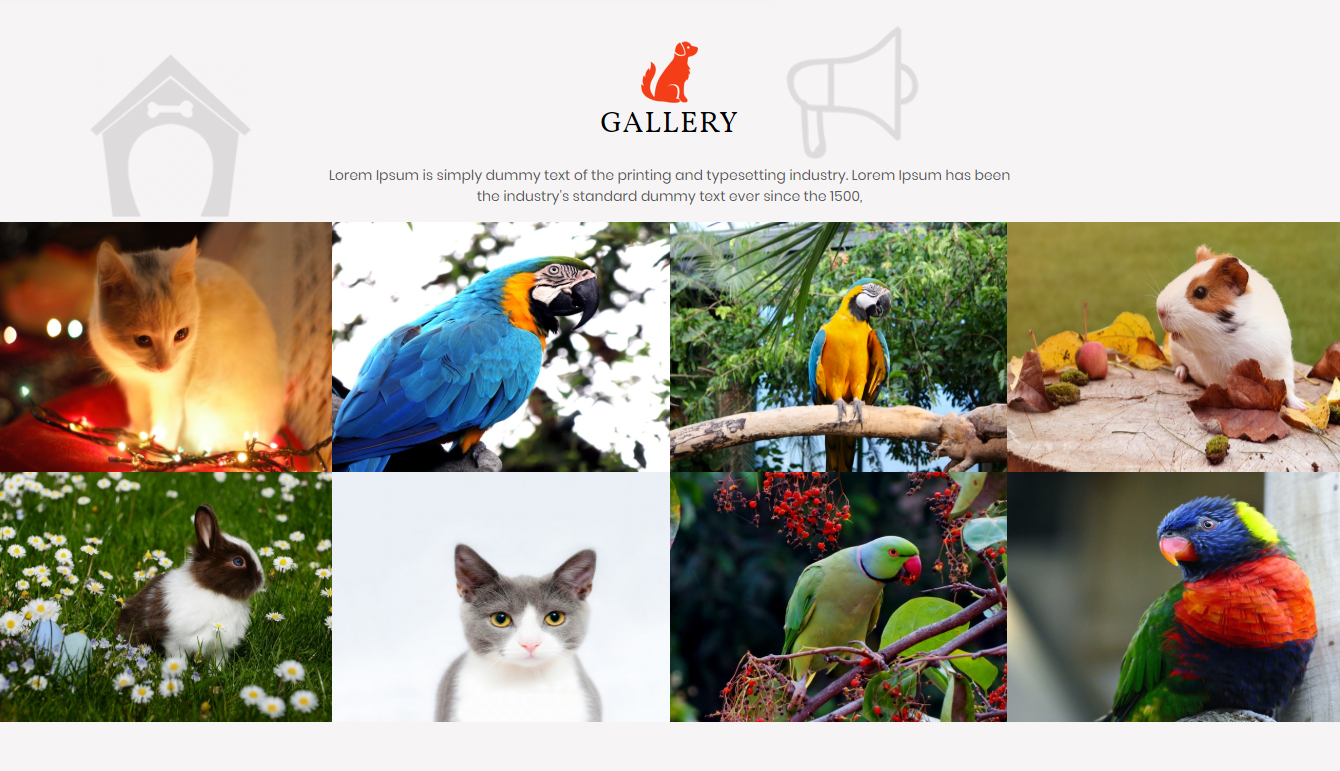
To continue with the Pet Gallery Section,
Refer to the Plugin Section first.
Go to Dashboard >> Gallery >> Add new gallery.
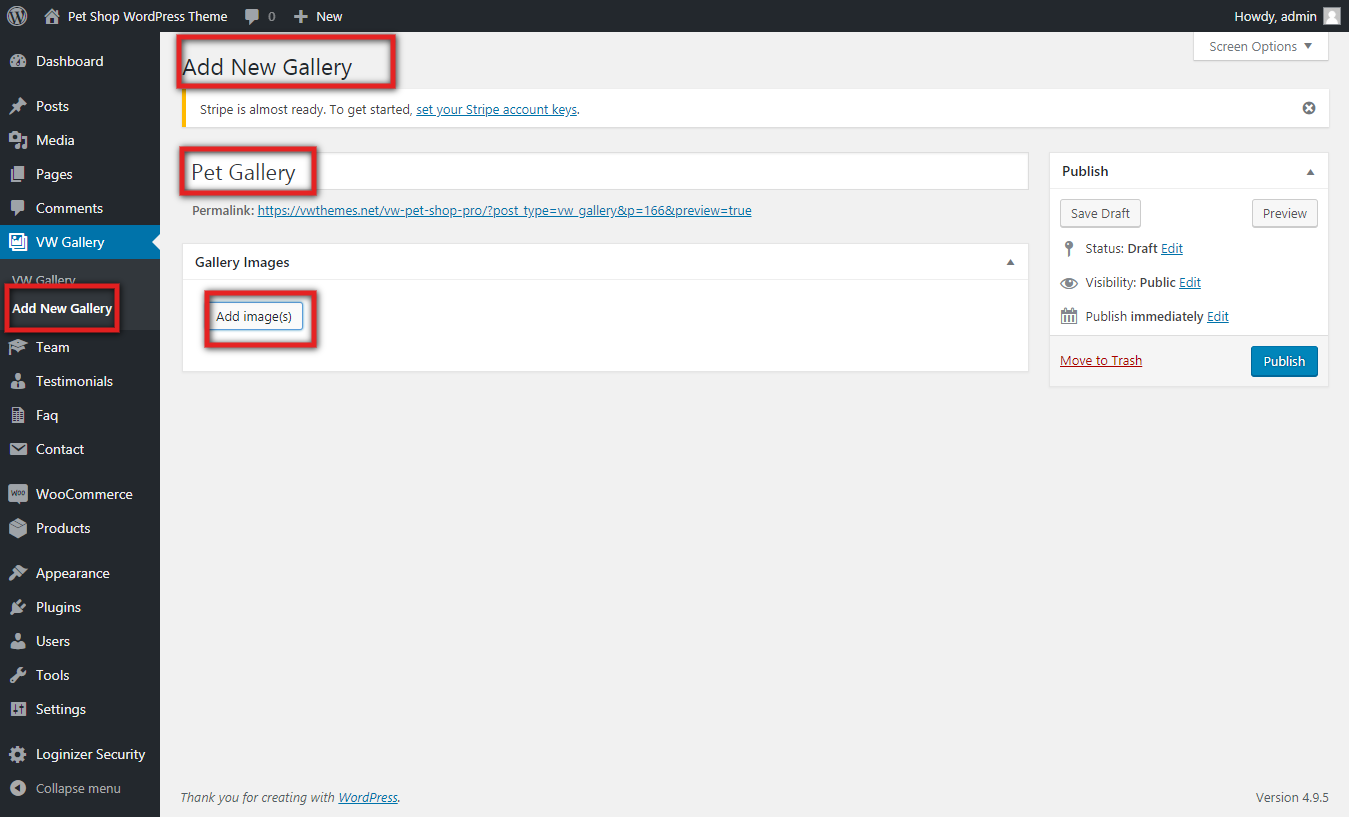
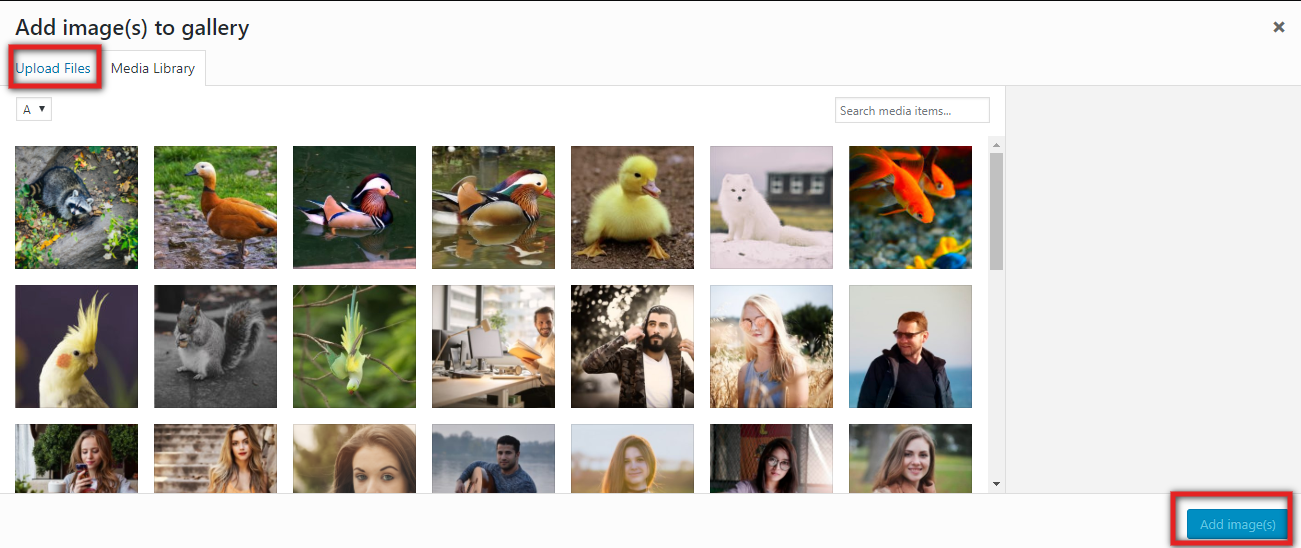
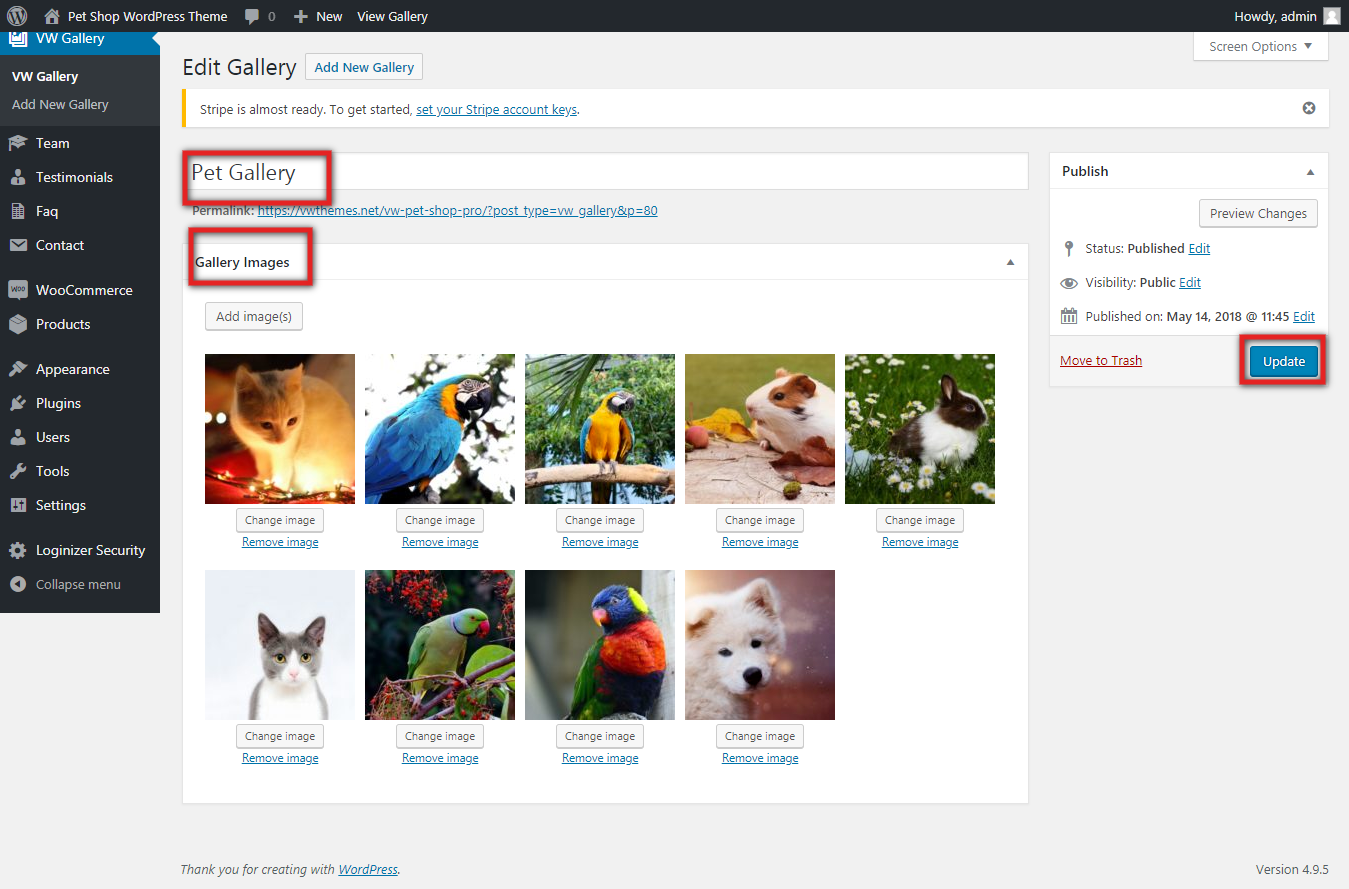
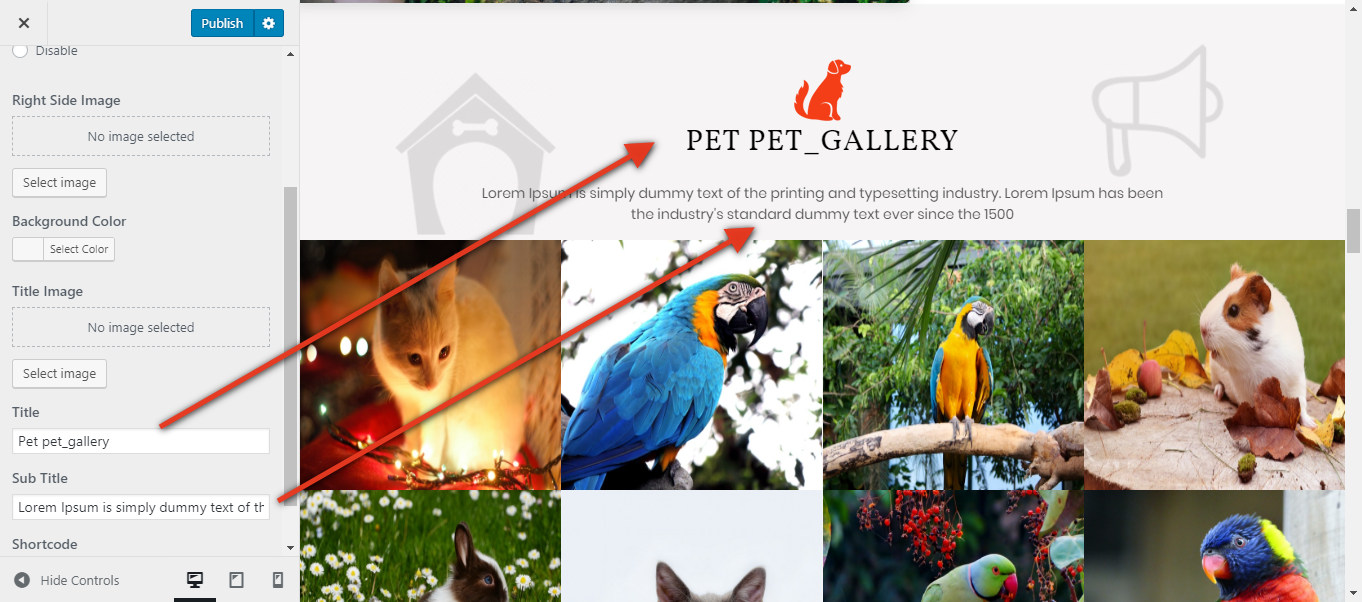
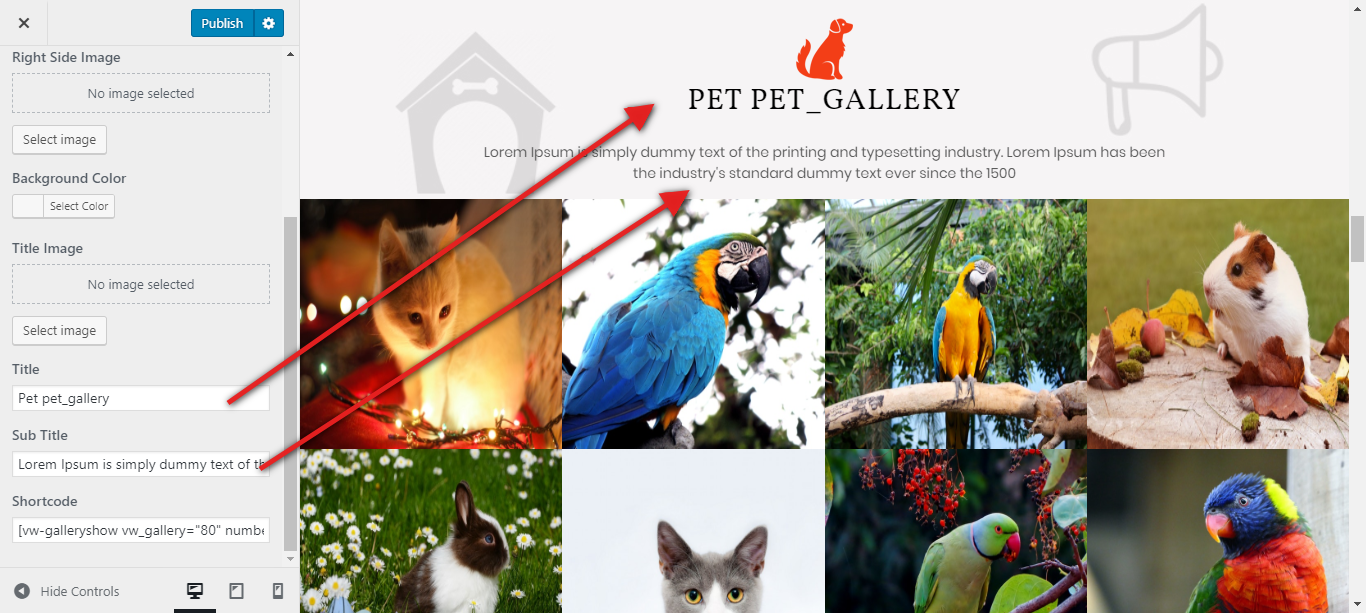
Go to Appearance >> Customize >> Pet Gallery.
You can see that the shortcode has already been inserted here. You only need to change the shortcode's ID, which is an integer. Your gallery ID can be found in the portfolio you've made.
Visit the gallery page on the admin page you made. You can find the ID in the gallery's permalink. Our ID is 80; please change it with yours by copying the ID and entering it in the shortcode. Your collection will now show up.
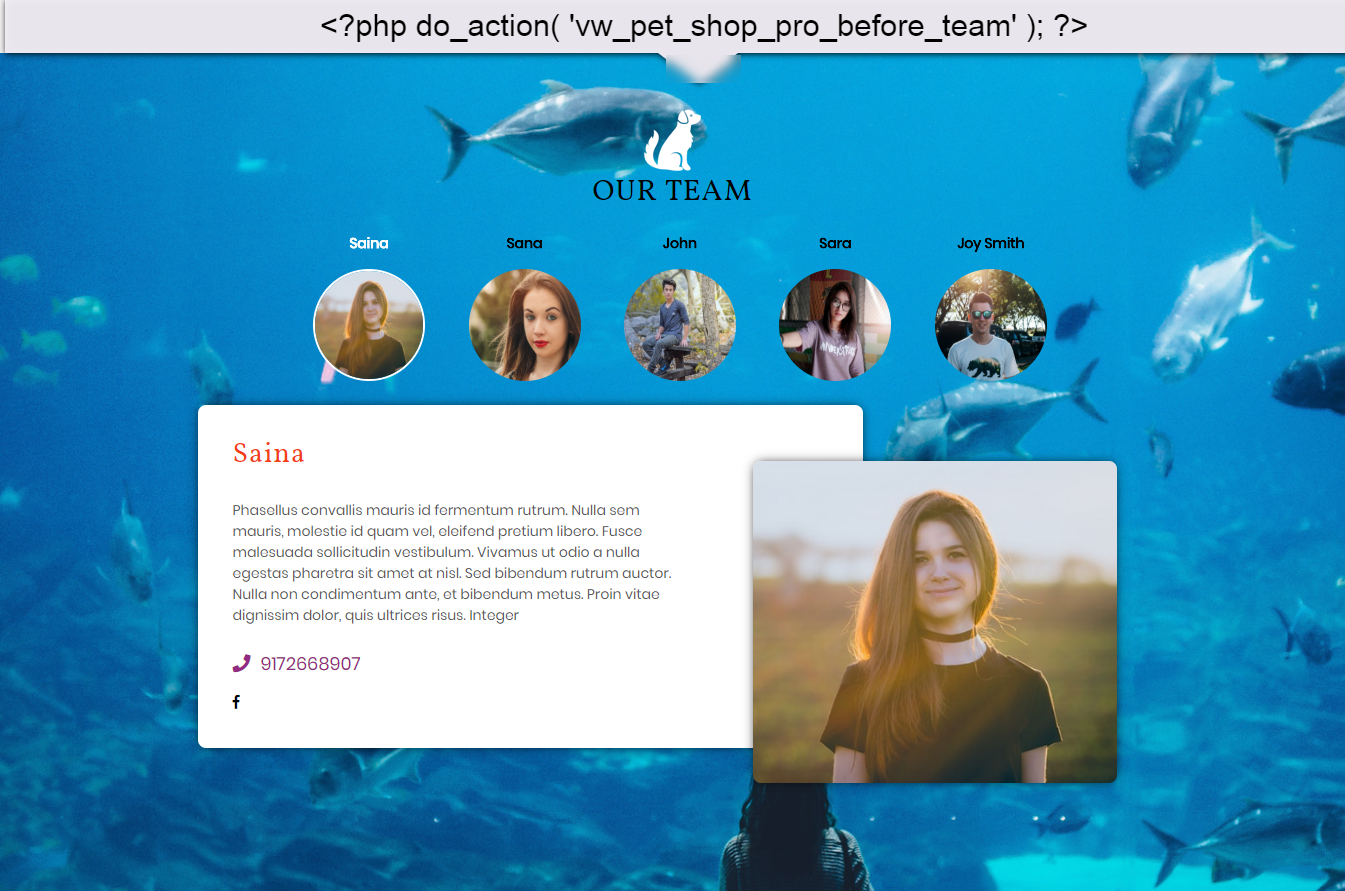
Setup Team Section

As we move forward with Team Section,
Look first at the Plugin Section.
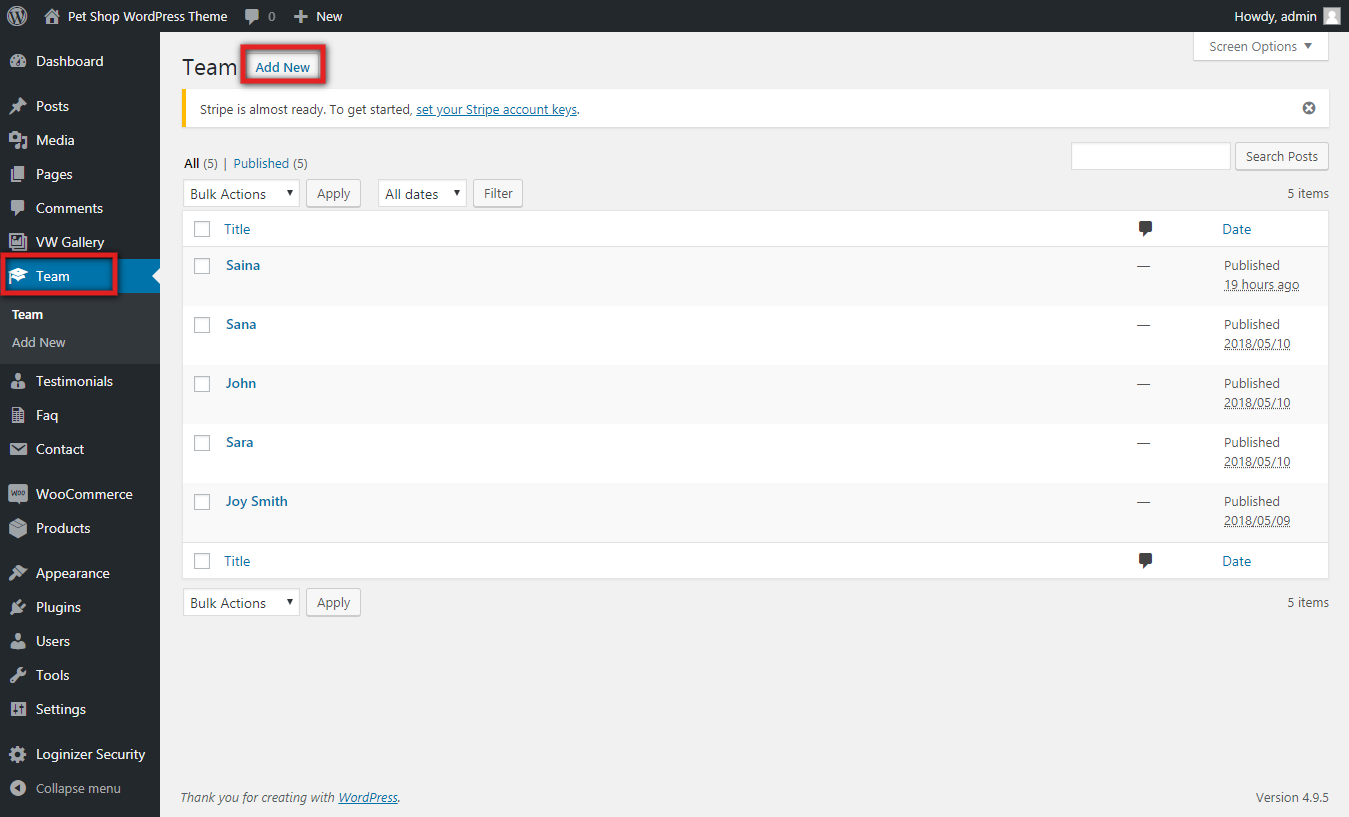
Go to Dashboard >> Appearance >> Team >> Add new.
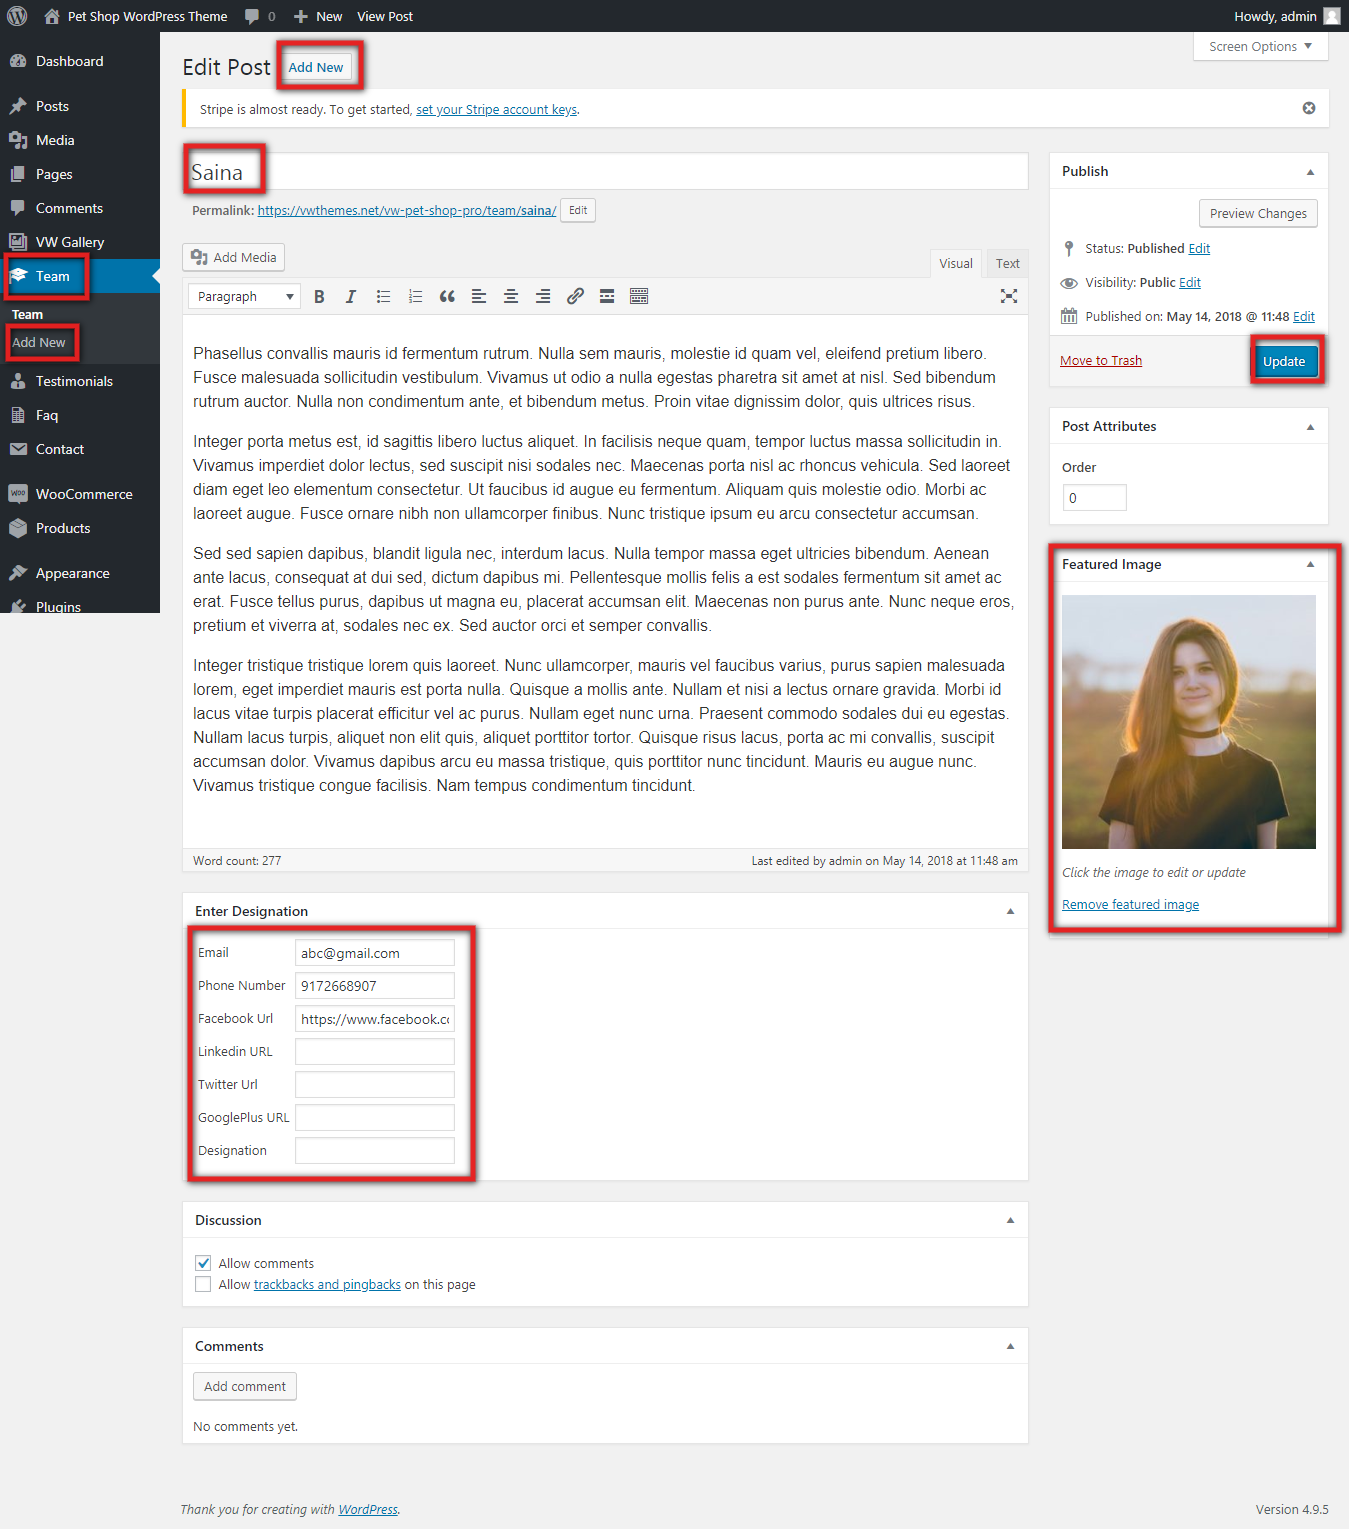
Go to Appearance >> Customize >> Theme Settings >> Team.

To build up this section, adhere to these directions.
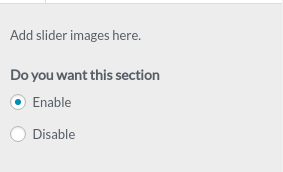
- Do you want this section : If you don't want this area, you can deactivate it here; if you do, just leave it enabled. Here, Enable and deactivate options are offered.
- Background Color:You can change the background colour of this section using this choice.
- Background Image:With the aid of this option, you can establish a background image rather than just a background colour.
- Section Title: The title of this section may be customised using this choice. For instance, as you can see in the screenshot, the title of this part is Our Attroneys.
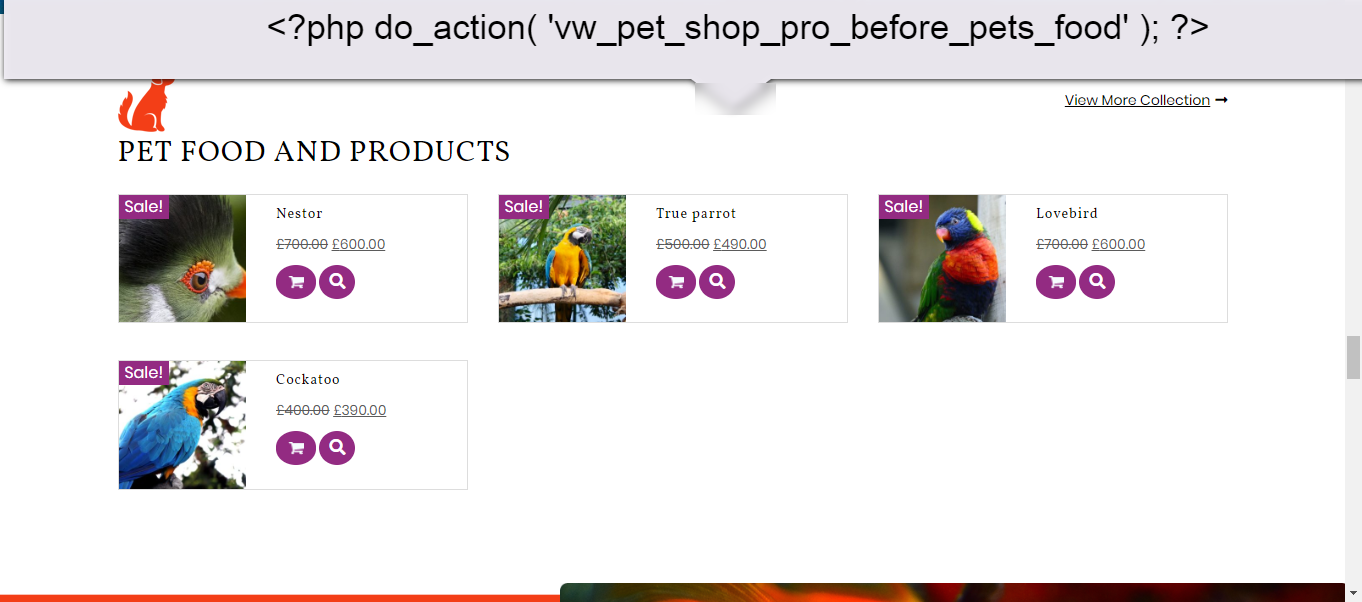
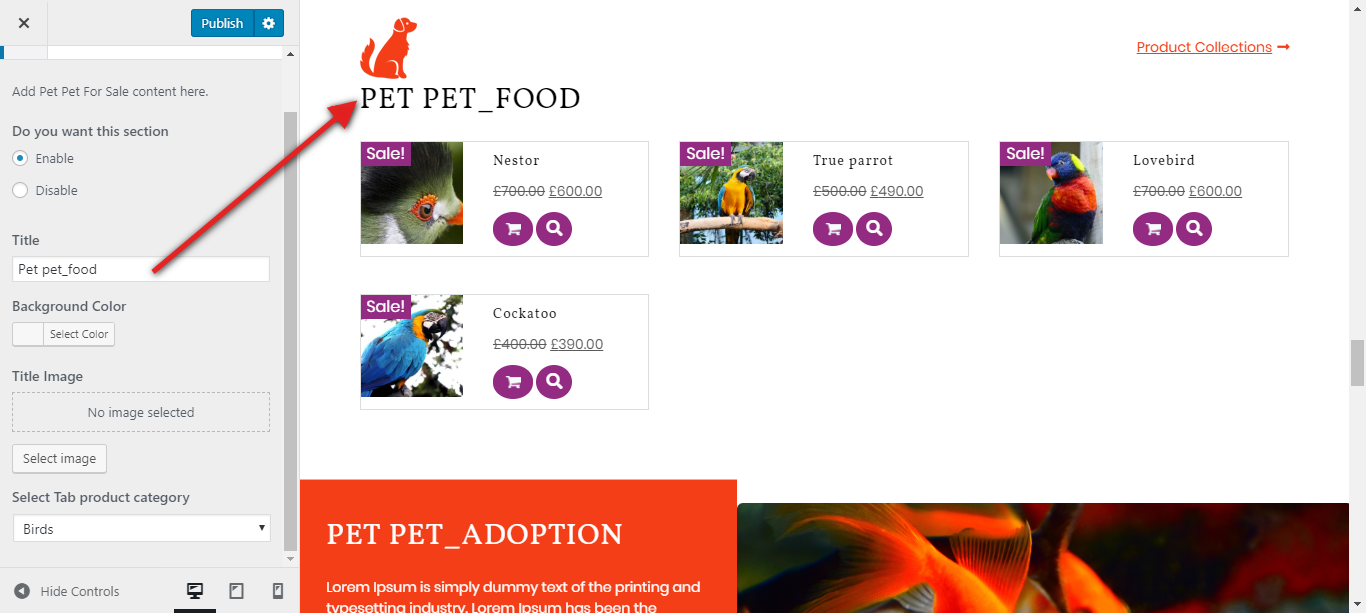
Pet Food and Product
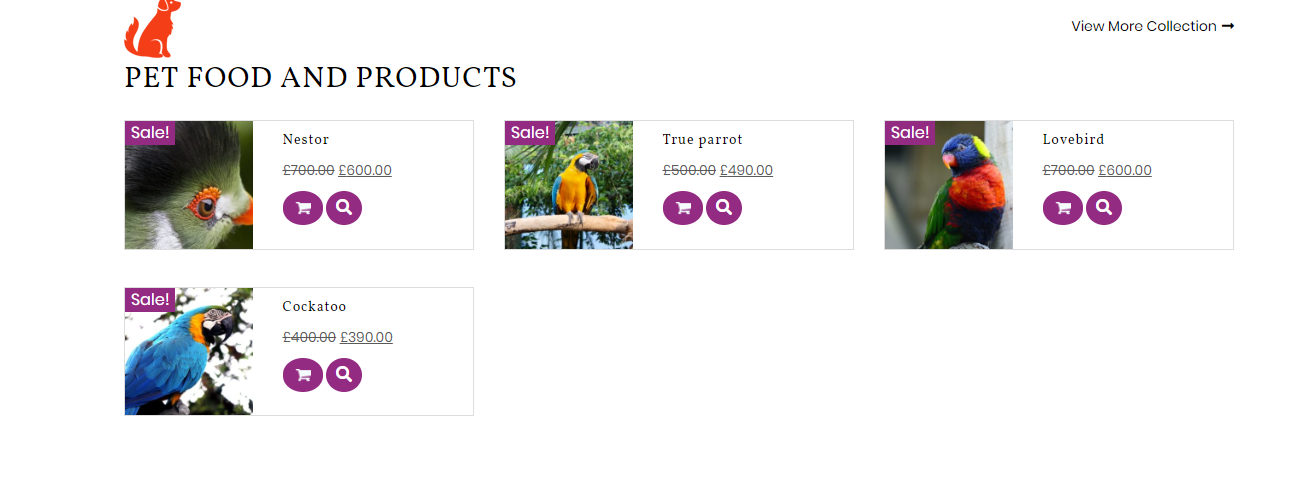
to continue with the Pet Food and Product.
Consult the part on plugins first.
Go to Dashboard >> Products >> Add new .

Go to Appearance >> Customize >> Theme Settings >> Pet food & Product .
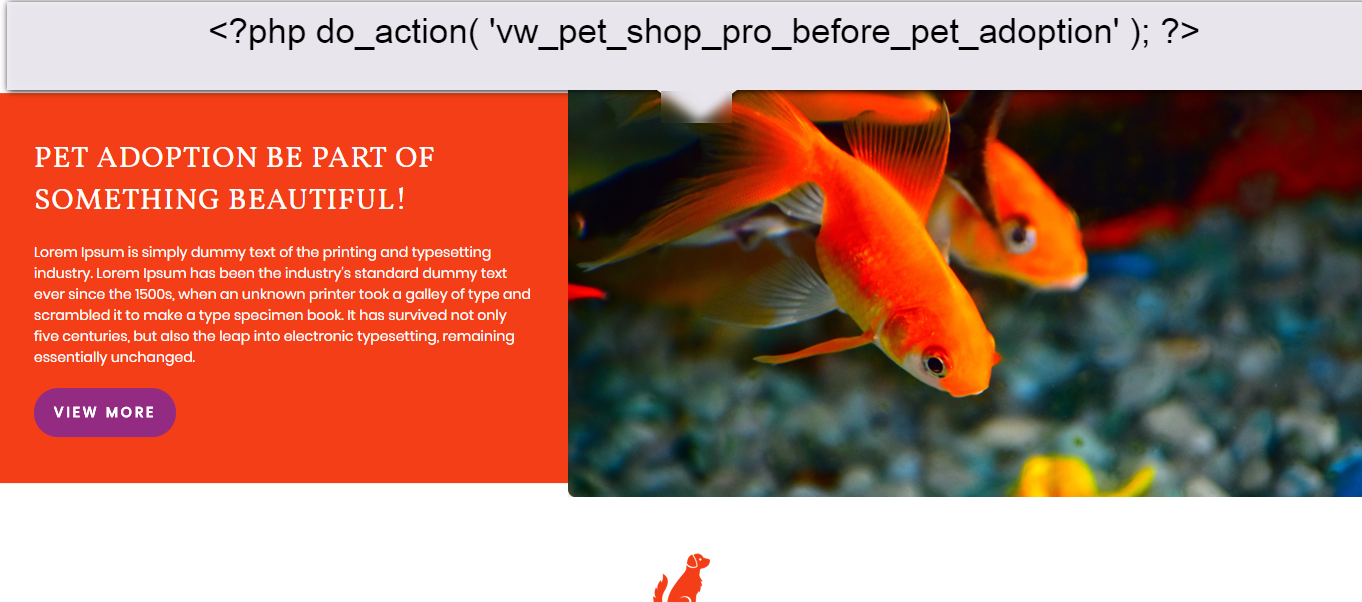
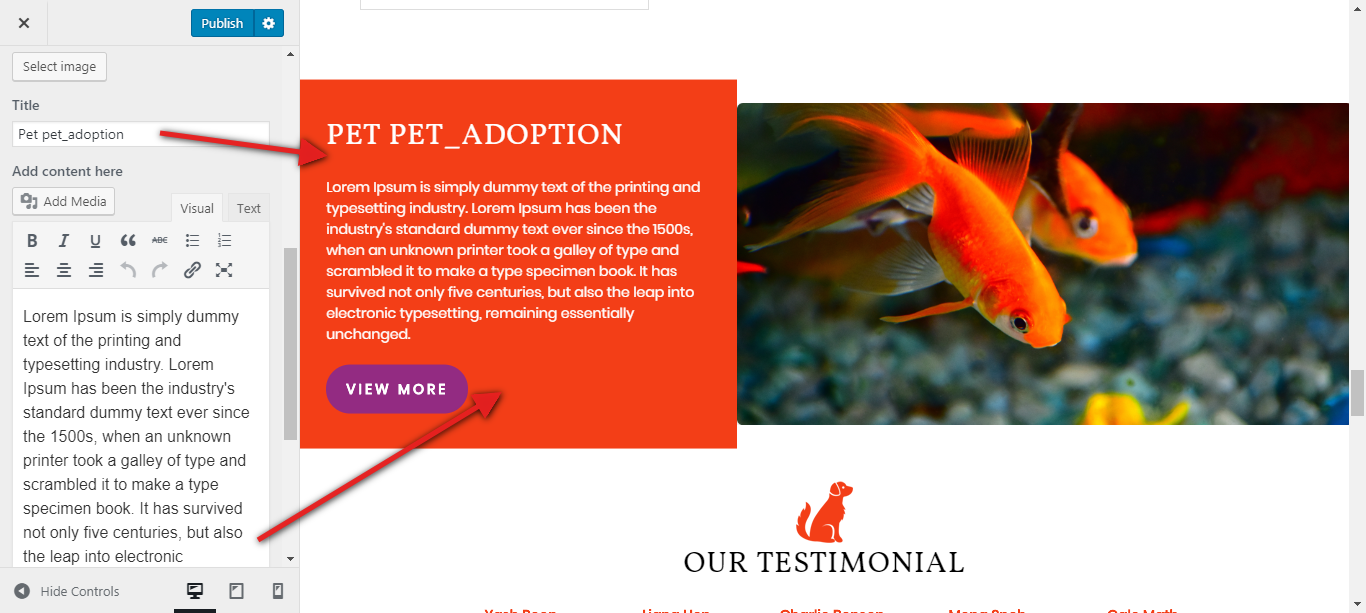
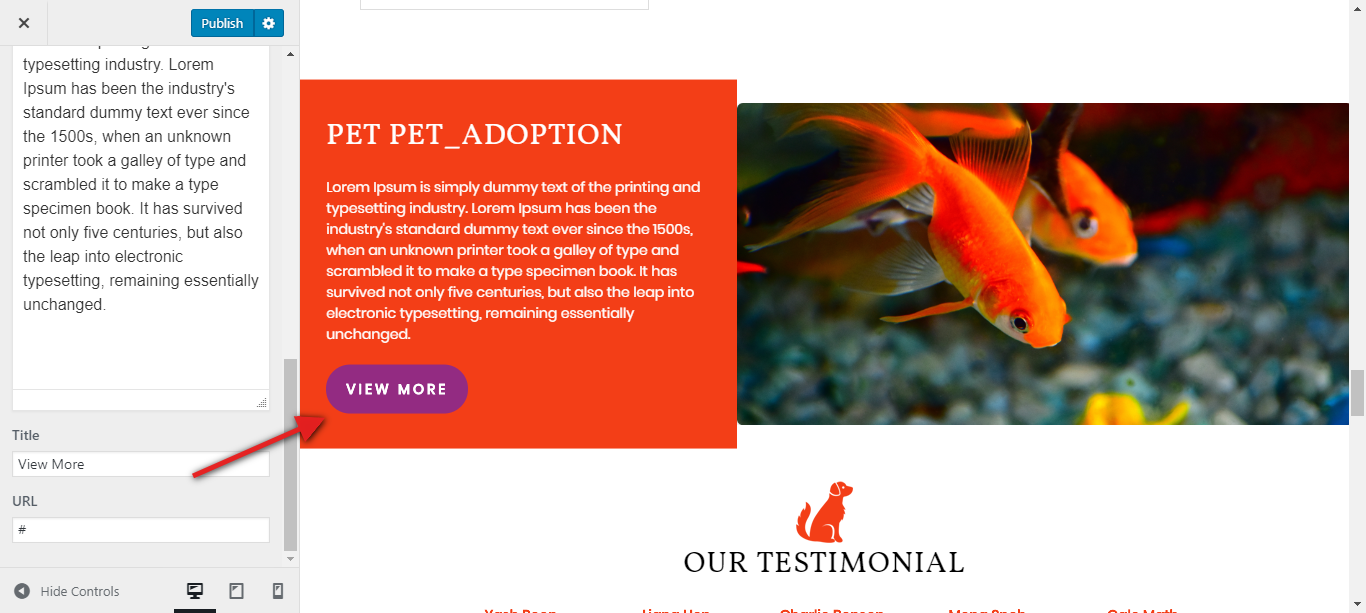
Pet Adoption

in order to move on to the section on pet adoption.
Go to Appearance >> Customize >> Theme Settings >> Pet Adoption .
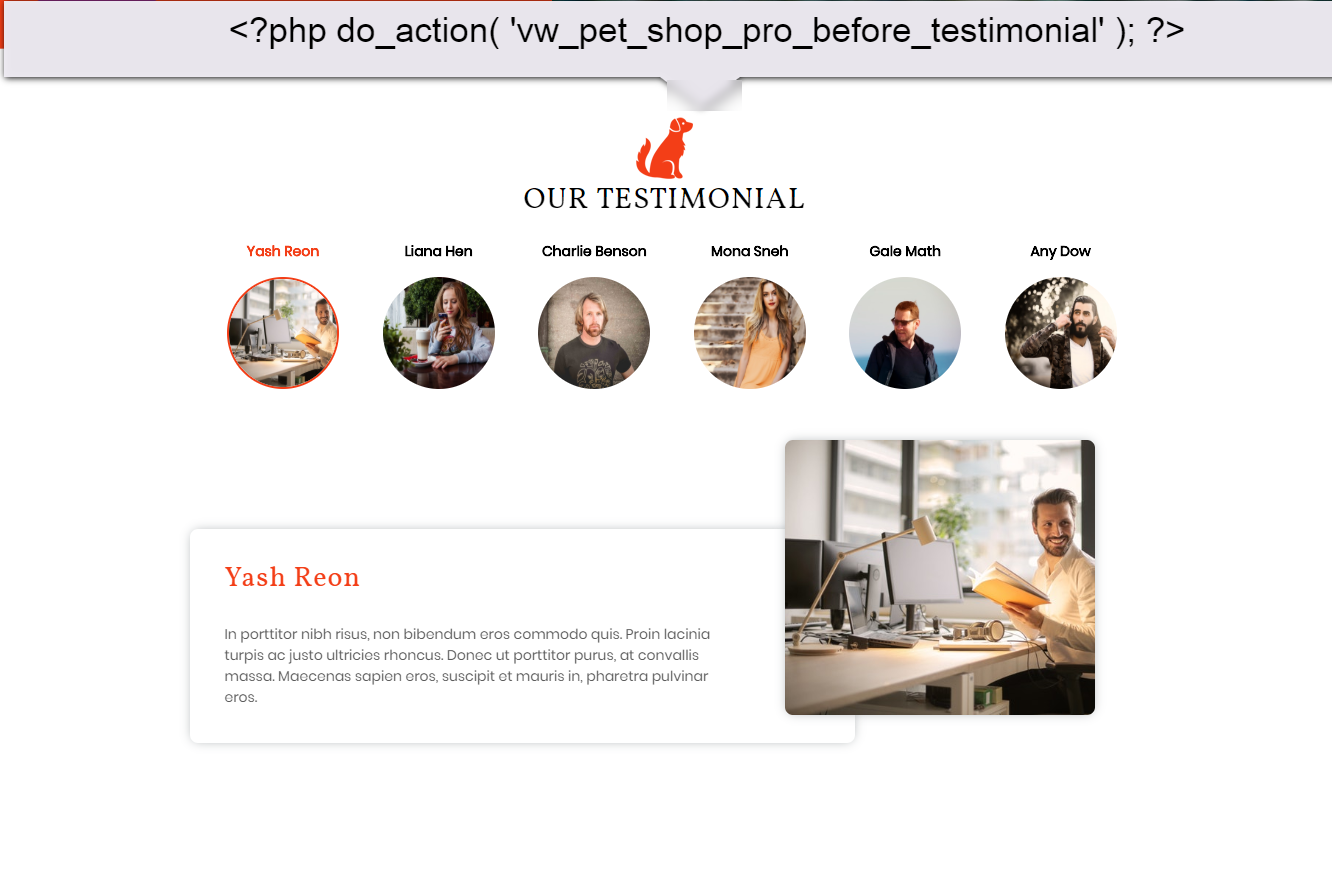
Testimonials
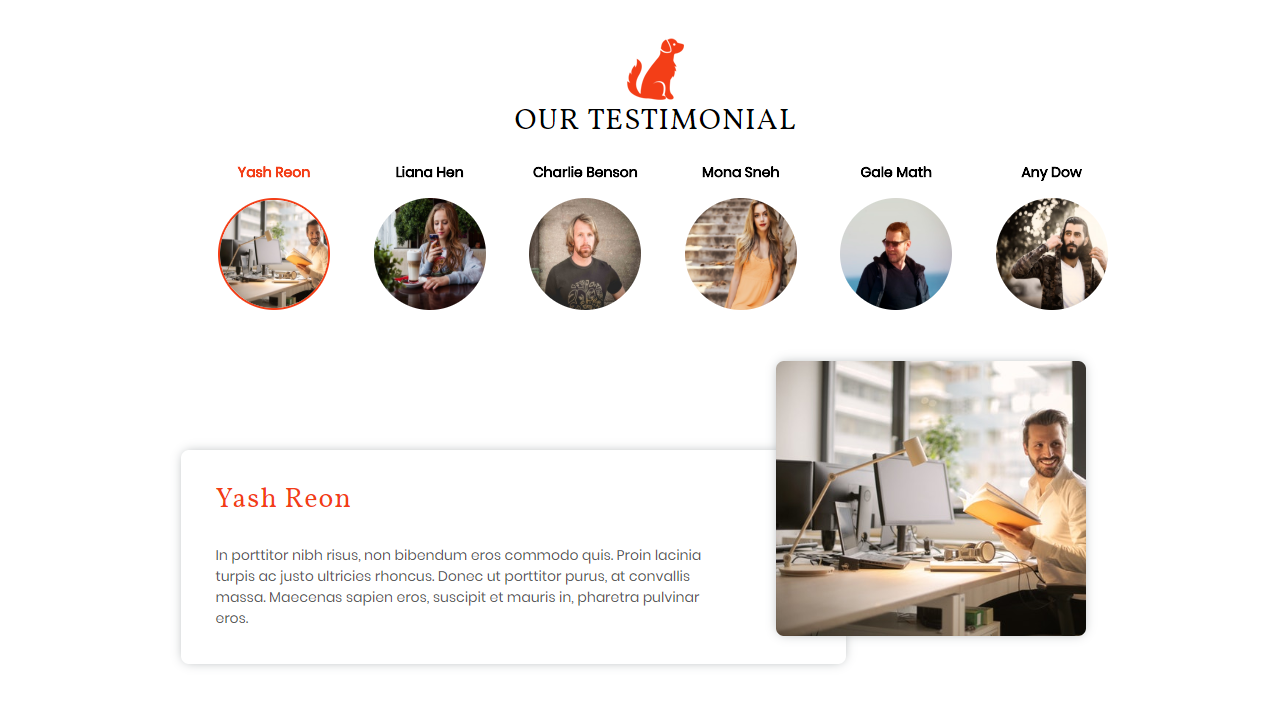
To continue with the Testimonial Section,
Consult the part on plugins first.
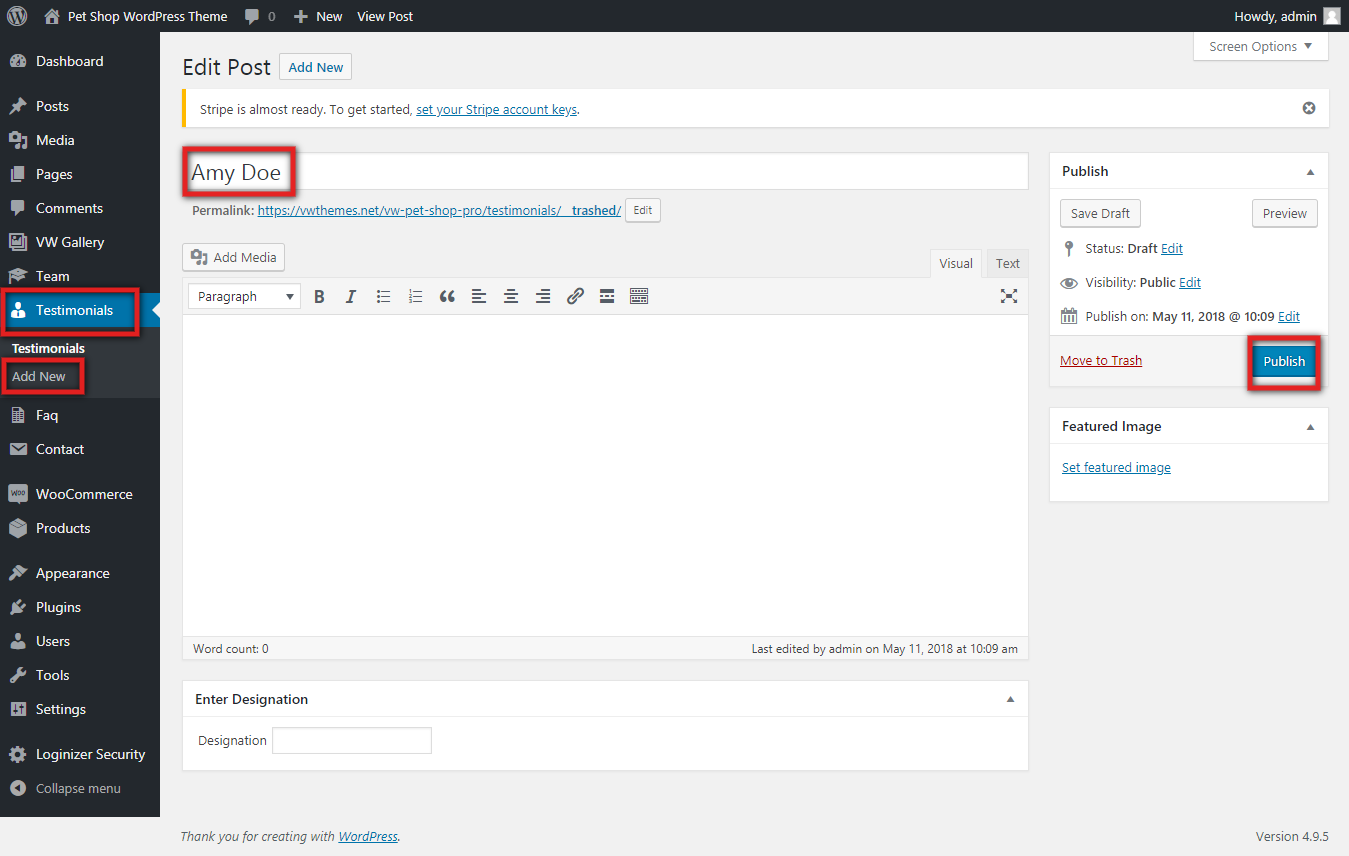
Go to Dashboard >> Testimonial >> Add new .
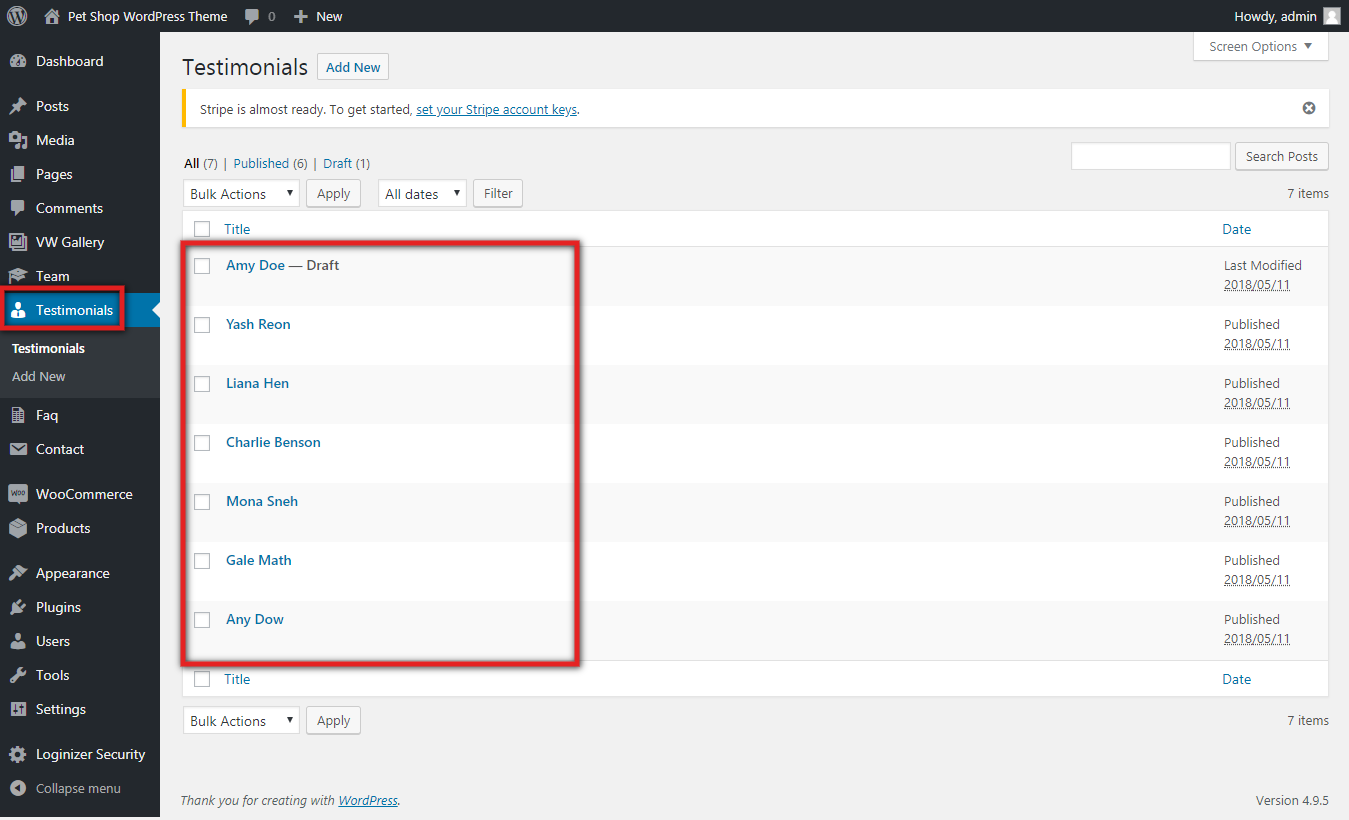
Go to Appearance >> Customize >> Theme Settings >> Testimonials .

Setup Newsletter

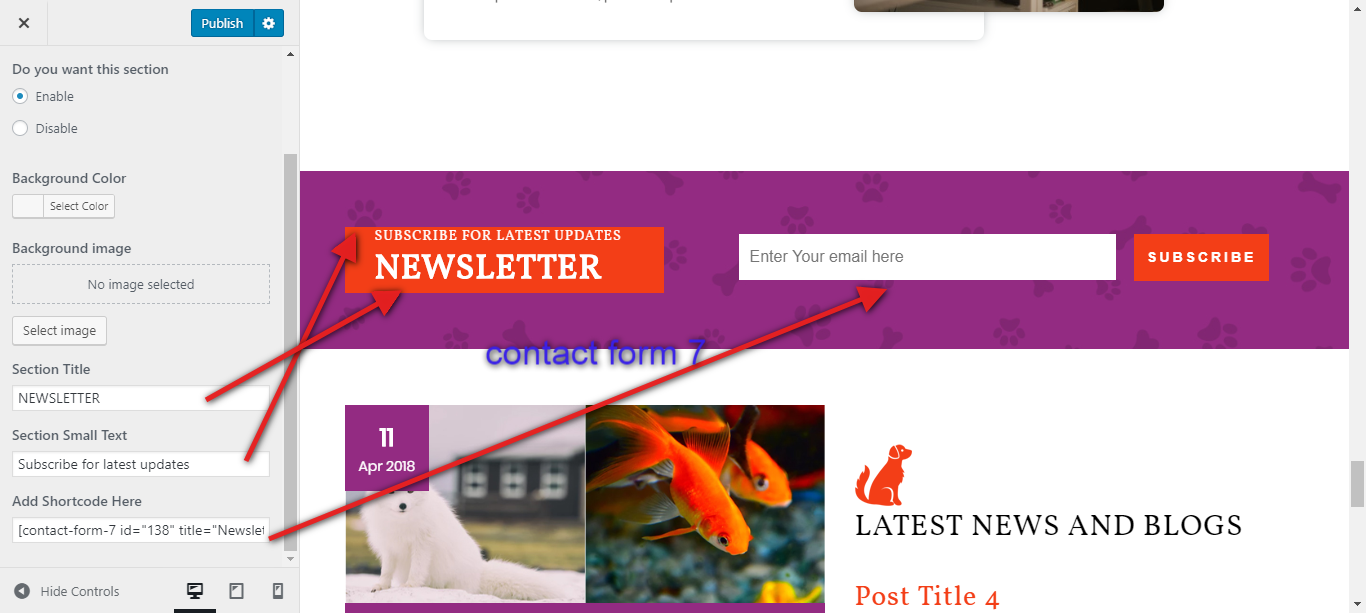
1. To continue with the newsletter section,
2. You must take a few preliminary, crucial actions.
3. You need to add contact form 7 plugin.
Appearance >> Customize >> Newsletter.
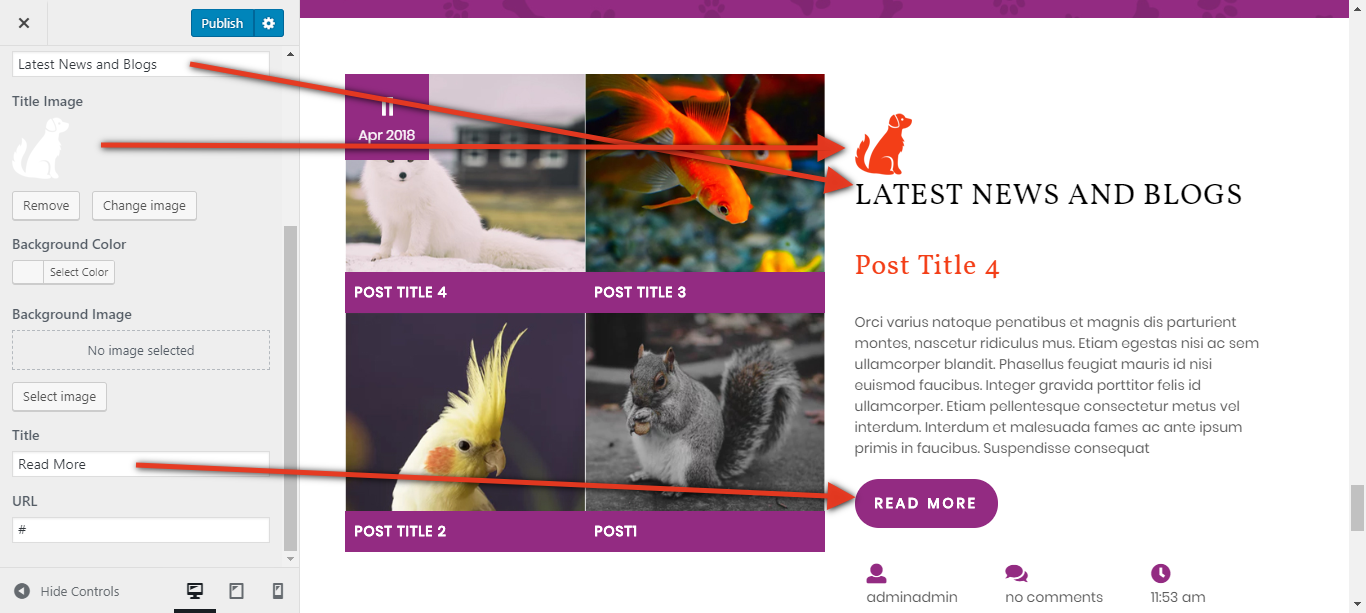
Setup Post Blog Section

To continue with the Post Blog Section,
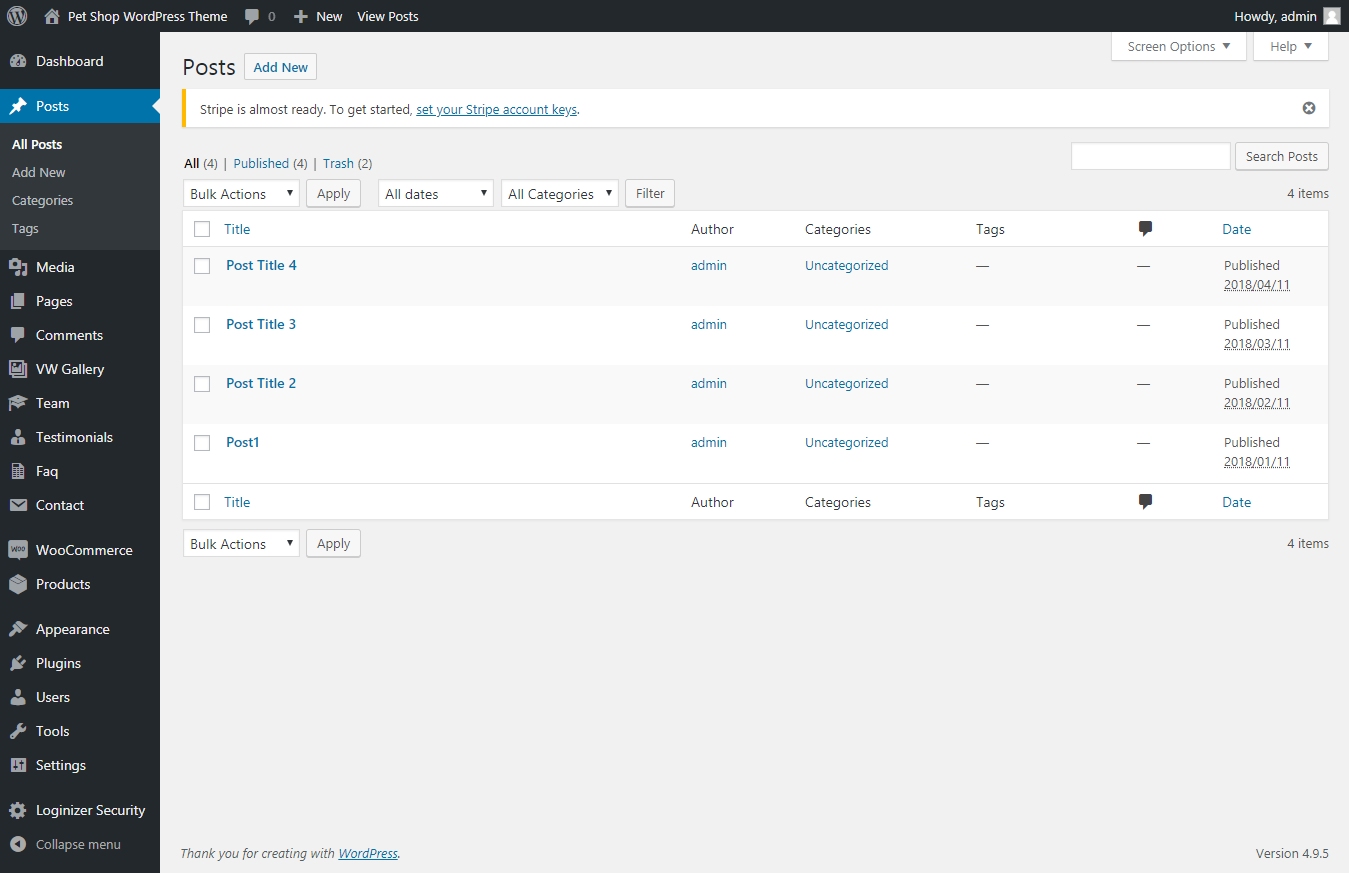
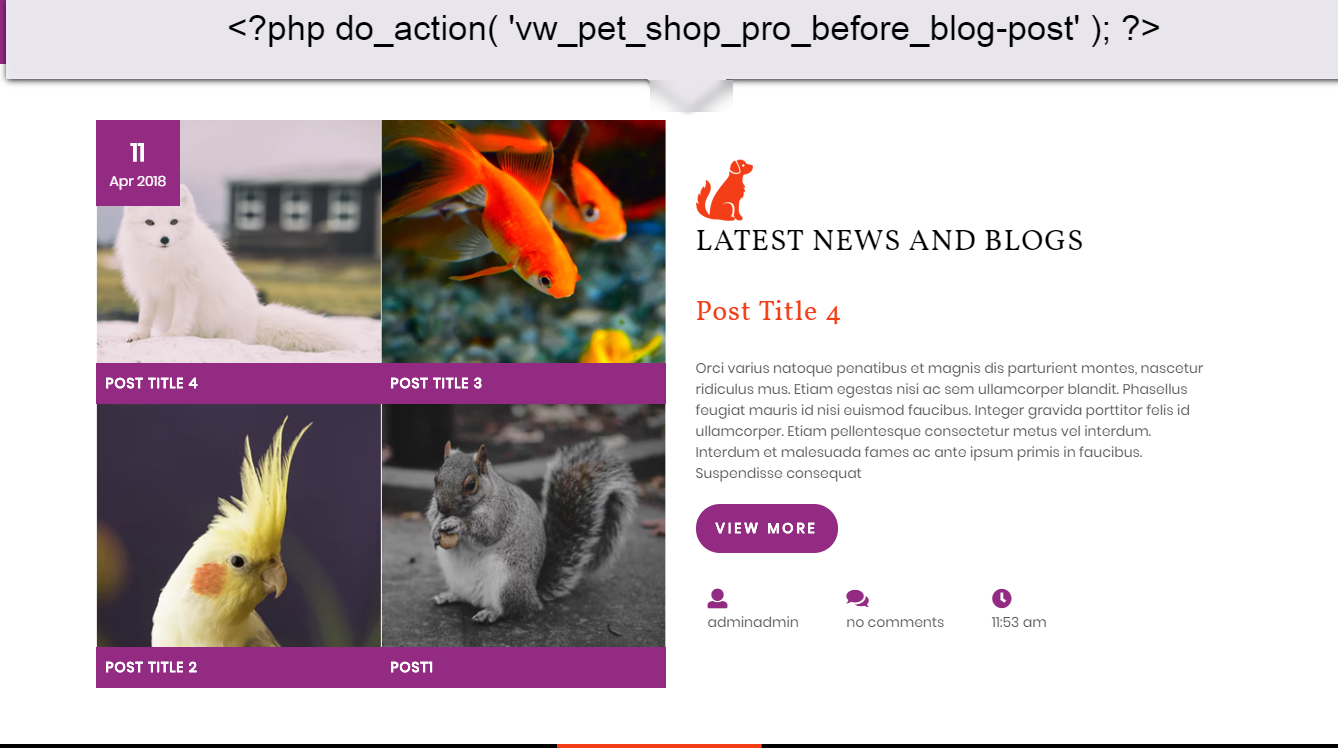
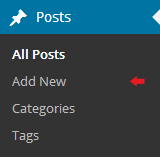
Go to Dashboard >> Posts >> Add new.

