System Requirements
We advise you have the following minimum system configuration in your web server in order to have the theme.
- WordPress 6.4 or later
- PHP 8.2 or 8.3
- MySQL 5.6 (or greater) | MariaDB 10.0 (or greater)
- Need php ini file configration -
- post_max_size = 256M
- upload_max_filesize = 256M
- max_execution_time = 5000
- max_input_time = 5000
- memory_limit = 1000M
Introduction
Thank you for your purchase of our WordPress theme. This documentation shows the entire process of configuring and managing a WordPress website from start to finish in various sections.
What is WordPress CMS?
WordPress is an open source website creation tool that is built on PHP and MySQL. It is a powerful blogging platform and a completely free content management system (CMS). You can use this CMS to create websites and solid online apps. It requires little knowledge or technical ability to manage. Because of its numerous advantages, such as ease of use and flexibility, WordPress has become the most widely used website development software available. Learn More
What is a Wordpress Template?
A WordPress template serves as a skin for websites built with the WordPress CMS. A WordPress Template is very simple to install. You can easily change the appearance of your WordPress website with the help of a newly installed template. A WordPress template includes all of the necessary source files, which you can freely edit and expand as you see fit.
Help and Support
Click here for support:
SupportFile Structure
The template package you downloaded is divided into several folders. Let's take a look at what's in each folder:
- Screenshots
- -contains template screenshot. Not for production.
- theme -contains wordpress theme files
- "vw-architect-architecture-pro.zip" -This folder contains all of the files required for the theme.
- "license.txt" -contains license details
- "readme.txt" -contain information about the theme's image path, font usage, and script usage
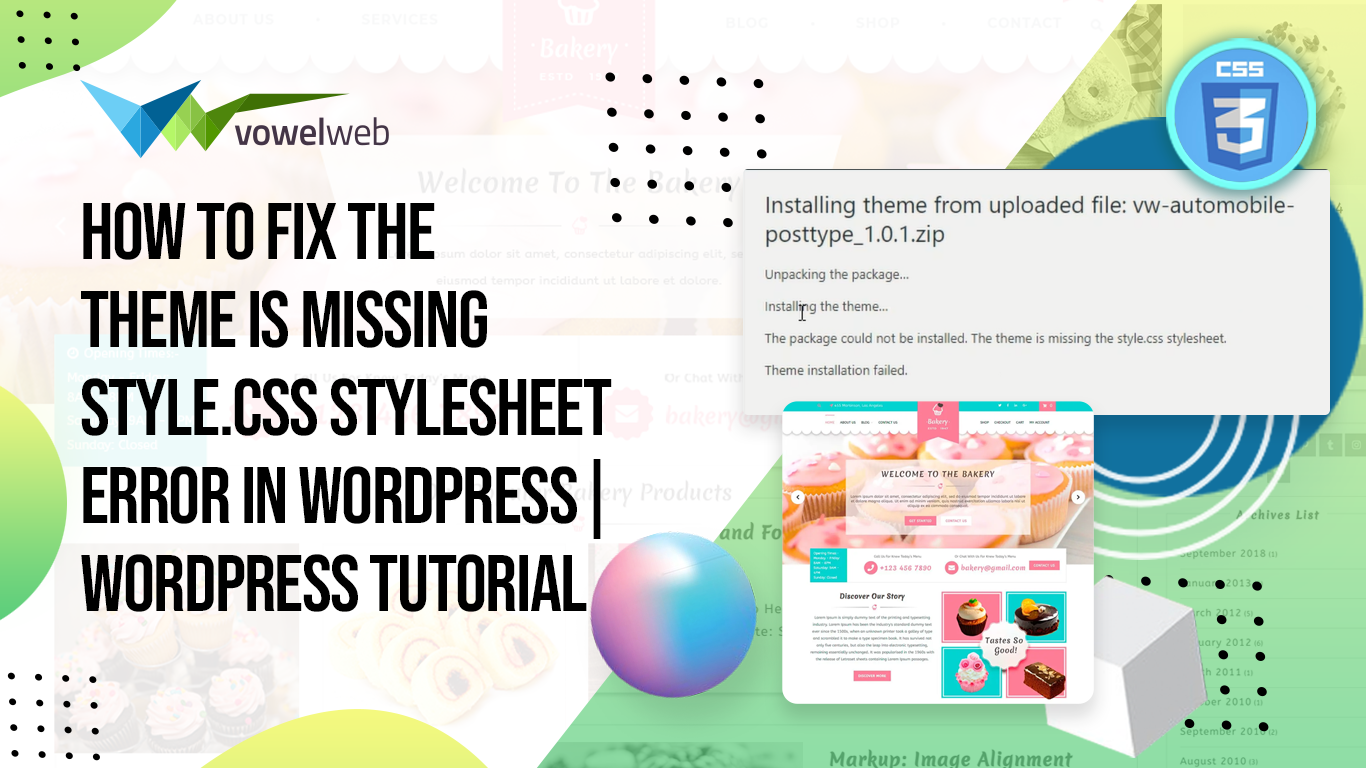
Template Installation
Template installation is very easy process.
All installation steps can be completed through the WordPress interface. It makes the process more comfortable and faster.
There are two methods for installing the system.
1-Install a theme using wordpress admin
The first step is to log into your WordPress admin area. Then, click on
1.Go to the Dashboard > Appearance > Themes

2. After you have navigated to the themes page, click on the "Add New" button located at the top of the page.

3. Click on upload theme button.

4. Click the "Browse" button, select the vw-architect-architecture-pro.zip theme, and then click the "Install Now" button.
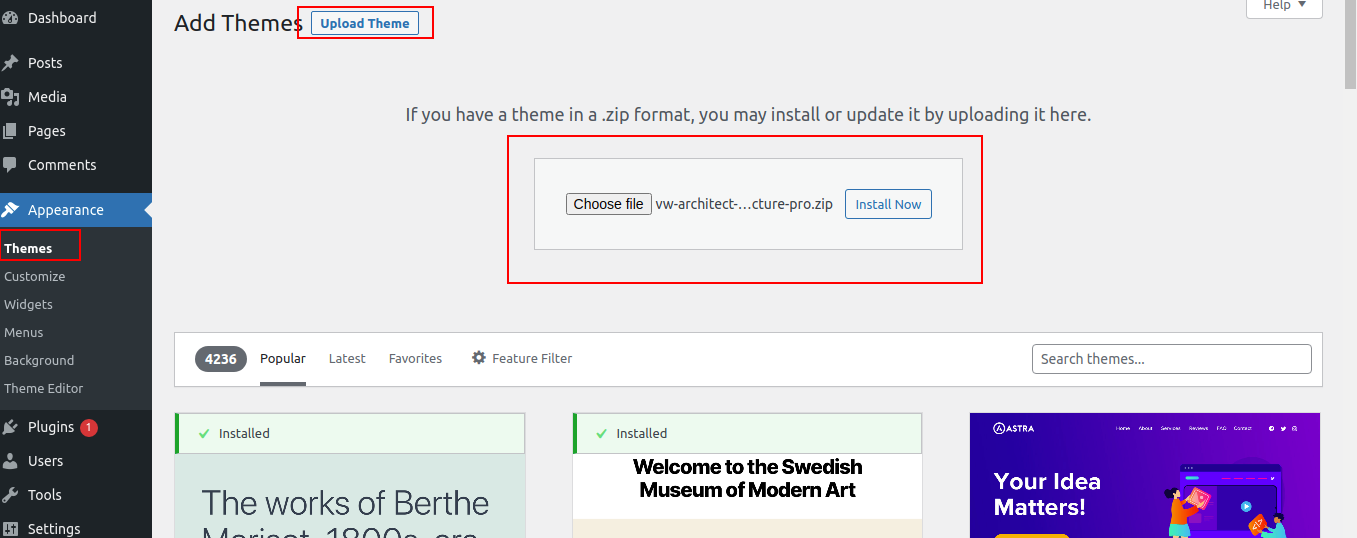
5. WordPress will now proceed with installing your selected theme and display a success message, along with options to either activate or preview the theme live.
Congratulations! Your theme has been successfully installed.
2-Install a Theme using FTP
The second method of installation is to upload the theme via FTP. To use this method, first connect to your site via FTP and navigate to your themes folder, which is located at wp-content/themes. Unzip the downloaded theme file and upload only the extracted Total folder to your server.

Next log into your WordPress site and navigate to Appearance >> Themes to activate Total.
Section Color/Font Pallette
Color/font selection is a simple process. These options are available in all sections of the customizer. It is a complete image that demonstrates the colour and font palette. With a single click, you can change the colour and fonts of the headings, paragraph, and buttons.
Depending on the number of options available in that section, each individual section has the option to set the colour palette for Headings, Title/Text, Paragraph, Button Text, and Button Background.
Default Color/Font settings


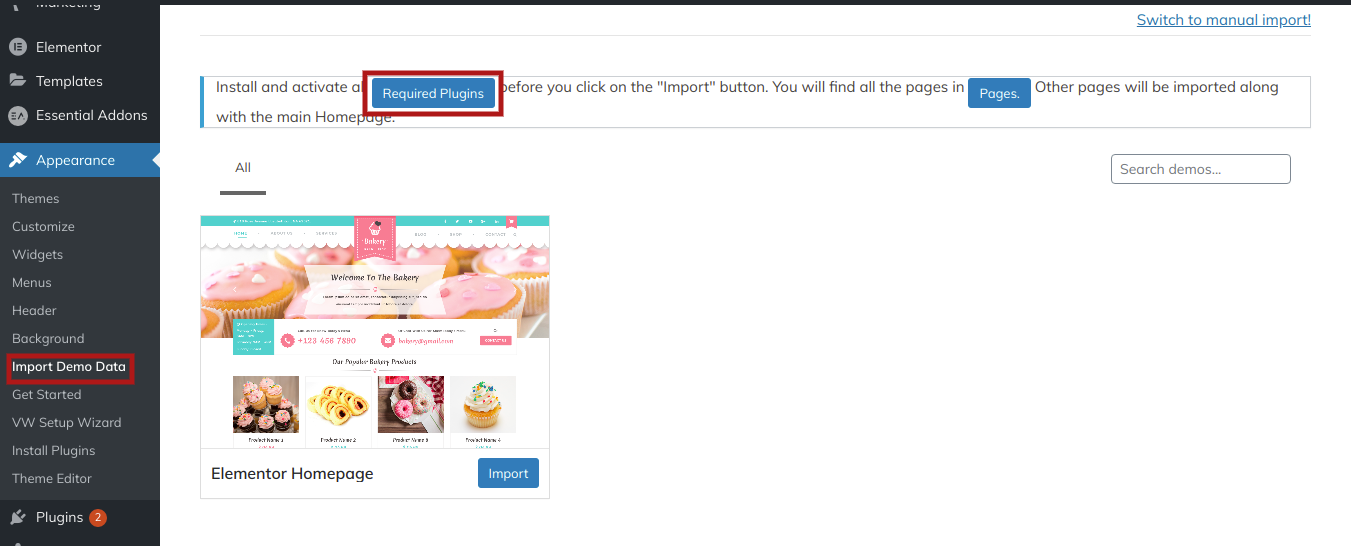
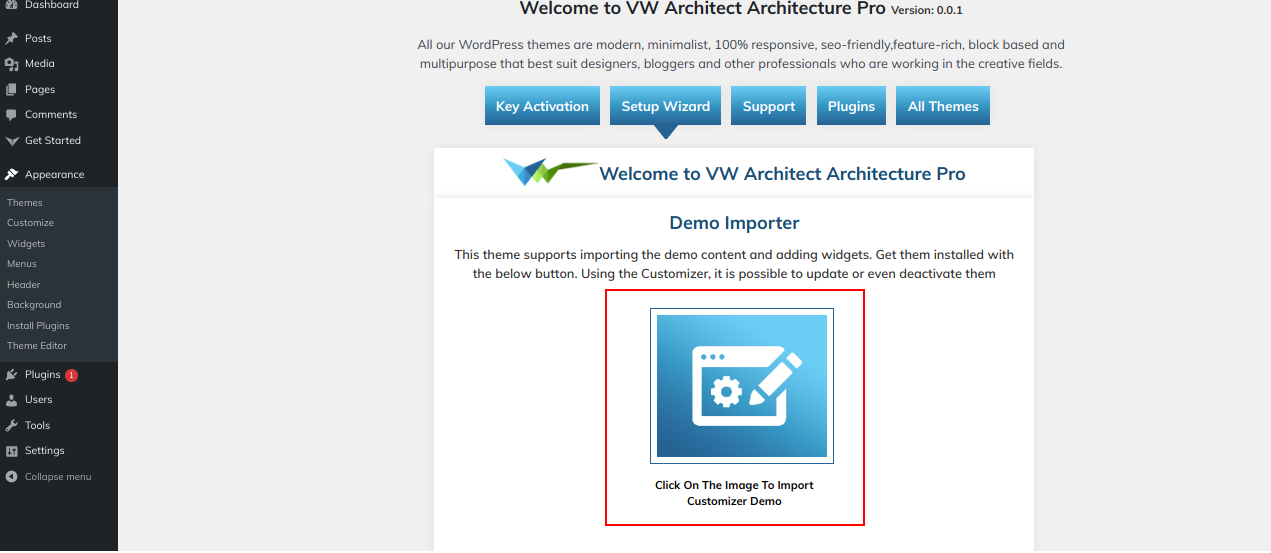
Theme Wizard
To import content using Theme Wizard, follow the steps below.
1) Go to Dashboard >> Getstarted

2) Insert your key.

Refer video for Licence key activation:

3) Setup Wizard should be selected, followed by the Start Now button.

4) install Plugins.

5) Import your demo content based on Customizer and Gutenberg.
You can use this video to configure your demo content.


Theme Setup
After activating the theme, you will see the index page with the most recent post. Now you must configure the home page template to display all of the demo sections on your front page.
Setup Home Page Template
To configure the Home page, follow these steps.
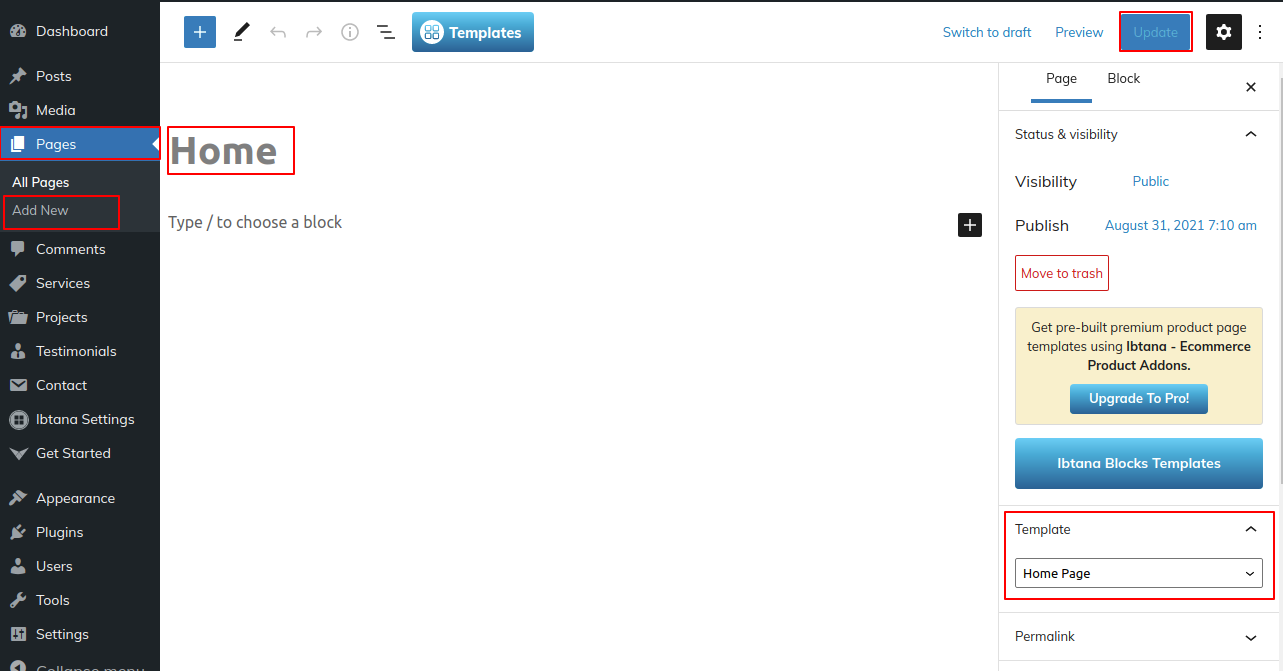
To set a template for a new page, navigate to the Dashboard, click on Pages, and then select Add New Page. Give the page a name, such as "Home," or any other desired label. Next, choose the "home-page" template from the dropdown menu of available templates.

2. Set the front page: Go to Setting -> Reading --> Set the front page display static page to home page

When you're finished, you'll be able to see all of the demo content on the front page.
6.1 Setup Header
This section explains how to create the header section. The first step is to include a site logo.
Steps for adding a logo to your website.
1. Go to Dashboard >> Appearance >> Customize >> Site Identity.
2. Steps for adding a logo to your website.
Go to Dashboard >> Pages >> Add New.
Repeat the process for the remaining pages.
Go to Dashboard >> Appearance >> Menu.

3. Follow these steps to create an icon section.
Go to Appearance >> Customize >> Theme Settings >> Header.


This is what the output will look like.

Refer video for create and setup menu:

6.2 Setup Slider
In order to configure the slider section.
Go to Appearance >> Customize >> Theme Settings >> Slider Settings.

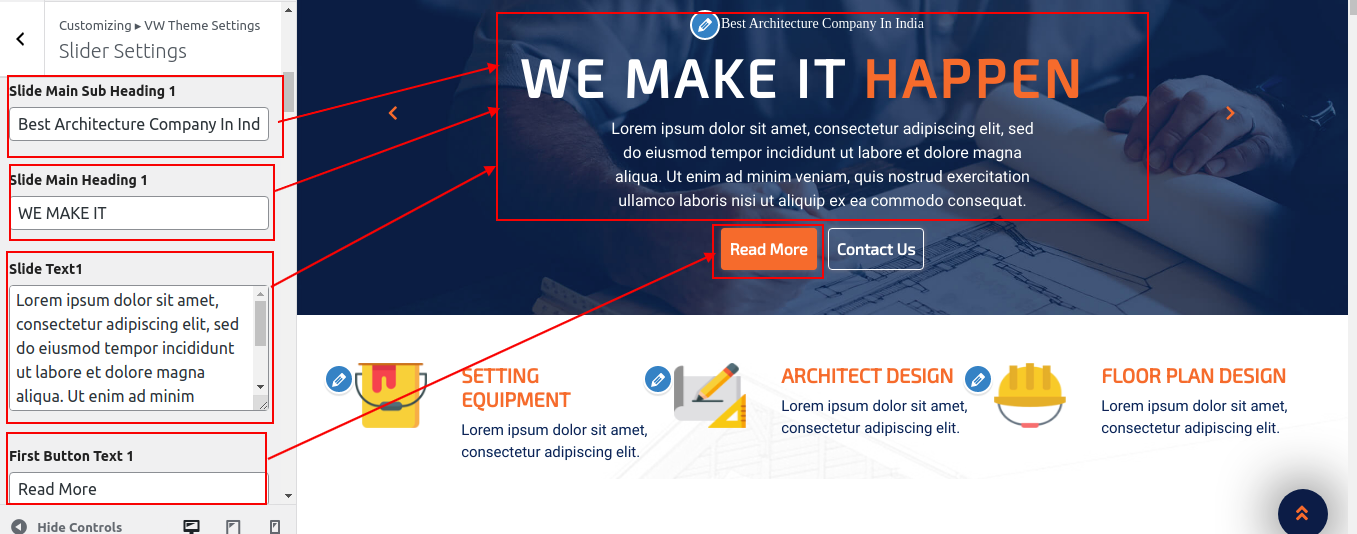

This is what the output will look like.

Refer video for Setup slider:

6.3 Feature Section
Setup Feature section
Go to Appearance >> Customize >> Theme Settings >> Feature Settings.


This is what the output will look like.

6.4 About Us Section
In order to setup this section.
Go to Appearance >> Customize >> Theme Settings >> About us.

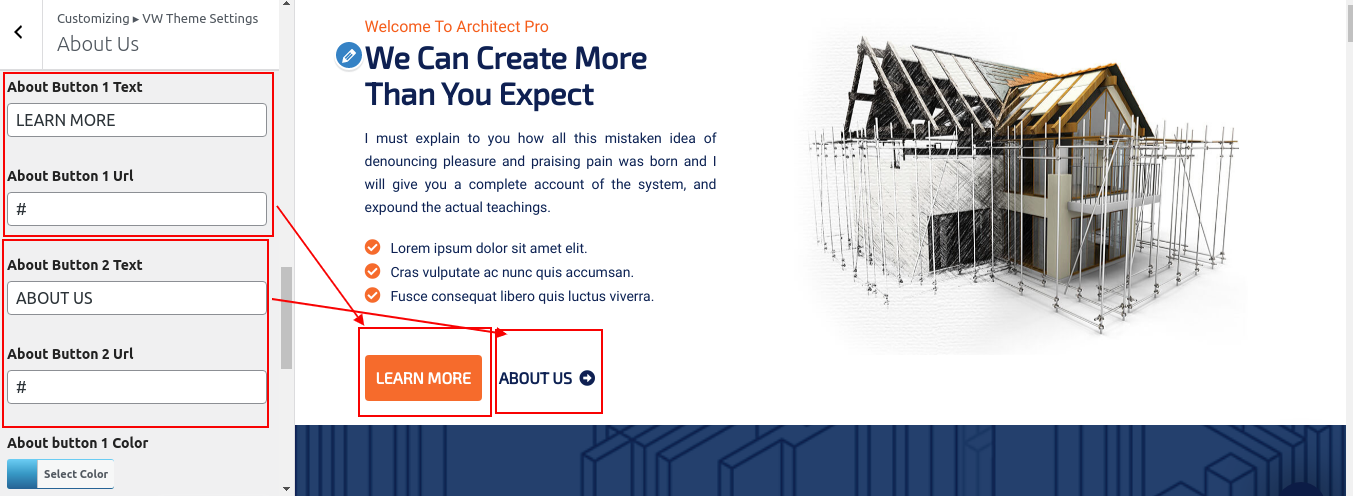
This is what the output will look like.

6.5 Setup Progress Bar Section
In order to setup Progress Bar section.
Go to Appearance >> Customize >> Theme Settings >> Progress Bar


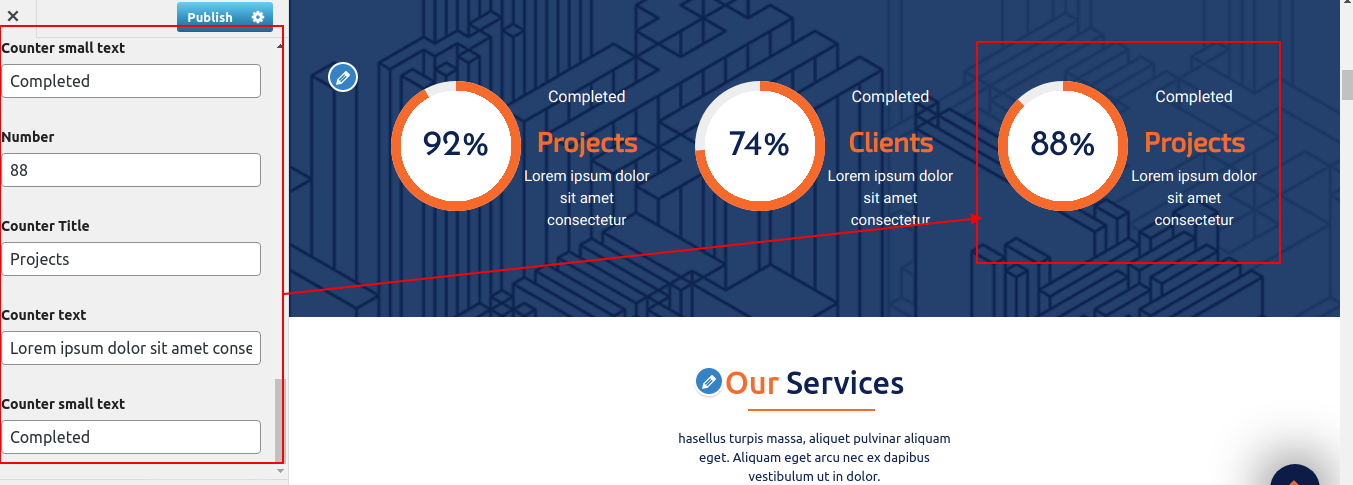
This is what the output will look like.

6.6 Setup Services Section
In order to setup Services section.
Go to Appearance >> Customize >> Theme Settings >>Services
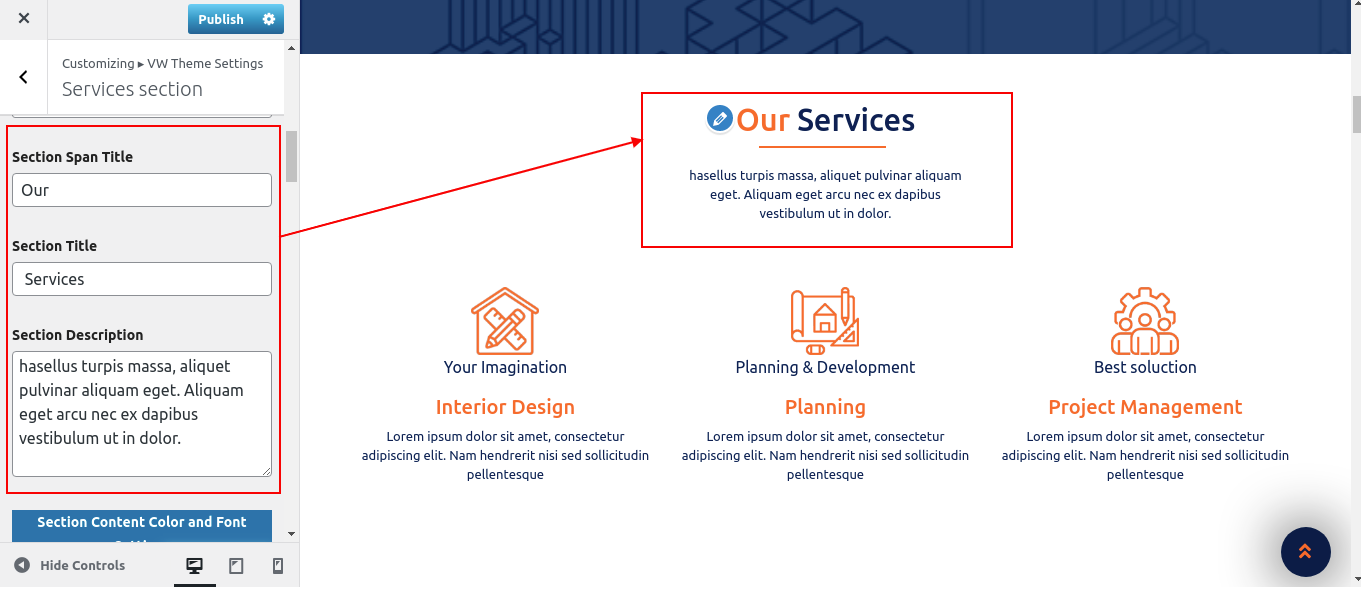
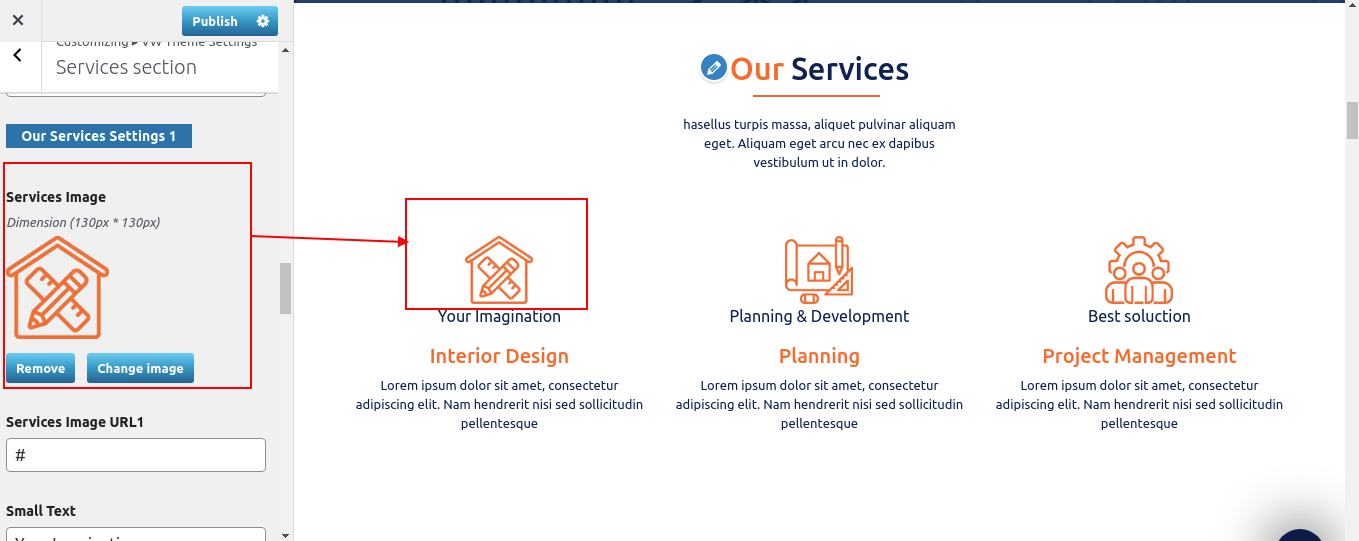
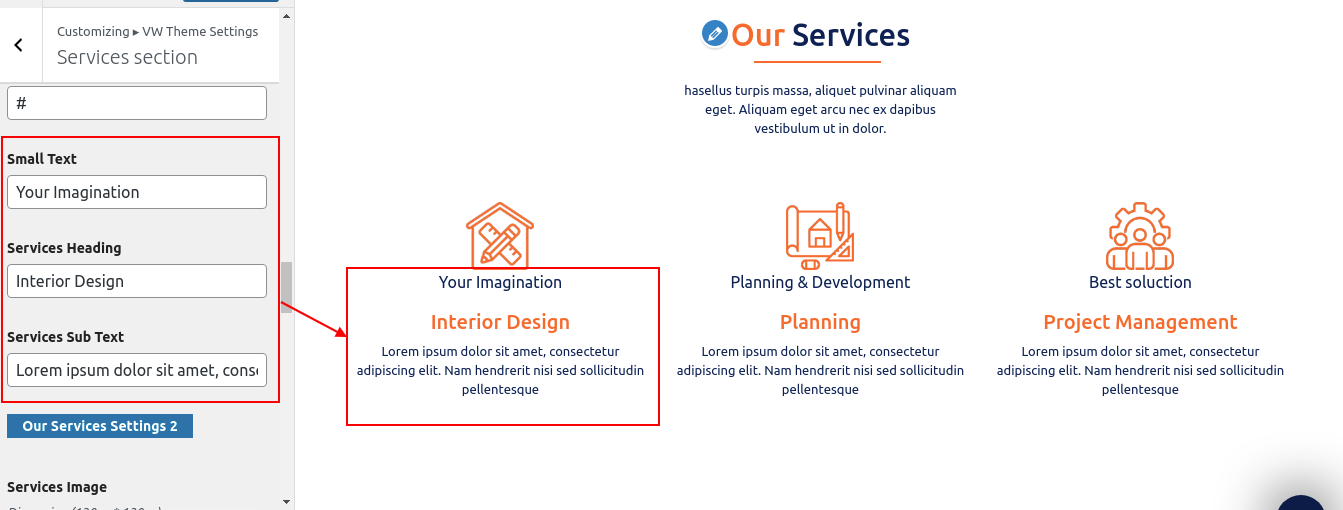


This is what the output will look like.

6.7 Setup Solution Section
In order to configure the Solution section.
Go to Appearance >> Customize >> Theme Settings >>Solution

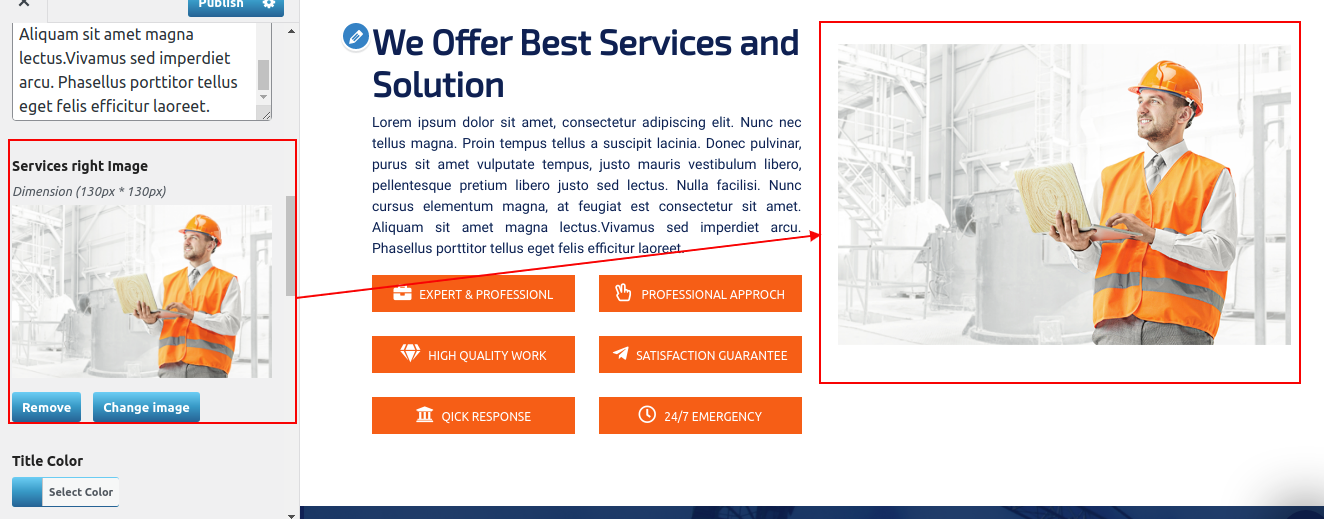
This is what the output will look like.

6.8 Setup Start Project Section
In order to setup Start Project section.
Go to Appearance >> Customize >> Theme Settings >>Start Project


This is what the output will look like.

6.9 Project Section
To access the my Project section, first activate the Vw Ecommerce addon plugin.
See the plugin section for more information.
The Projects option will appear on the dashboard after installation.
Go to Dashboard >> Projects >> Add New.


Repeat the process for the remaining posts.
To set up the project section.
Go to Appearance >> Customize >> Theme Settings >> My Project.
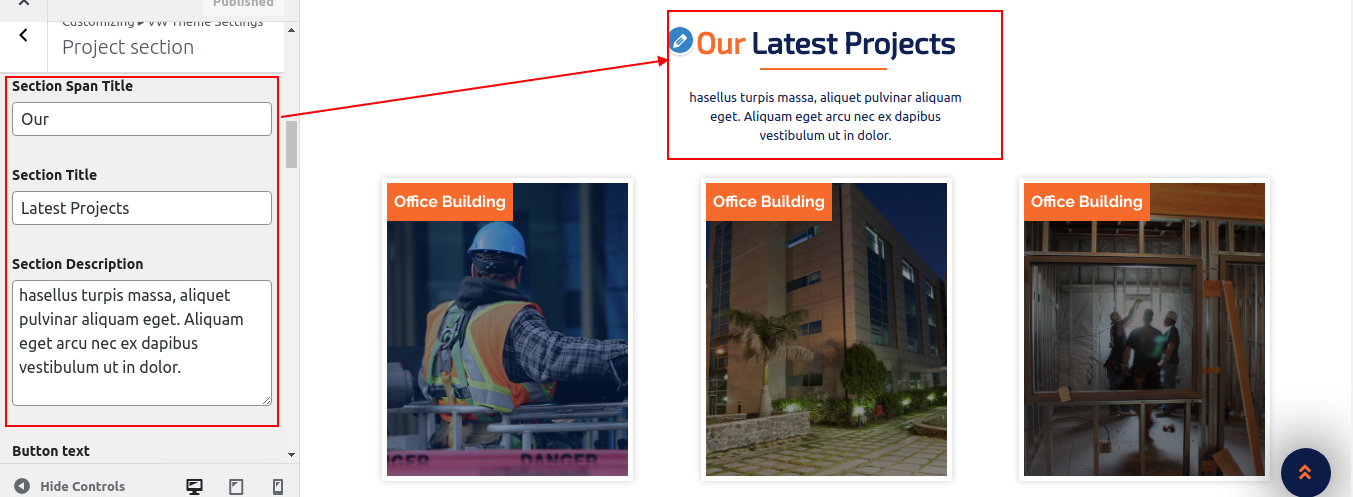

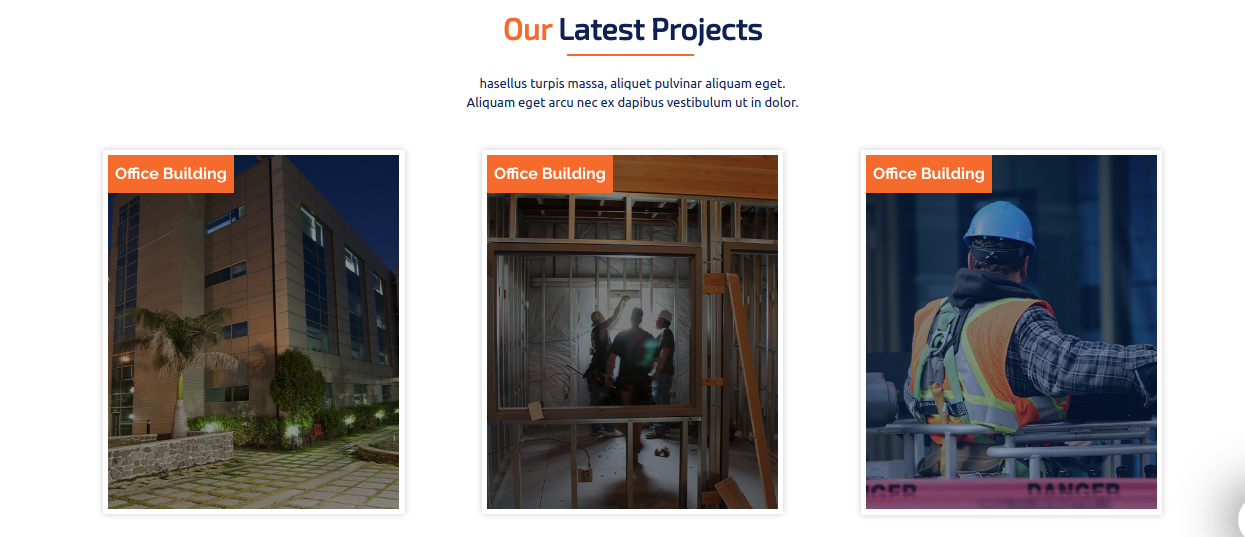
This is what the output will look like.
9.10 Portfolio Section
To access the my Portfolio section, first activate the Vw Ecommerce addon plugin.
For better reference see plugin section.
The Projects option will appear on the dashboard after installation.
Go to Dashboard >> Portfolio >> Add New.


Repeat the process for the remaining posts.
Rep this procedure for the remaining posts.
Go to Appearance >> Customize >> Theme Settings >> My Portfolio.
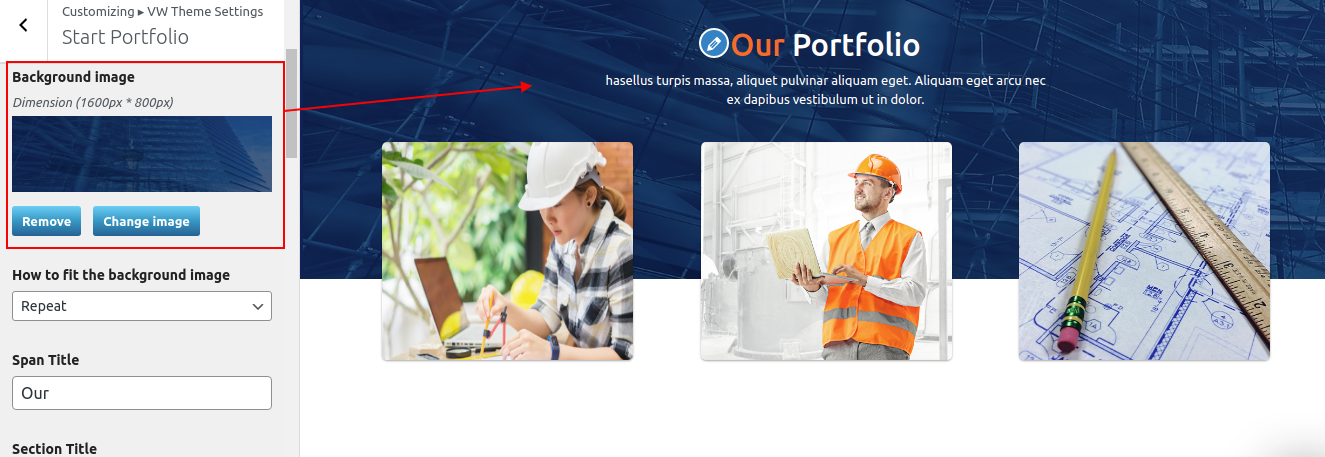

This is what the output will look like.

9.11 Newsletter Section
In order to configure the Newsletter section.
Go to Appearance >> Customize >> Theme Settings >> Newsletter.

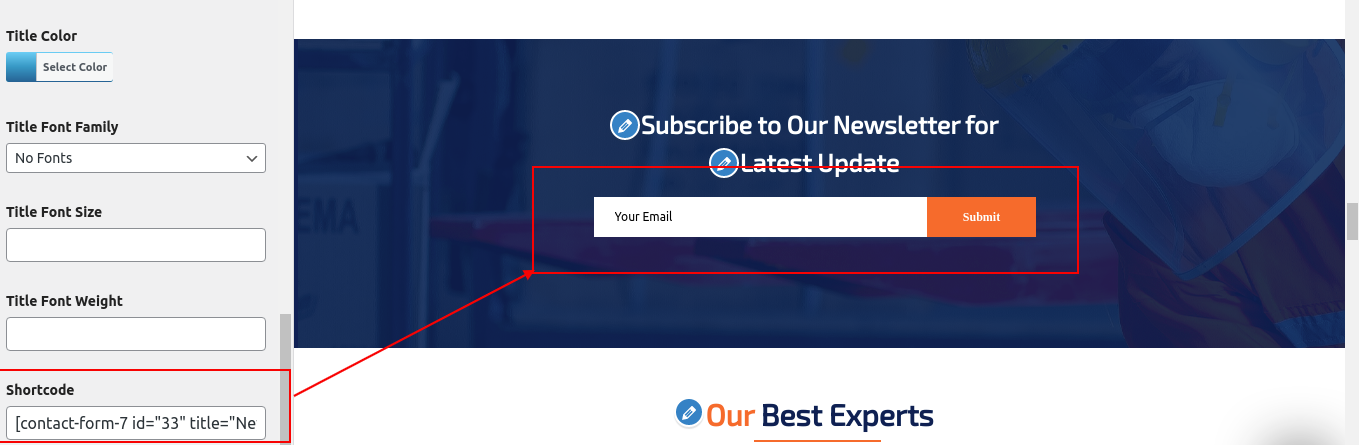

This is what the output will look like.

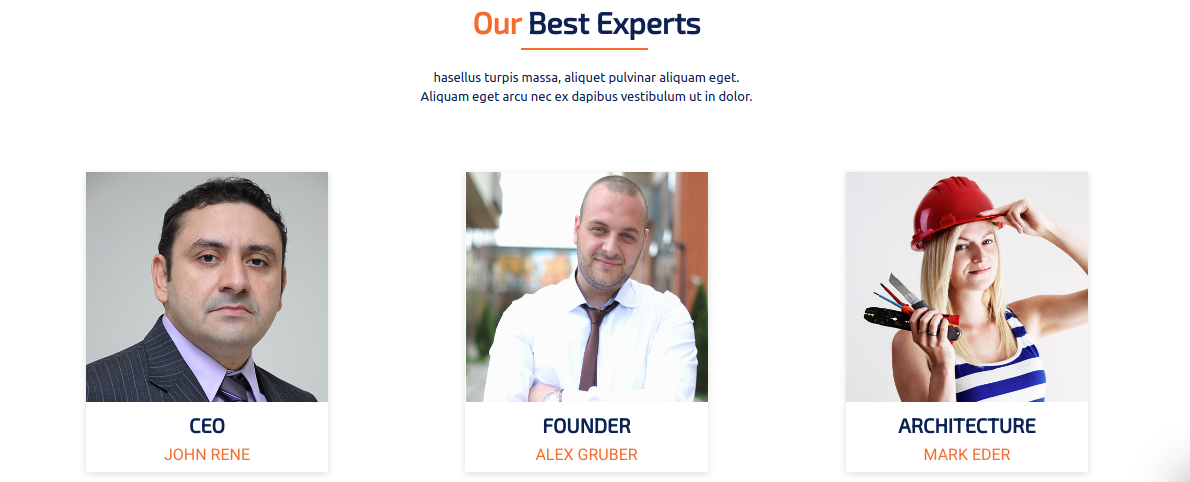
9.12 Setup experts
To create an experts section.
Go to Appearance >> Customize >> Theme Settings >> experts.

This is what the output will look like.
FAQ Section
In order to create a FAQ section.
Navigate to the Theme Settings section within the Appearance customization options, and then select the FAQ option.

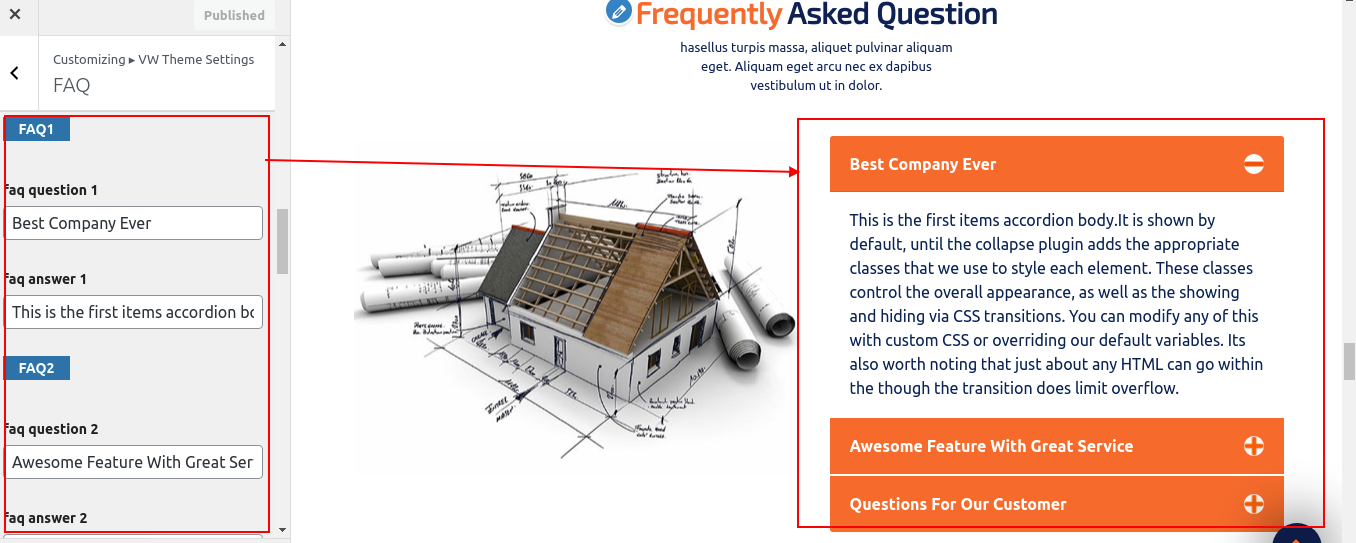

This is what the output will look like.

get quote Section
In order to configure the get quote section.
Go to Appearance >> Customize >> Theme Settings >> get quote.

This is what the output will look like.

13. Blogs Section
In order to create a blog section.
Go to Appearance >> Customize >> Theme Settings >> Blog.


This is what the output will look like.

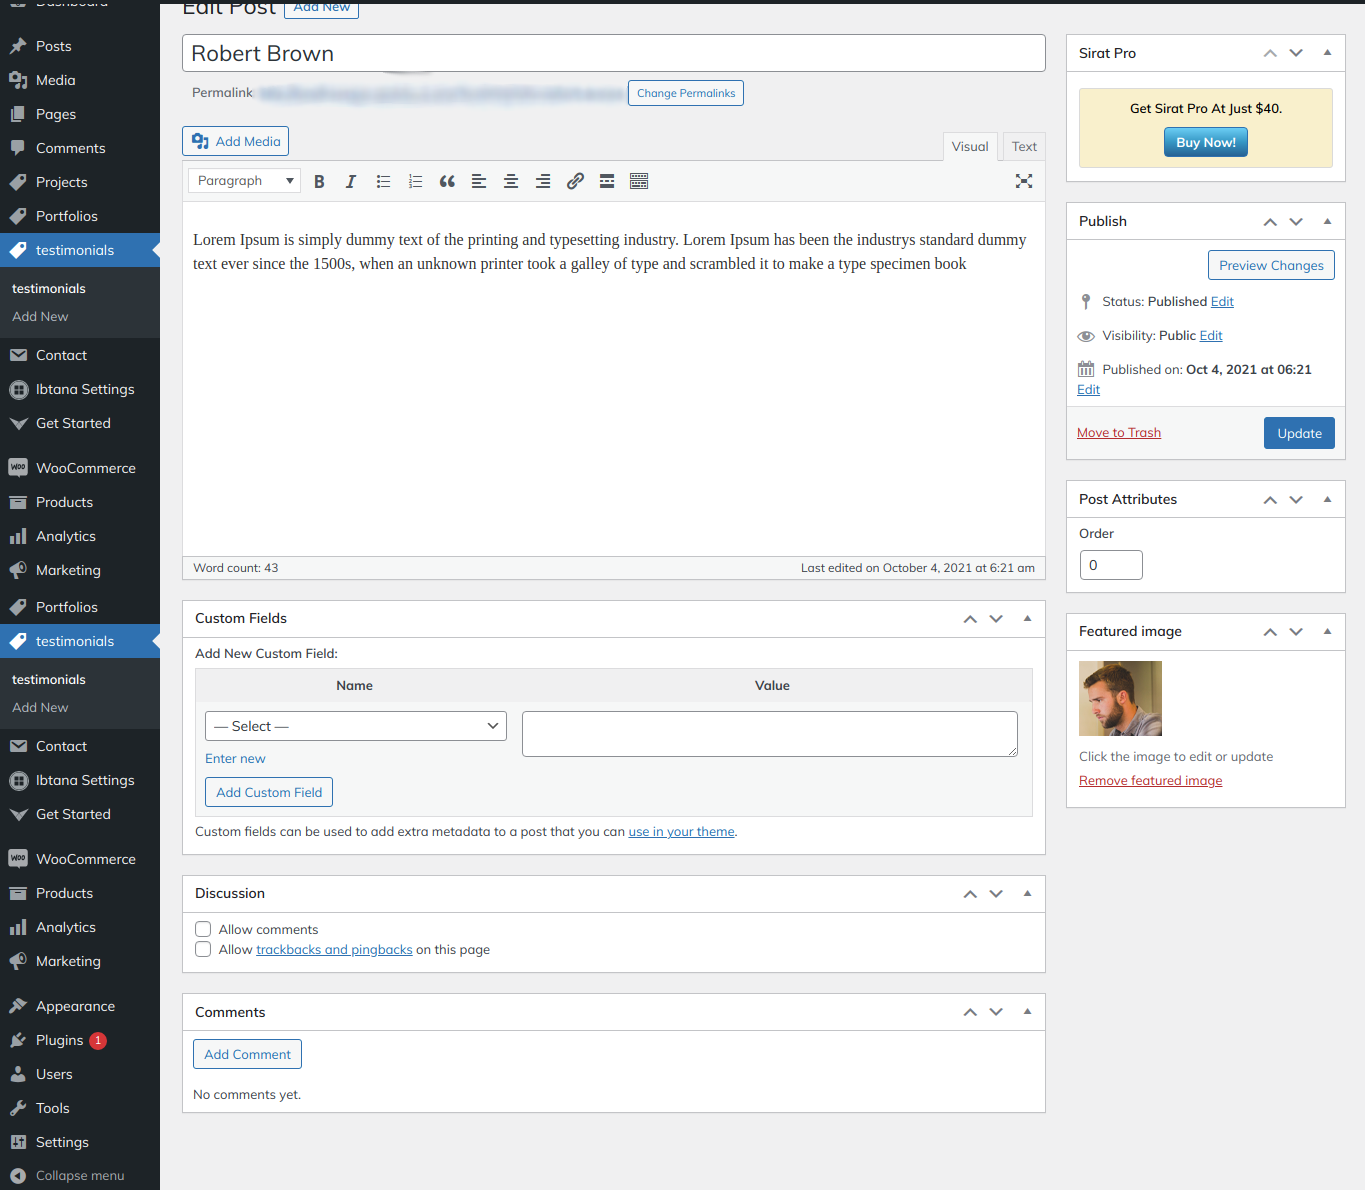
6.14 Testimonial Section
To access the Testimonial section, first activate the Vw Ecommerce addon plugin.
See the plugin section for more information.
The Testimonial option will appear on the dashboard after installation.
Go to Dashboard >> Testimonials >> Add New.
To create a testimonial section.
Go to Appearance >> Customize >> Theme Settings >> Testimonial.


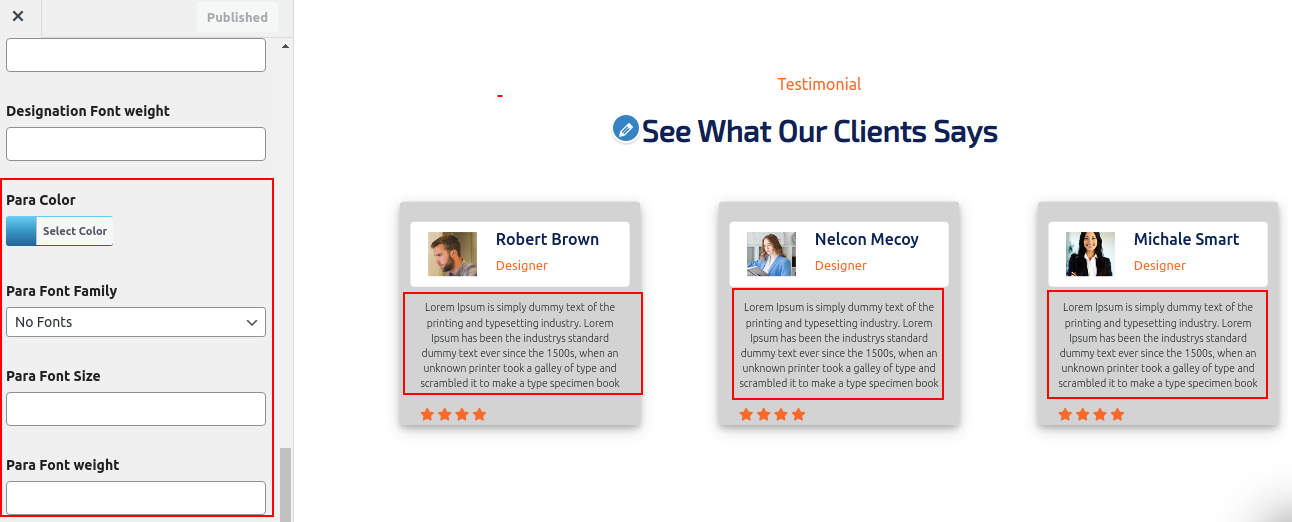
This is what the output will look like.

6.15 Free Enquiry Section
To set up the Free Enquiry section.
Go to Appearance >> Customize >> Theme Settings >> Free Enquiry.


This is what the output will look like.

6.16 Clients Section
To get to the Clients section.
Go to Appearance >> Customize >> Theme Settings >> Clients.

This is how the output will look.

Get in touch form Section
In order to Contact Us section.
Go to Appearance >> Customize >> Theme Settings >> Get in touch.

This is how the output will look.

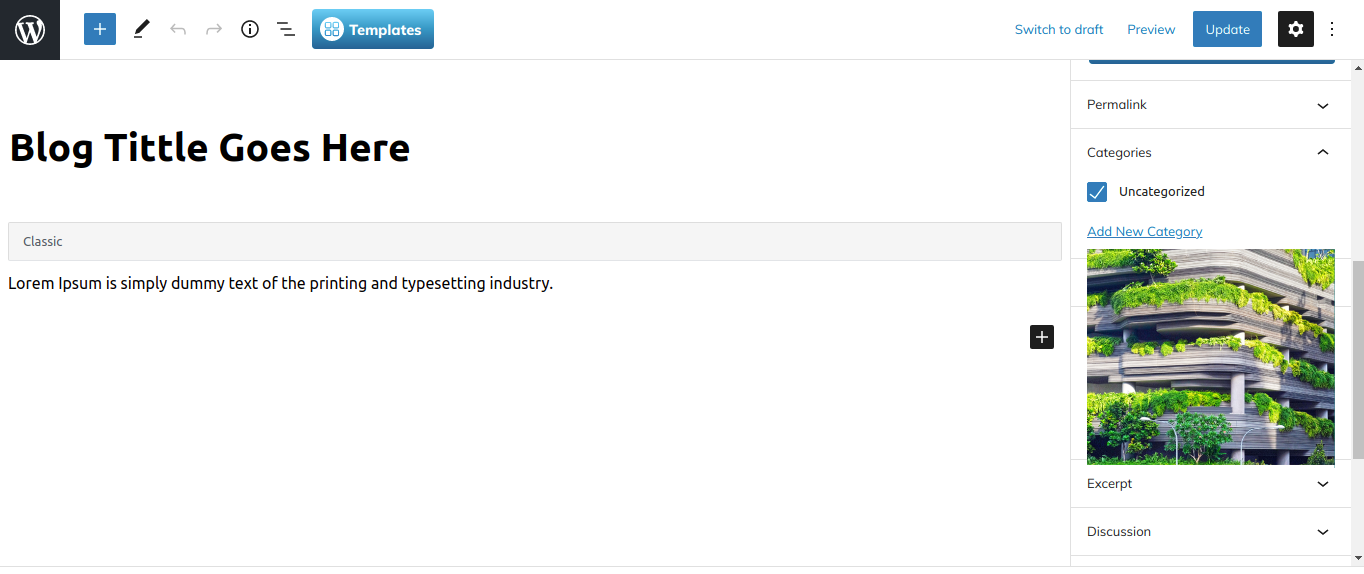
Latest Post Section
In order to highlight the Latest Post Section.
Go to Dashboard >> Posts >> Add News
Refer video for create latest Post section:

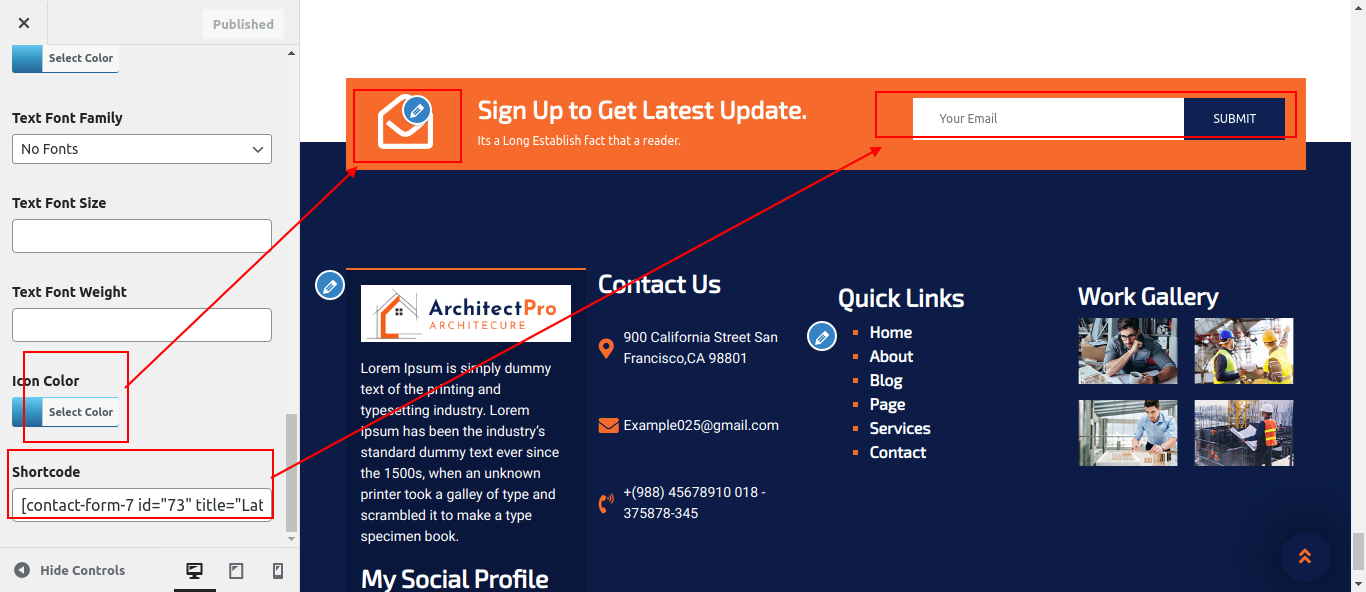
6.17 Setup Contact Page
In order to configure the Contact Page Section.
1. You must first take some critical steps.
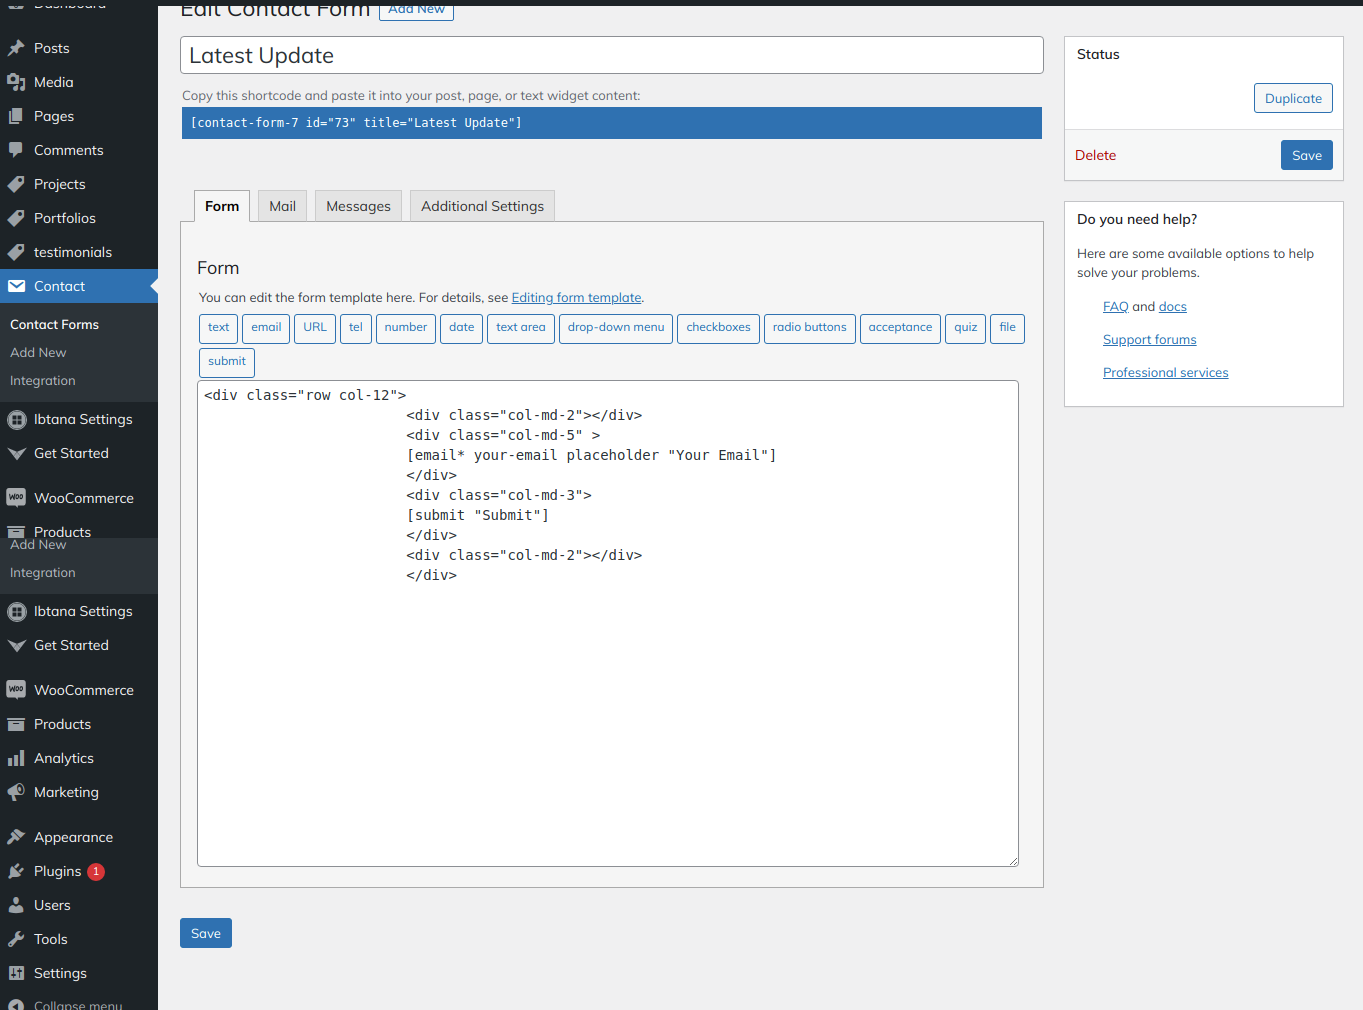
2. You must install the Contact Form 7 plugin.
Create contact form
Go to Dashboard >> Contact >> Add New
Appearance >> Customize >> Theme Setting >> Footer Widgets

Refer video for installation of Contact form 7 Plugin:

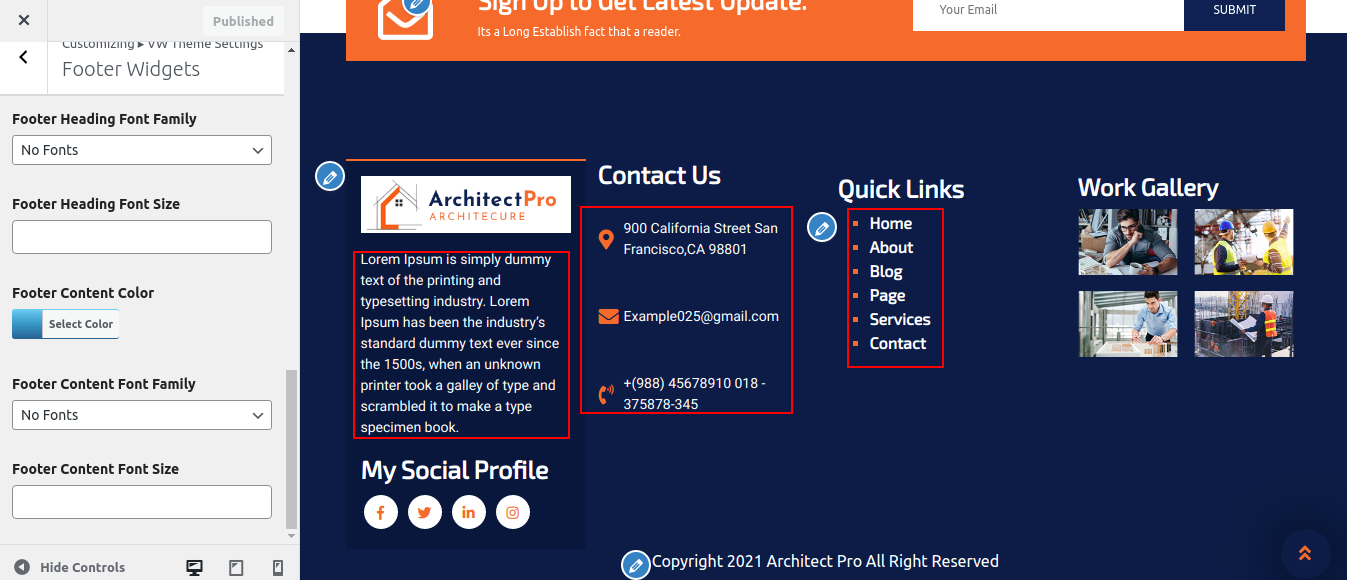
18. Footer Section
The footer contains four columns. Each column displays a different element. The admin pannel widget section will be used to configure these sections. You can add whatever widget you want and then update the widget.
Go to Dashboard >> Appearance >> Widgets

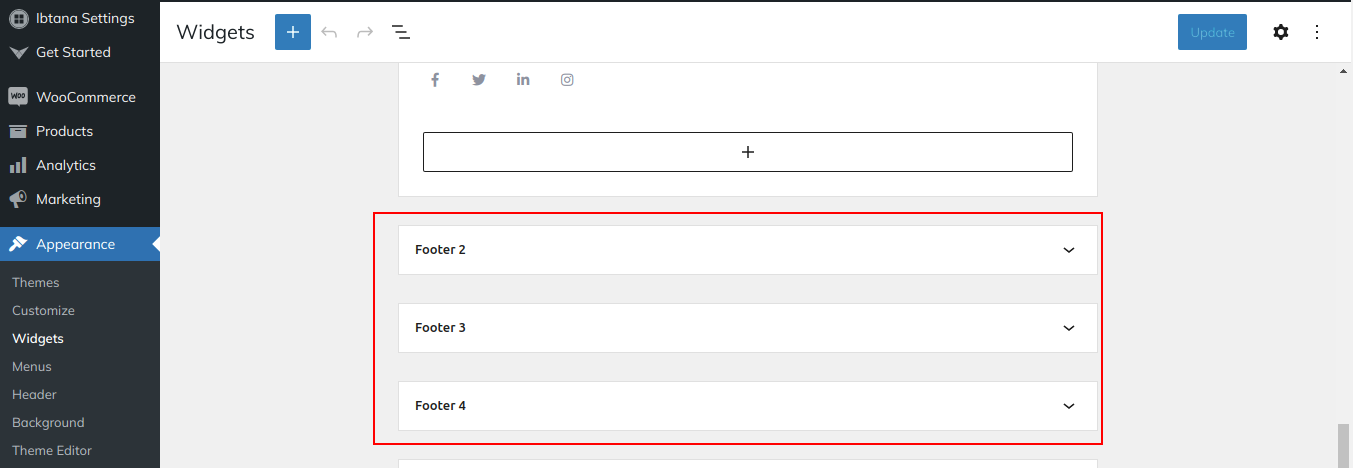
You can add a footer section this way.

Refer video for Create a Footer Widget:
6.18Footer Text
Footer Text should be displayed on the home page.
Go to Appearance >> Customize >> Theme Settings >>Footer Text.

You can add footer text in this manner.

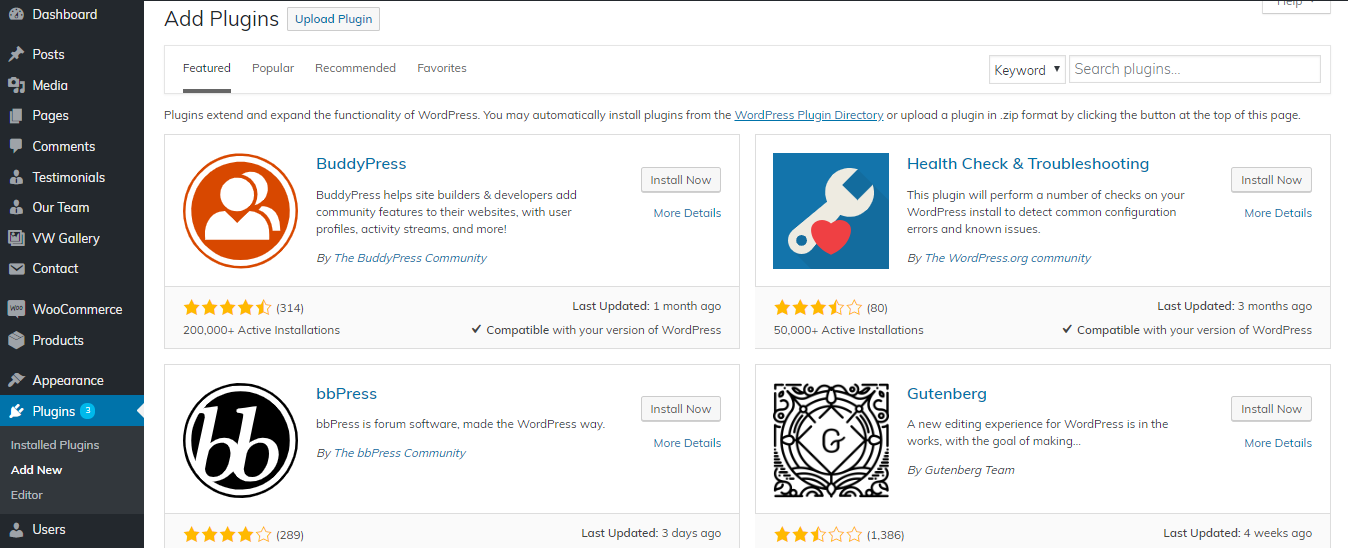
Theme Plugins
After the installation is complete, you will see a success message similar to this. To use the plugin, after it has been installed, click the Activate Plugin link.

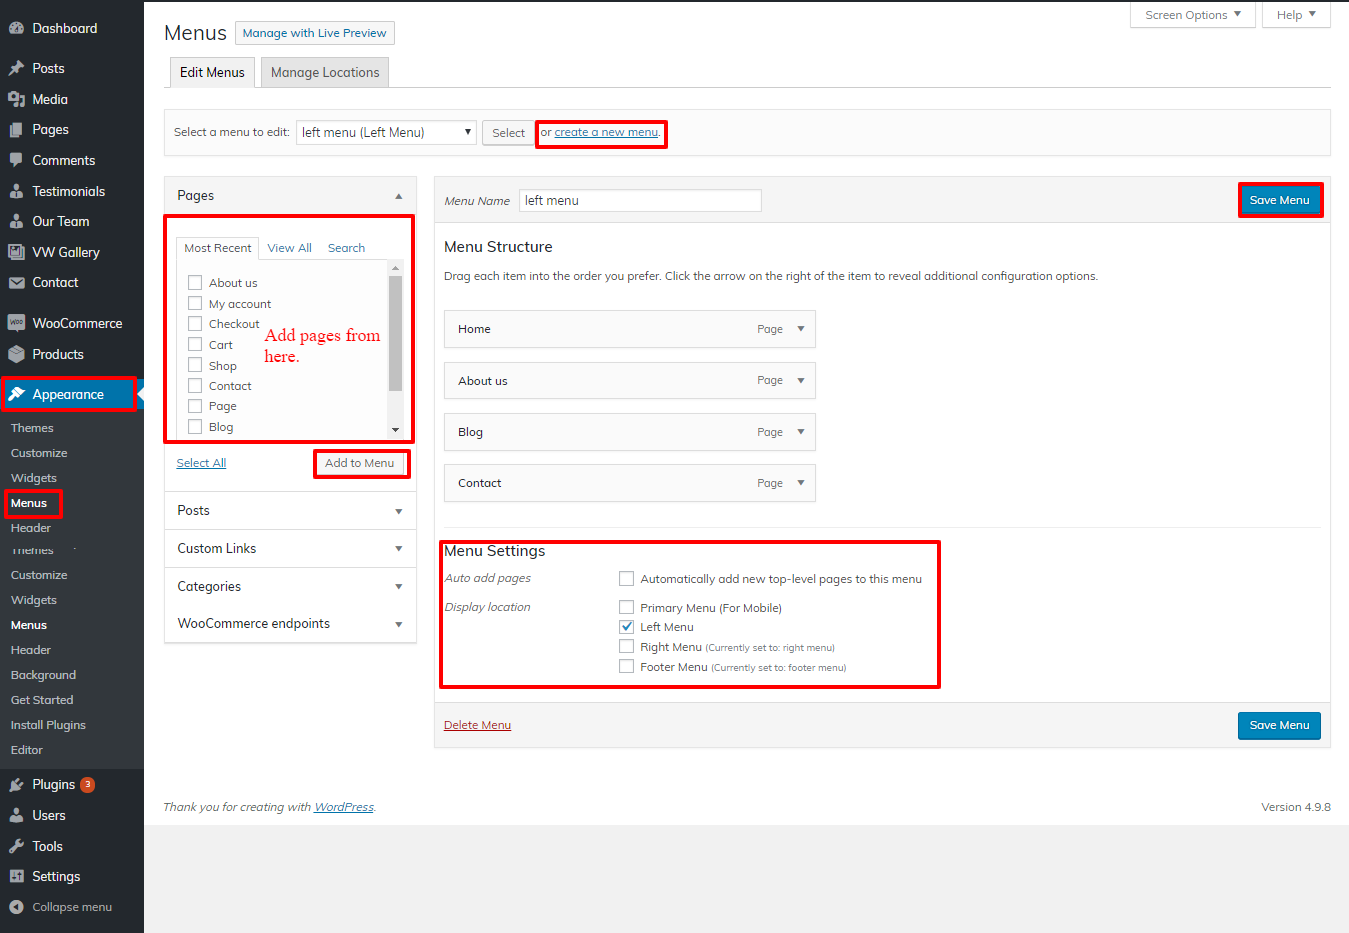
Setup Navigation
- First of all, create pages from go to Pages >> Add new page.
- Go to Appearance >> Menu
- Select the Create a new menu link option.
- Give your menu a name in Menu name and save menu button.
- Once you've created the menu. You must add pages by selecting them with checkboxes. After you've added a menu list, you can rearrange it using drag and drop.
- Choose a menu theme location from the checkboxes below.
For a better understanding, look at this screenshot.
Page Templates and sidebars
Page Templates
- Home Template (the default Home template)
- Default Template (the default page template with a right sidebar position)
- Page (Left Sidebar) (a page templates with left sidebar position)
- Page (Right Sidebar) (a page template with right sidebar position)
- Blog (Full Width) (a blog templates with one column without sidebar)
- Blog (Left Sidebar) (a blog templates with left sidebar position)
- Blog (Right Sidebar) (a blog template with right sidebar position)
- Contact Template (the default Contact template with no sidebar position)
Post, Categories and Post Formats
Adding category
Review the following article for more information on adding categories: http://codex.wordpress.org/Manage_Categories_SubPanel

- Access your WordPress Administration Panel (Dashboard).
- Click the Posts tab.
- With that done, click Categories for blog posts.
- Enter the name of your new category here.
- After that, click the Add New Category button.
Creating a Blog post

- Access your WordPress Administration Panel (Dashboard).
- Click the Posts tab.
- Click the Add New tab.
- Fill in the blanks with your post's content. Please see the following link for more information on adding posts. http://codex.wordpress.org/Posts_Add_New_SubPanel.
Custom Widgets