Introduction
We appreciate you installing our WordPress Theme. The complete procedure to configure and manage a WordPress Website from the beginning is shown in this documentation in different portions.
What is WordPress CMS?
WordPress is an open source tool which is based on PHP and MySQL to create websites. It is a completely free CMS, or content management systemCMS, or content management system and a strong blogging platform. With this CMS, you can develop websites and solid online apps. You hardly require any knowledge or technical capability to manage it. WordPress has become the most accepted website development software available because of it’s varied aspects like its easy usage and flexibility. Learn More
What is a Wordpress Template?
A WordPress template acts as a skin for the websites which are created on WordPress CMS. The installation of a WordPress Template is very easy. With the help of an installed new template, you can change the look of your WordPress website very easily. All the requisite source files are provided with a WordPress template and you can freely go for editing and increasing it the way you want.
Template Installation
File Structure
The template package you have downloaded consists of several folders. Let's see what each folder contains:
-
Screenshots
-contains template screenshot. Not for production.
- theme -contains wordpress theme files.
- "vw-hosting-services.zip" -this folder contains all the necessary files for the theme.
- "license.txt" -contains license details.
- "readme.txt" -contain information about theme images path, font use and usage script.
Template installation
Installing a template is really easy process.
All installation steps can be done within WordPress interface. It makes process comfortable and fast.
There are two ways to go about the installation process.
1-Install a theme using wordpress admin.
First thing you need to do is to login to the admin area of WordPress. Next, select.
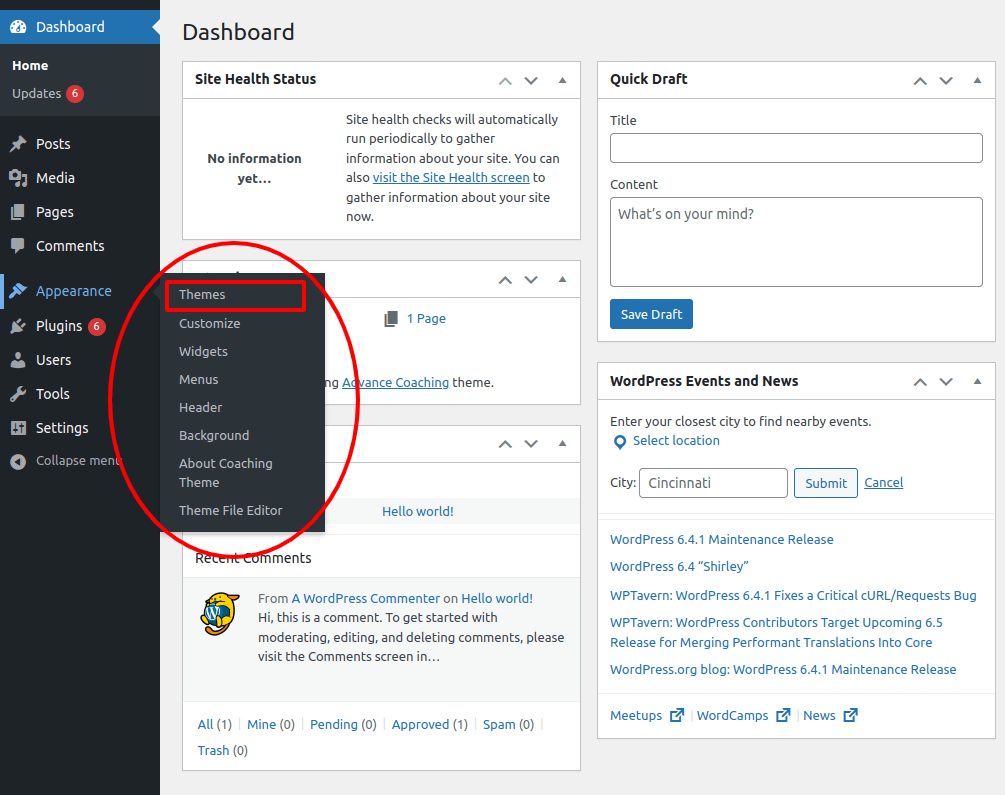
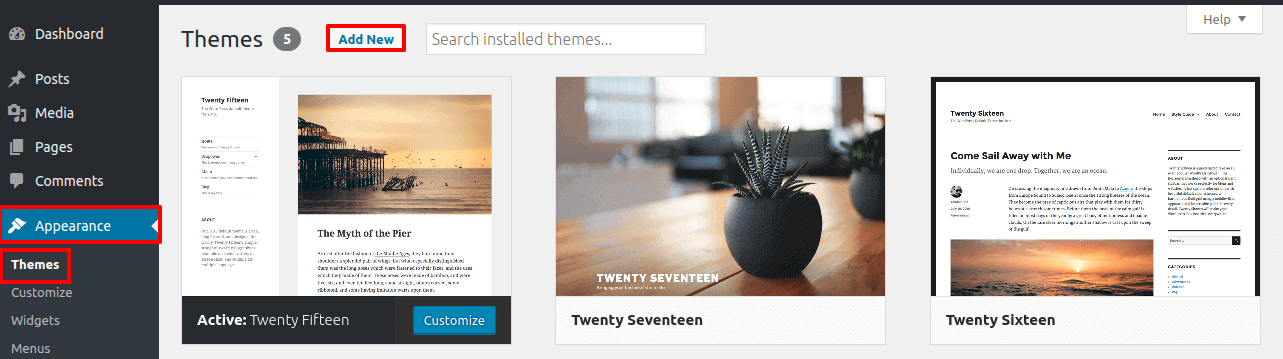
1.1 Go To Dashboard >> Appearance >> Themes.
1.2. Once you have reached the page of themes, click on the Add New button.
1.3. Press "Upload Theme" Click, then choose your vw-hosting-services.zip theme then click on "install now".

Then, Your theme will be successfully install.
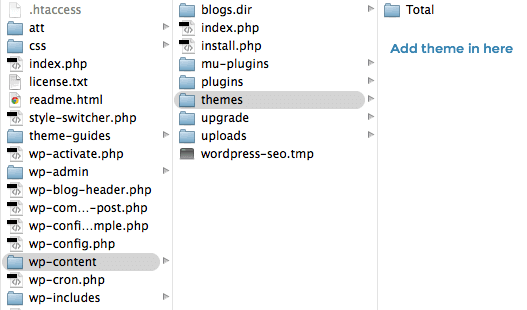
2-Install a Theme using FTP
The following installment choice is to FTP the theme. For this method first log into your site via FTP and browse to your themes folder placed in the wp-content. The theme you downloaded and unzip it and upload only the extracted Total folder to your server.
Next log into on your WordPress blog and browse to access Appearance >> Themes to activate Theme.
Create a main page Template With Customizer
When setting up a main page with customizer, proceed as directed below.
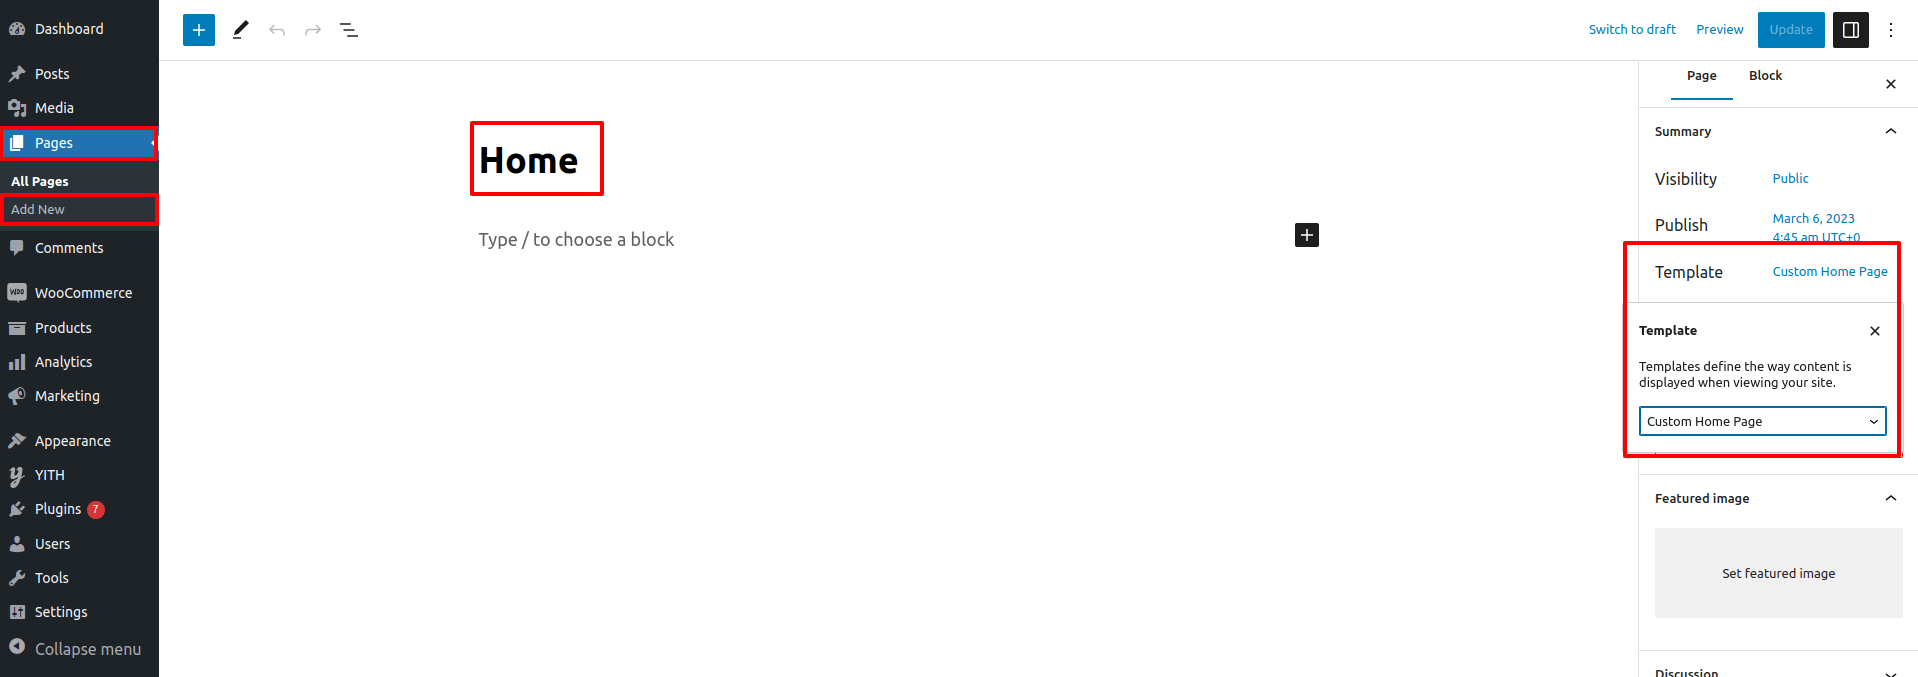
Dashboard >> Pages >> Add New
3.1. Create a new page and name it as "Home" then select the template "Custom Home page".
3.2. you can select static home page by two methods
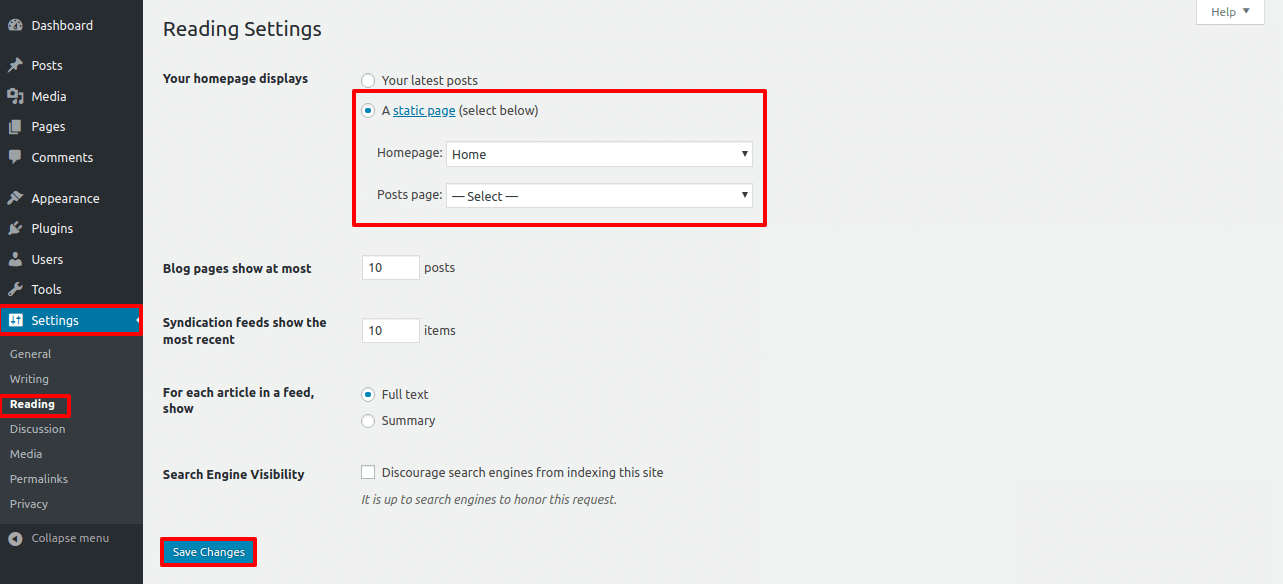
Method 1. Go To Dashboard >> Setting >> Reading
Select the option of Static Page, now select the page you created to be the Home page, while another page to be your default page.
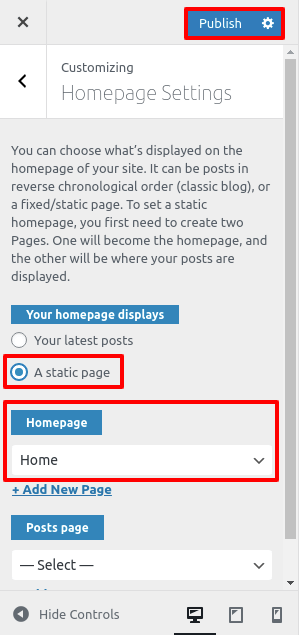
Method 2. Go To Dashboard >> Appearance >> Customize >> Homepage Setting
Select the option of Static Page, now select the page you created to be the Home page, while another page to be your default page.
Once you have done that, save the setting and now you have a custom Home page. You will now have a custom page being displayed as your Home page.
Set Logo
For Logo
Go To Dashboard >> Appearance >> Customize >> Site Identity
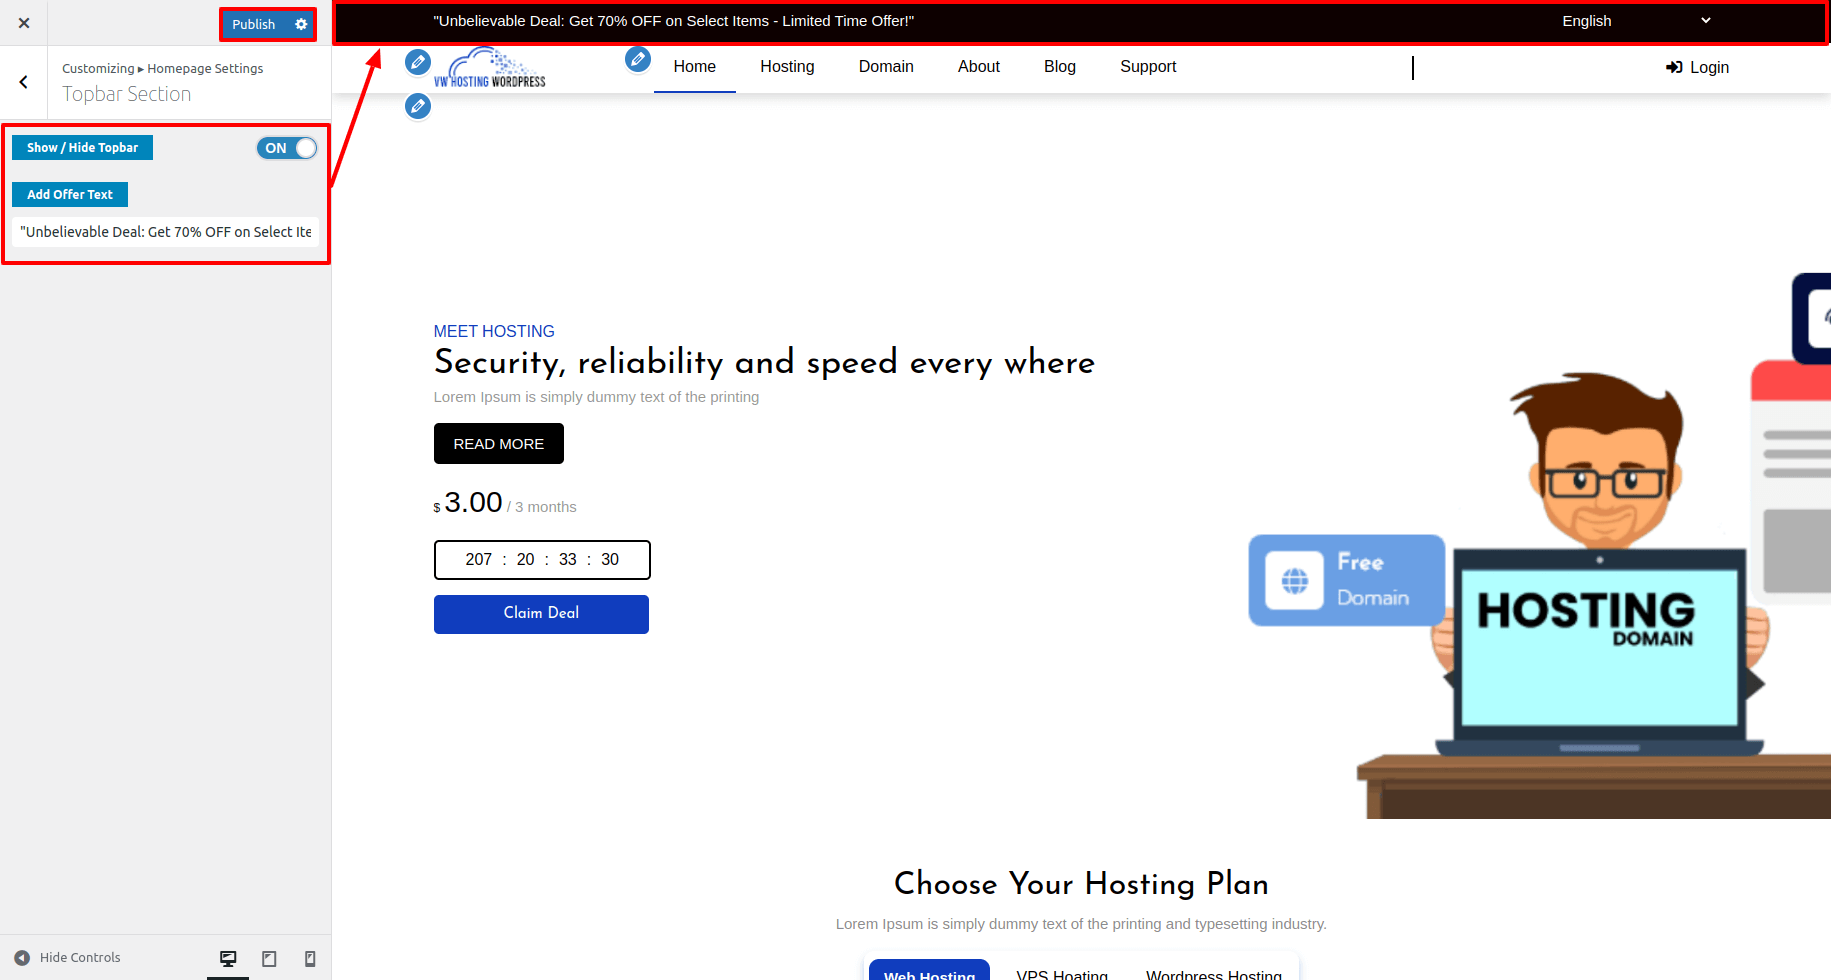
Set Topbar Section
When setting up the topbar, proceed as directed below.
First, you need to install GTranslate plugin.
Go To Dashboard >> Plugins >> Add New
And activate the plugin.
Go To Dashboard >> Appearance >> Customize >> Homepage Setting >> Topbar Section
Set Navigation Menus
- Create pages by going to pages first >> A new page was added.
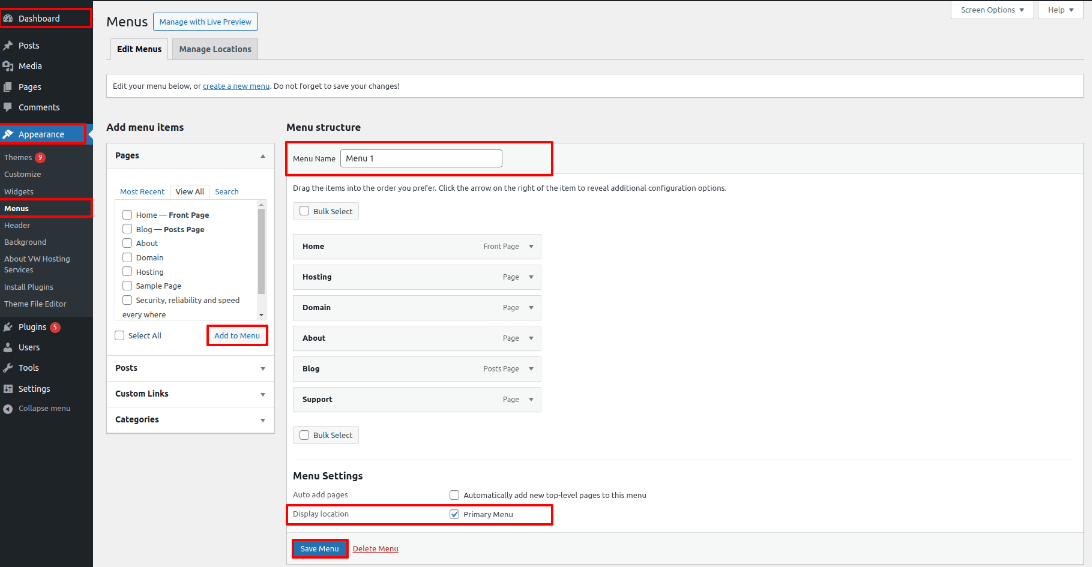
- Go To Appearance >> Menus.
- Then Make a new menu.
- Give your menu a name inside of the Menu Name field, then click the Save Menu button.
- After creating a menu. pages must be added by checking the appropriate boxes. You can drag and drop the menu list into place after adding it.
- Choosing a menu theme location from the below checkboxes.
See this screenshot for better understanding.
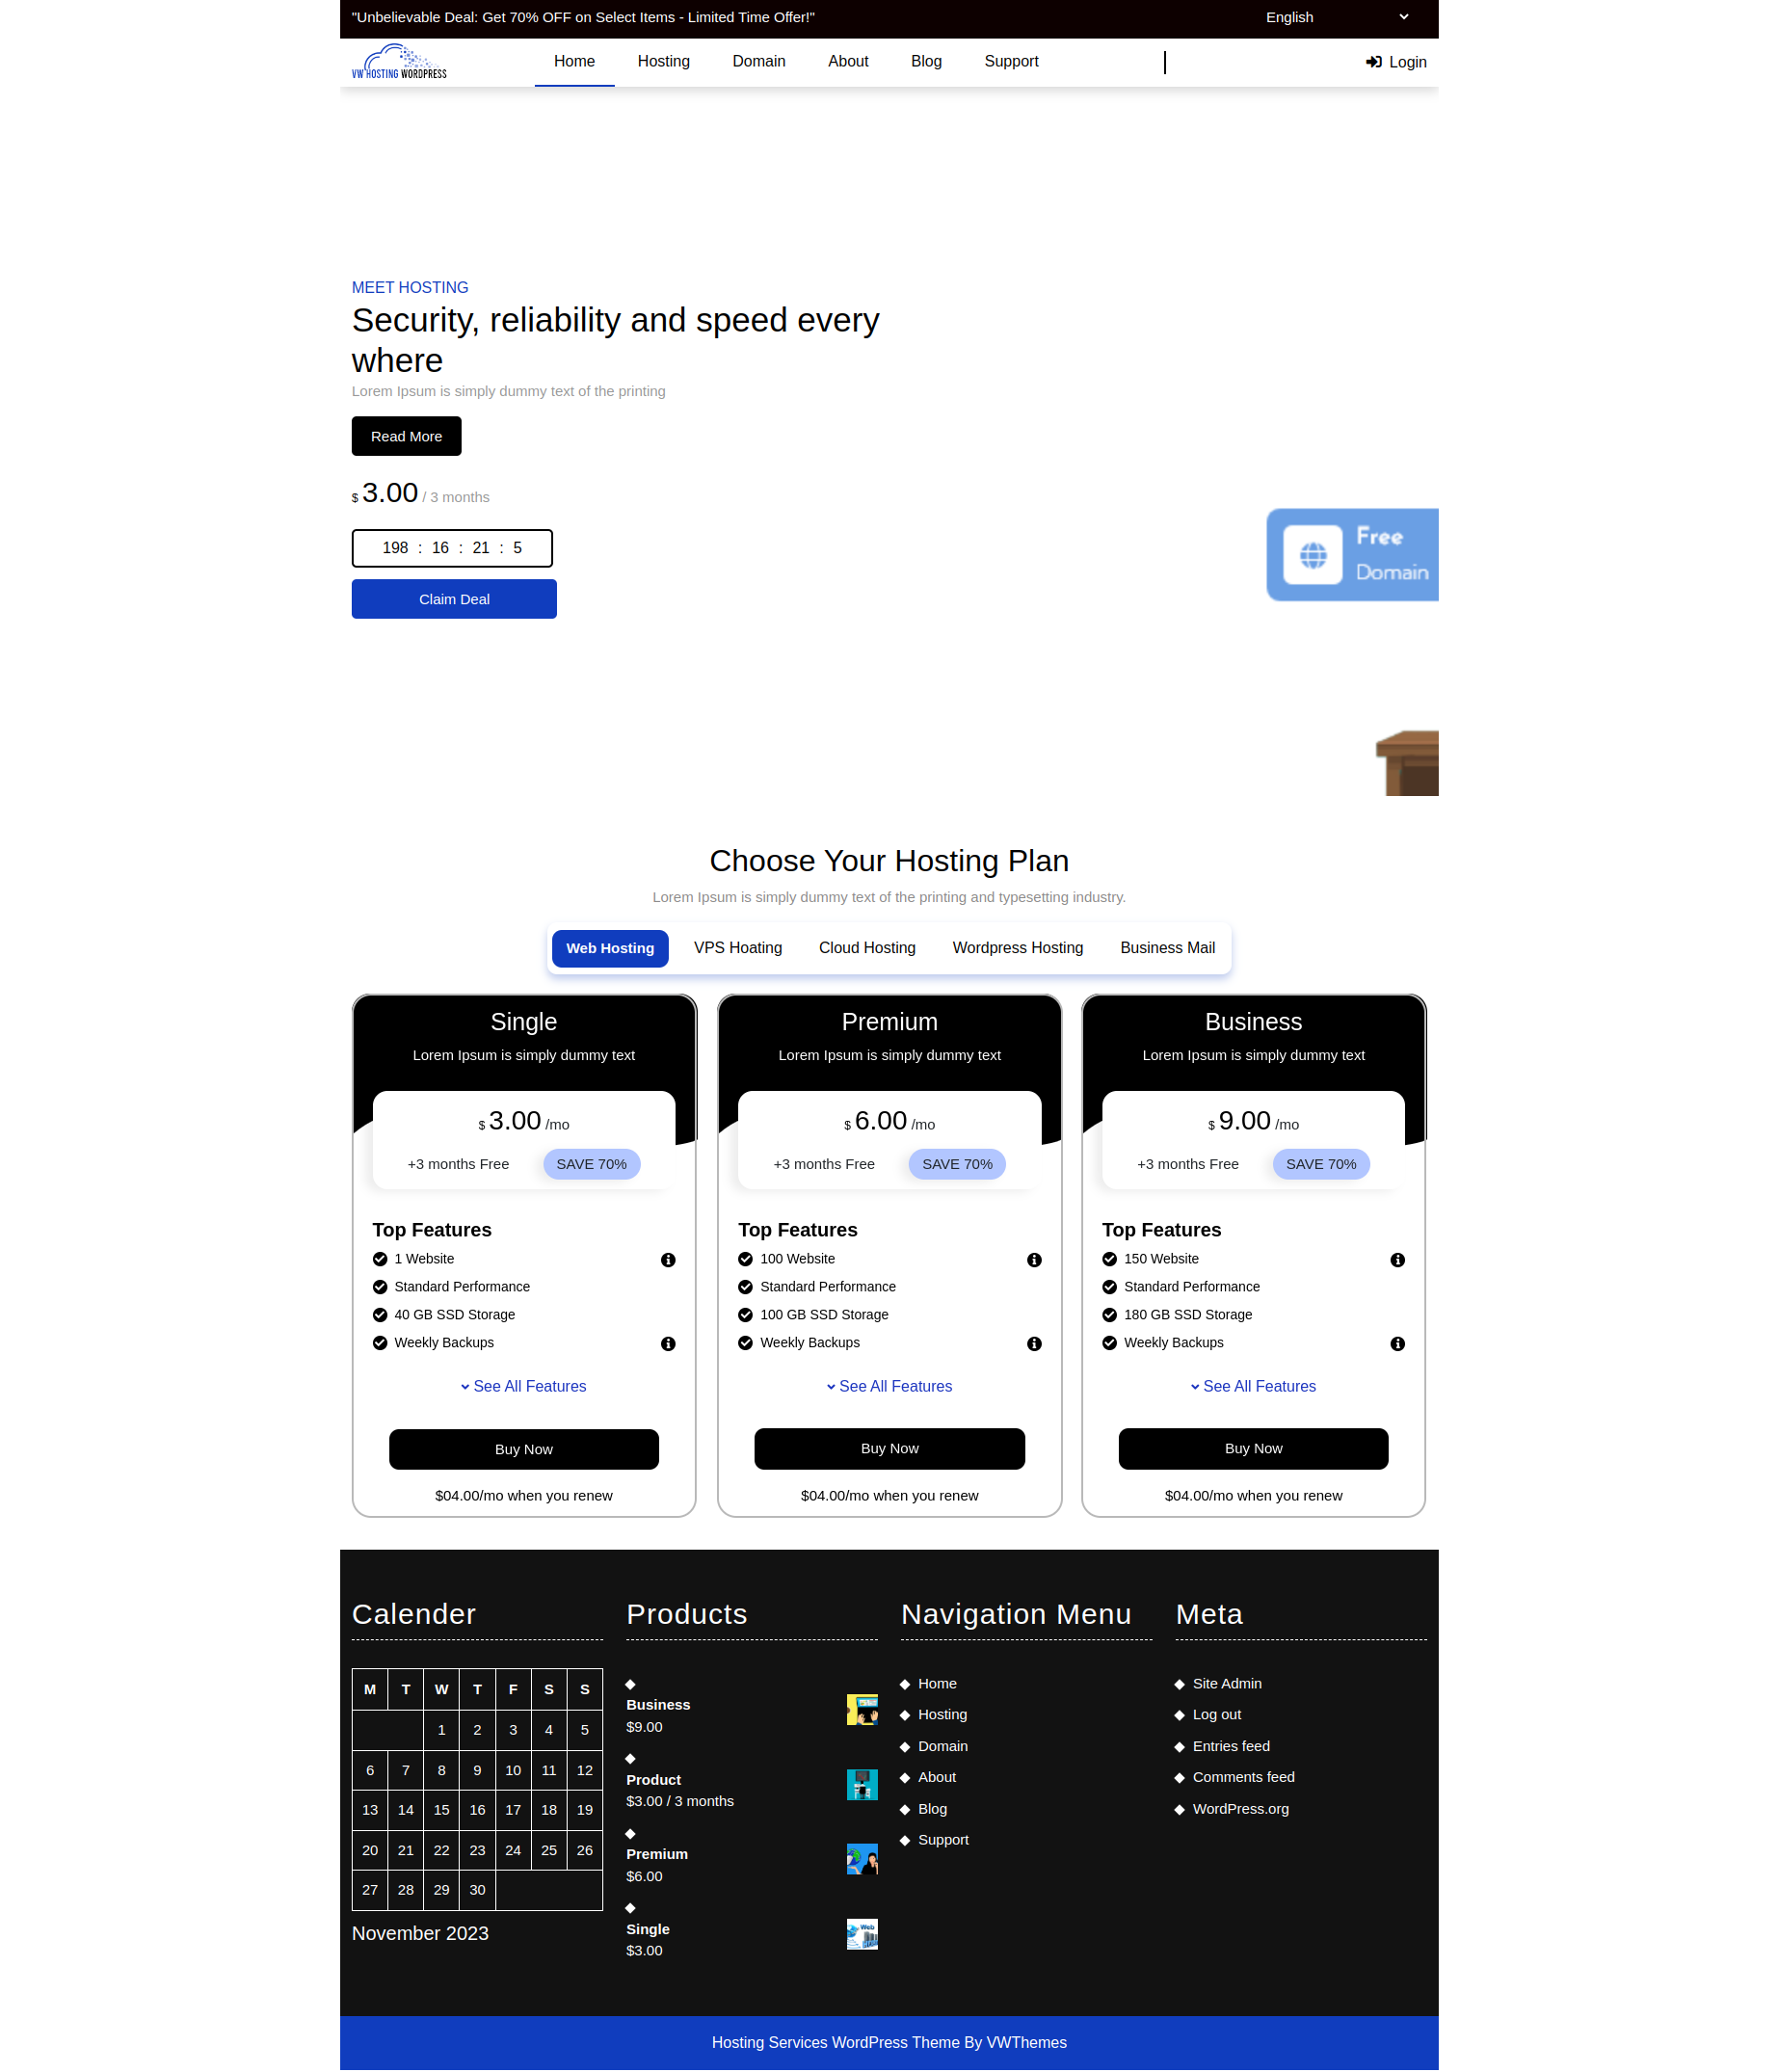
It will appear as such on the front end.

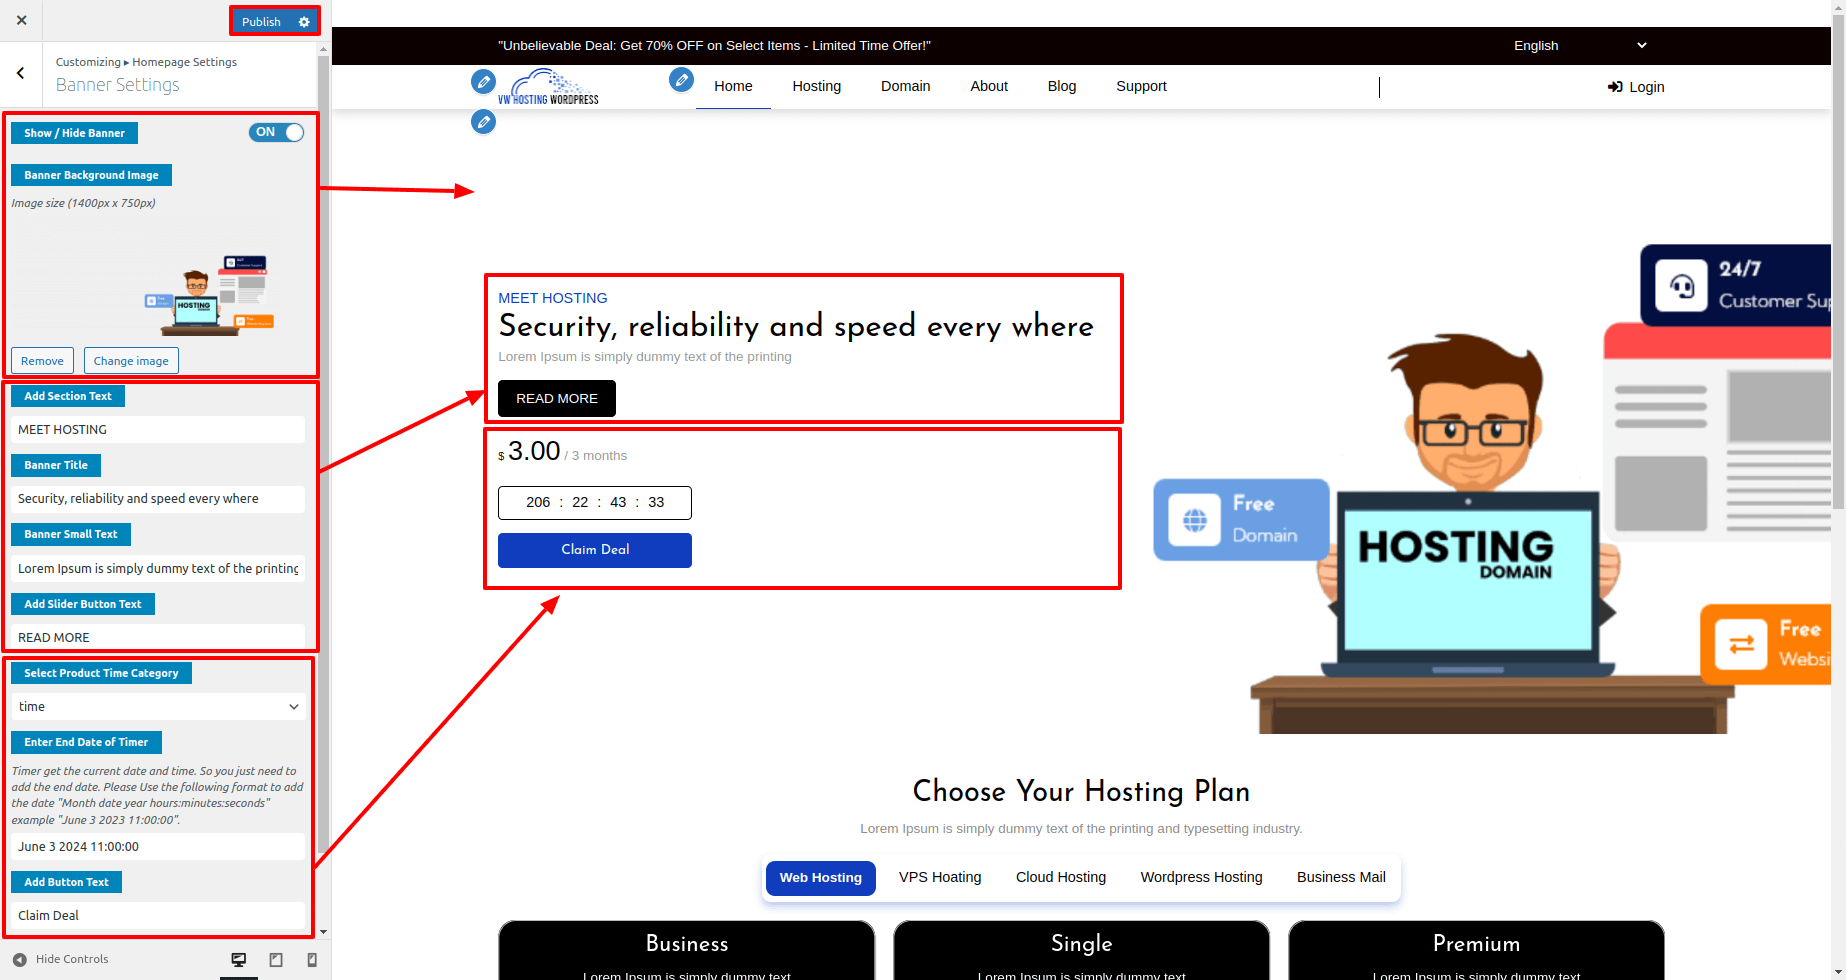
Set Banner
When setting up the Banner Section, proceed as directed below.
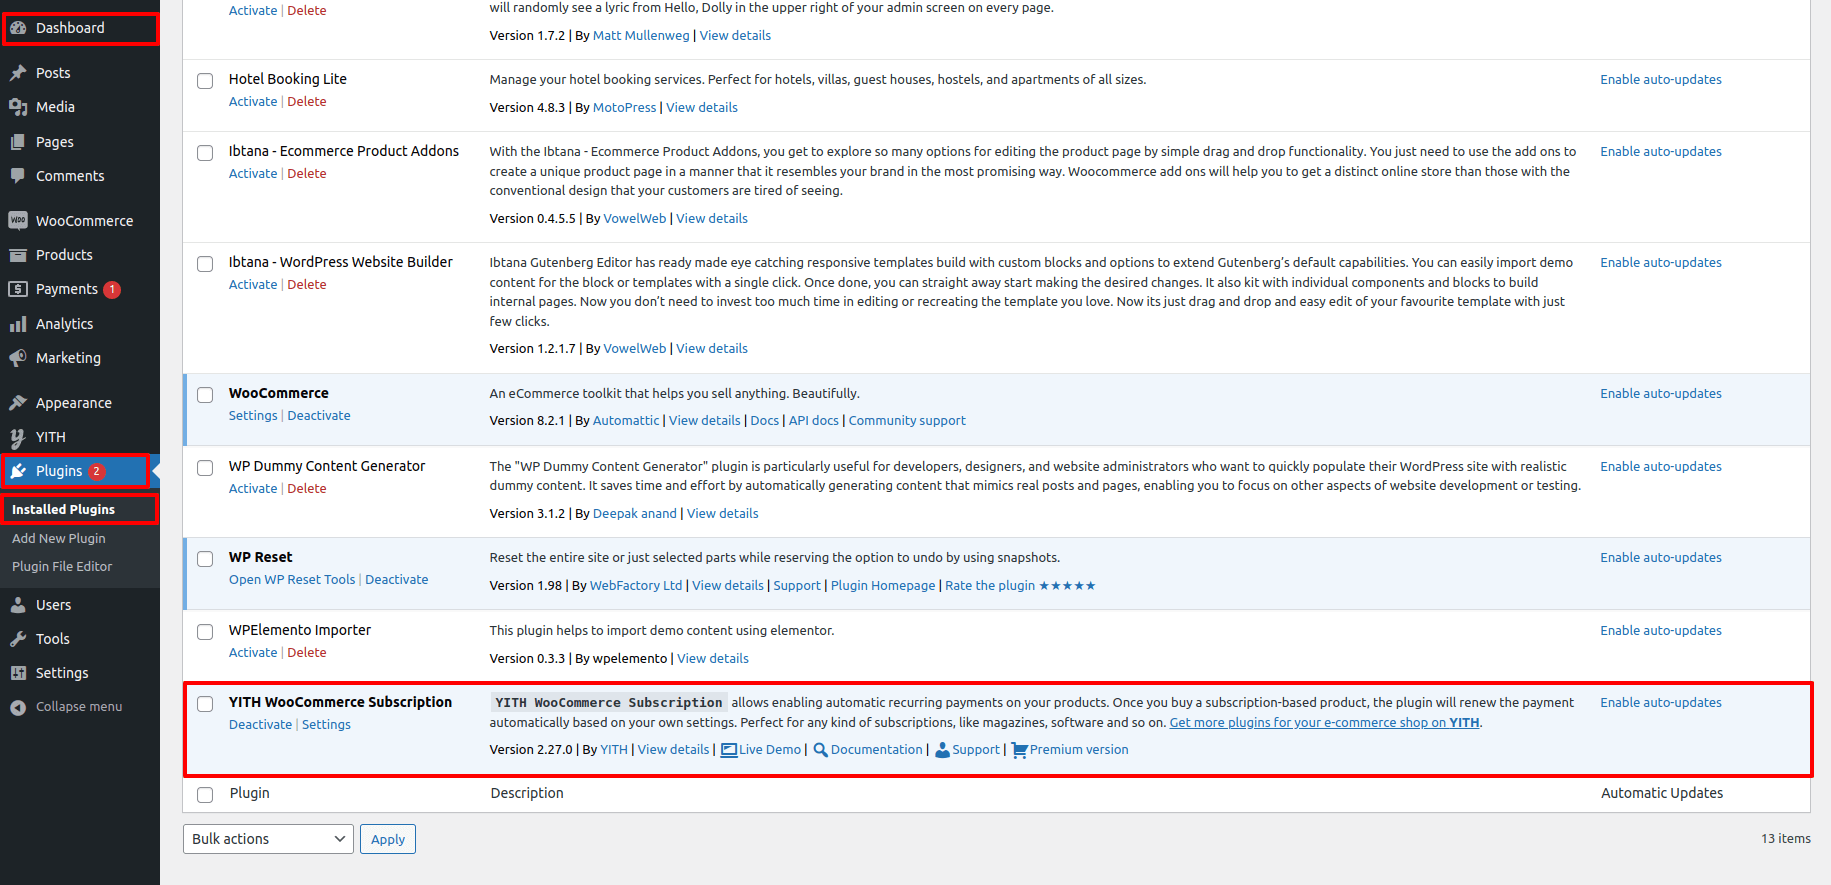
First, you need to install YITH WooCommerce Subscription plugin.
Go To Dashboard >> Plugins >> Add New
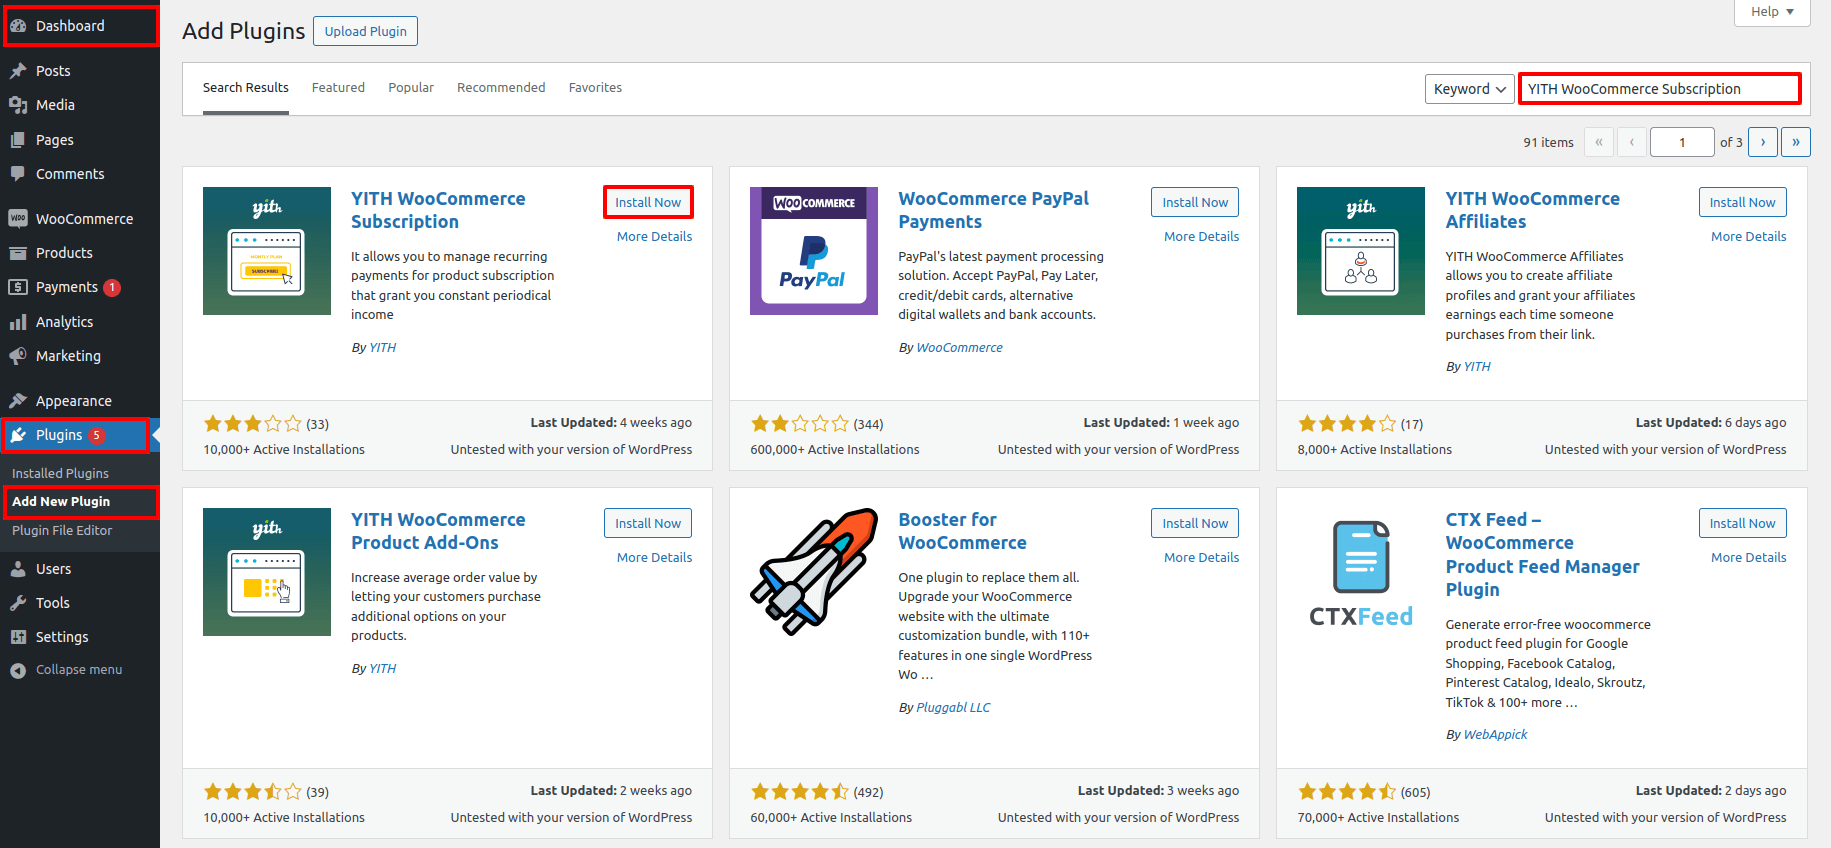
And activate the plugin.
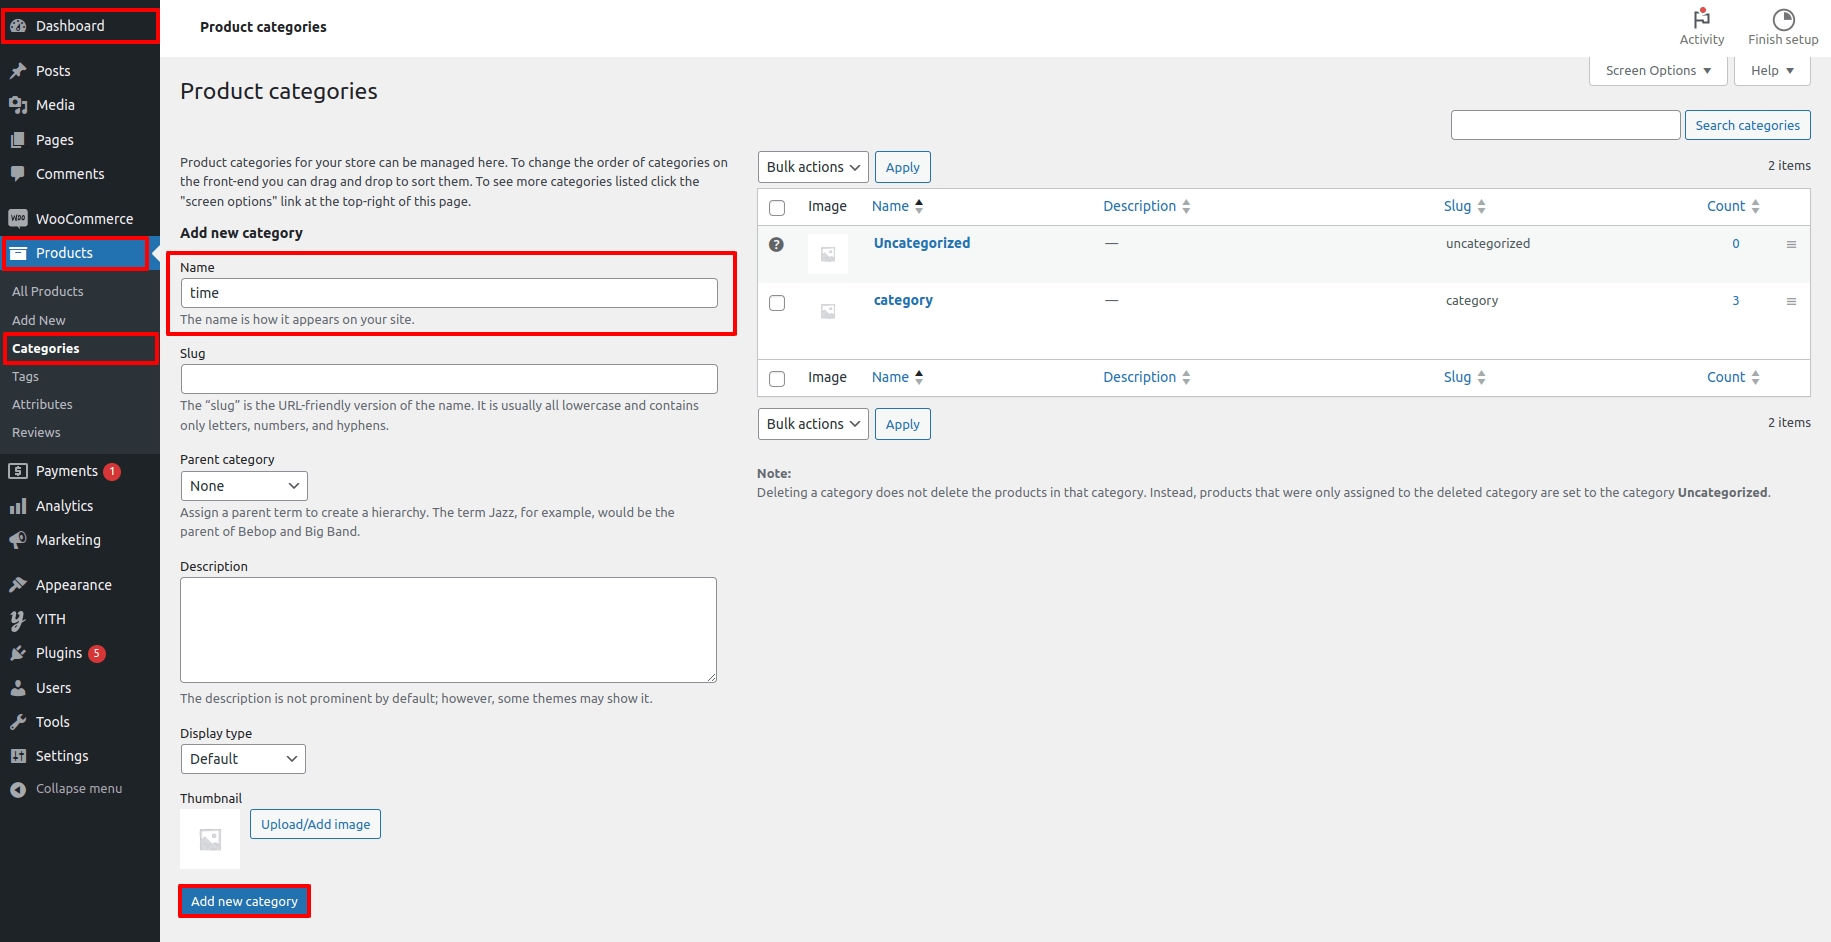
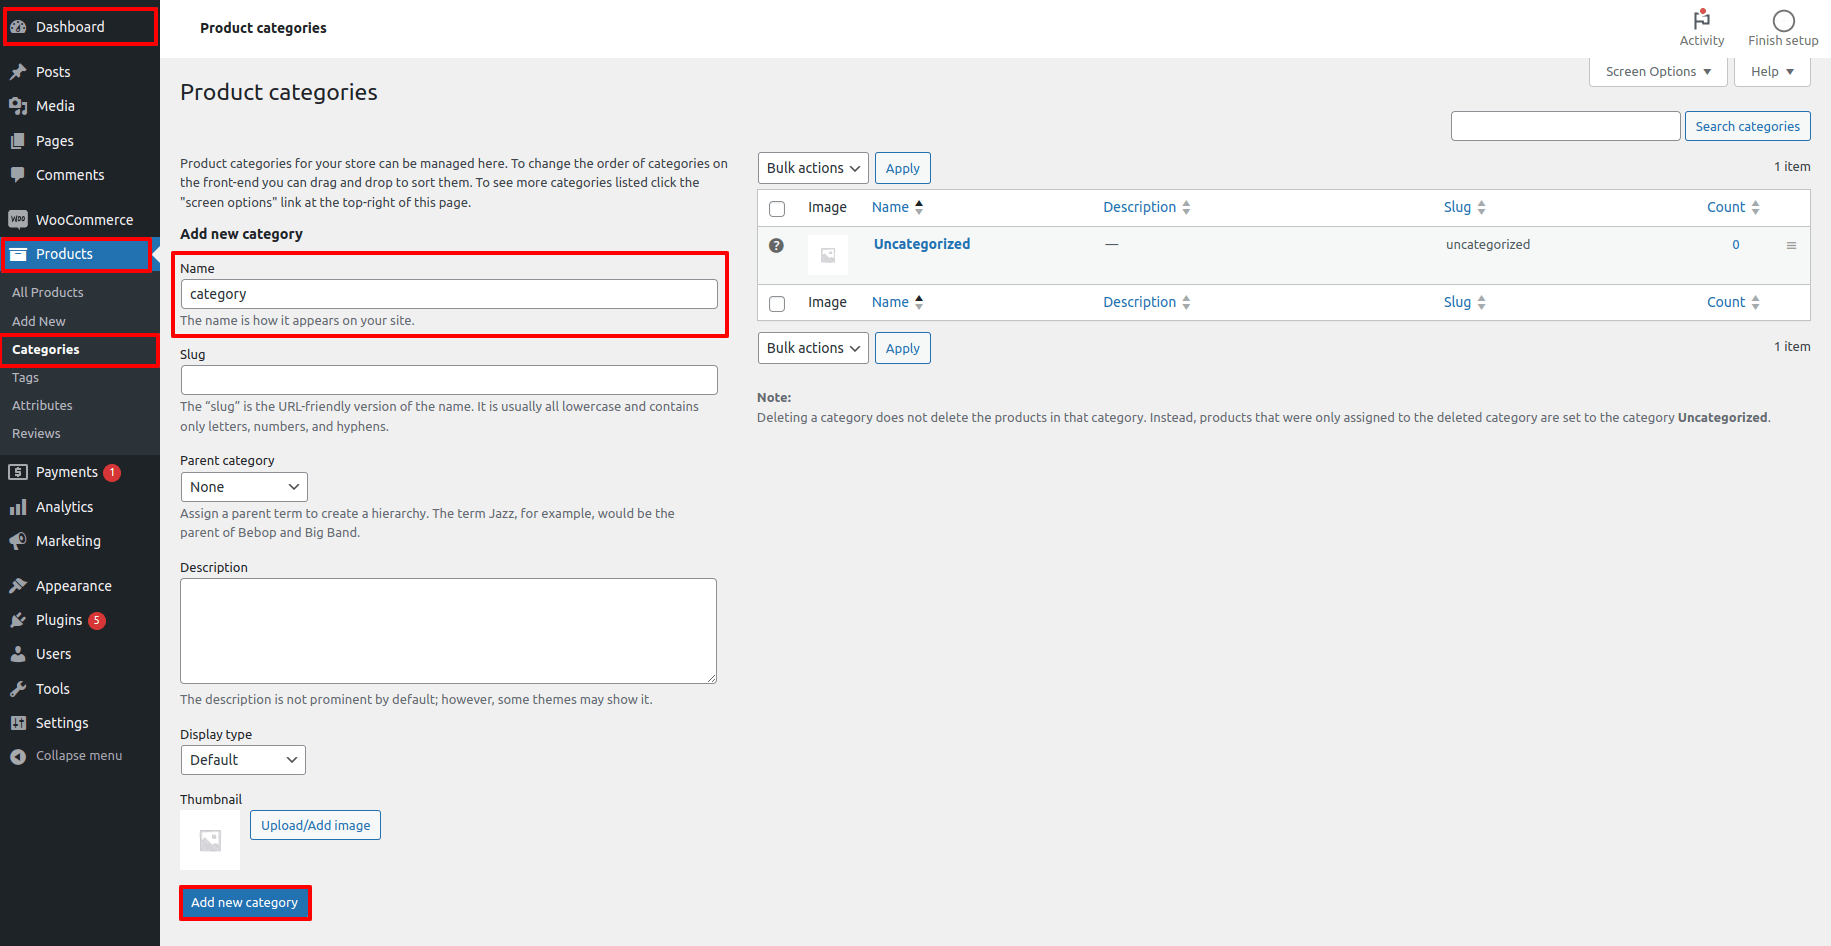
Go To Dashboard >> Products >> Categories
Add category.
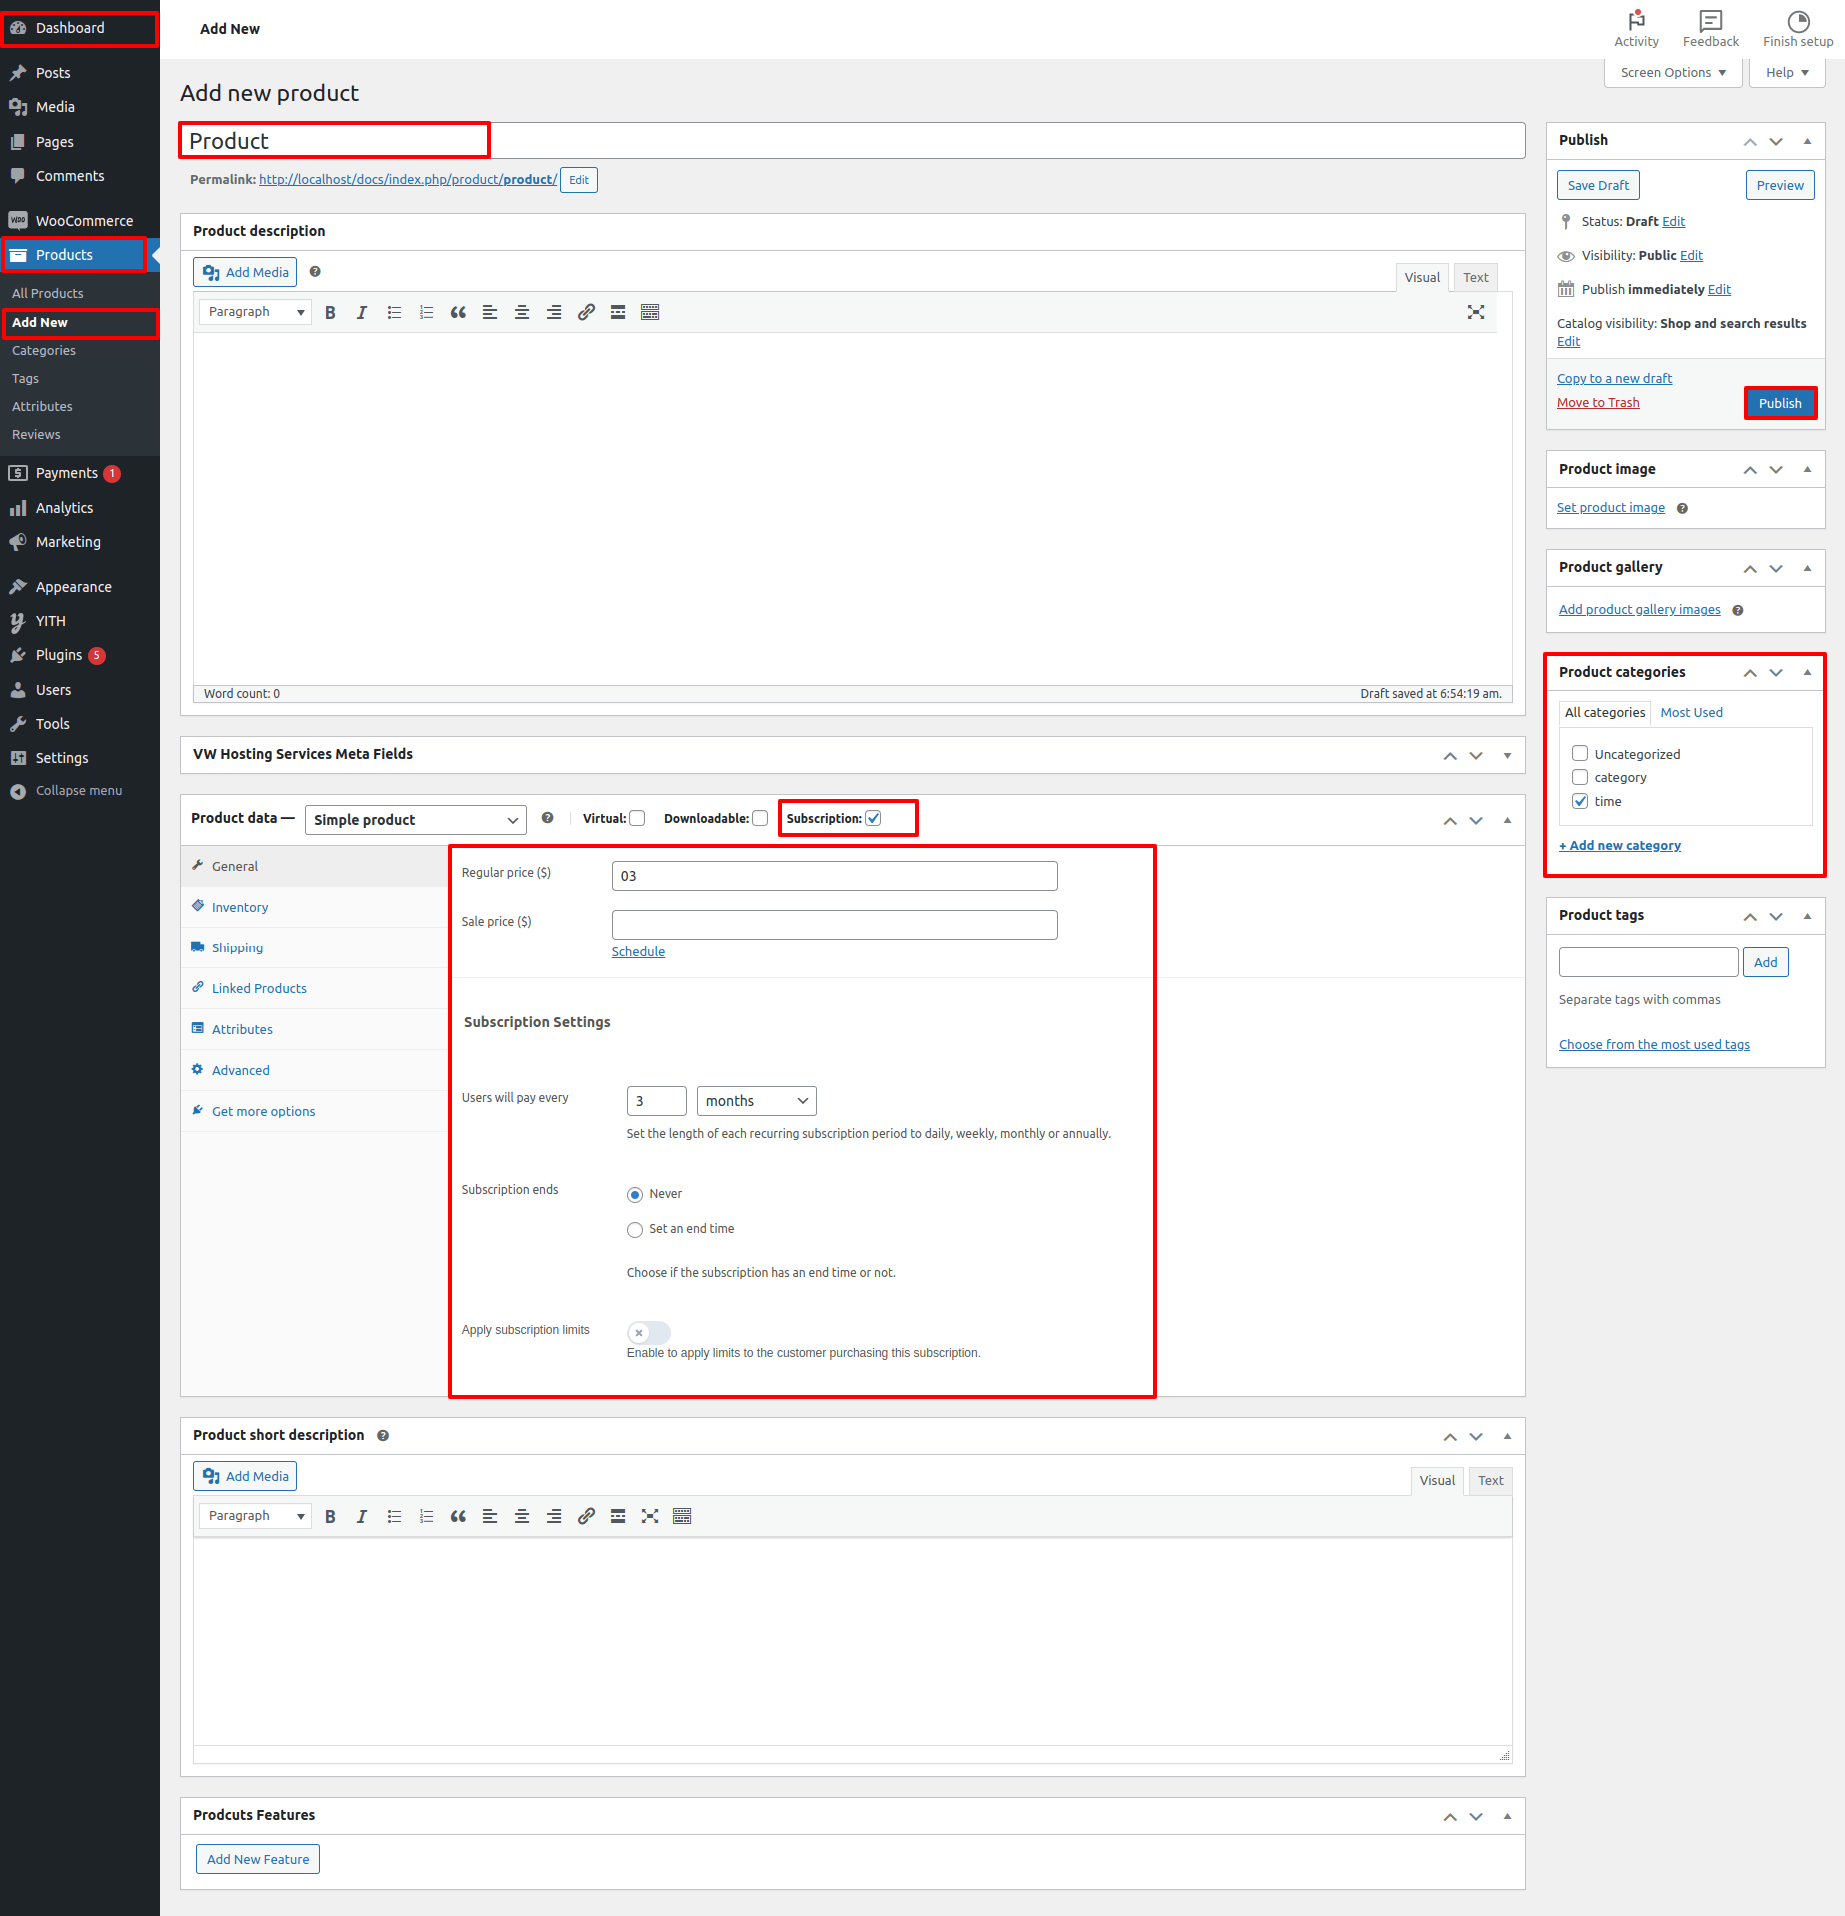
Add title, product data and select category.
Go To Customizer >> Homepage Setting >> Banner Setting
Select the banner background image, category and time for Banner Section.
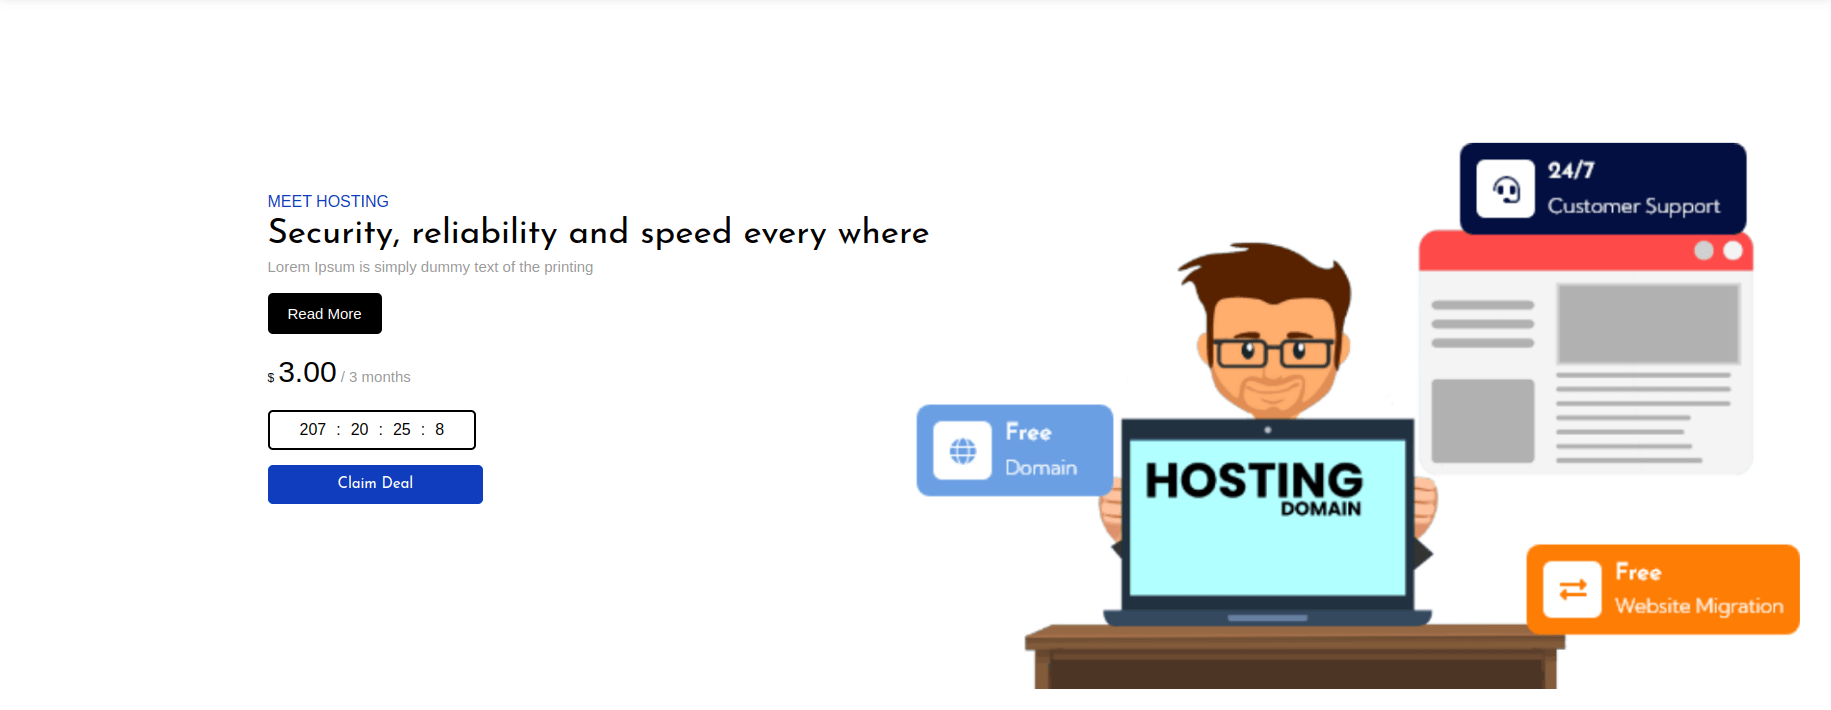
It will appear as such on the front end.
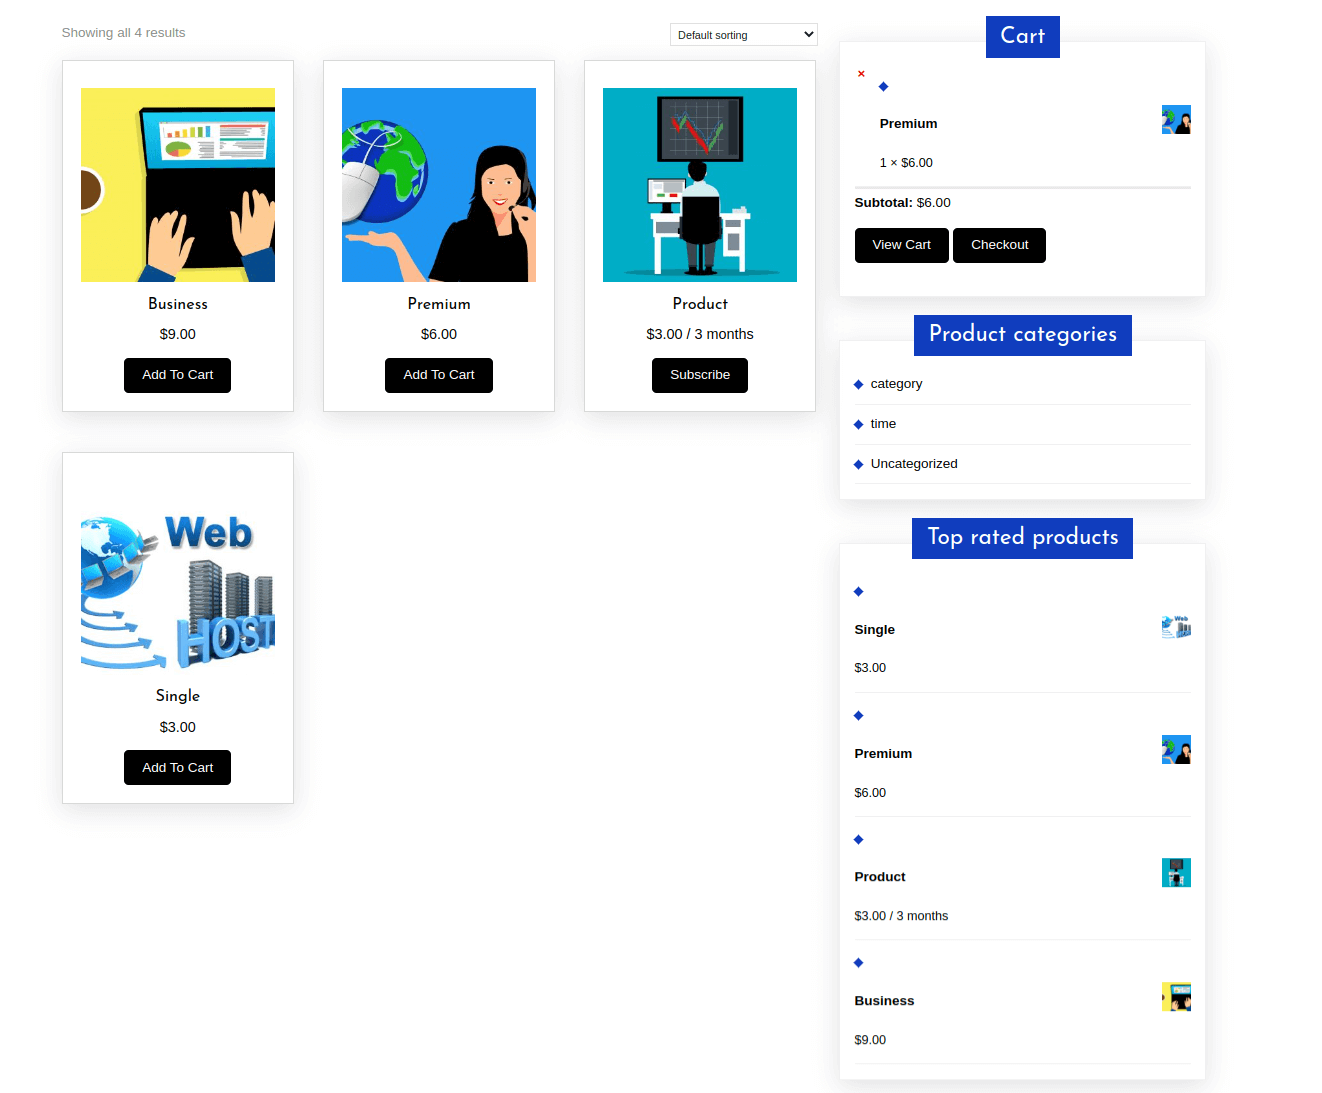
Set Products Section
When setting up the product section, proceed as directed below.
First, you need to install woocommerce plugin.
Go To Dashboard >> Plugins >> Add New
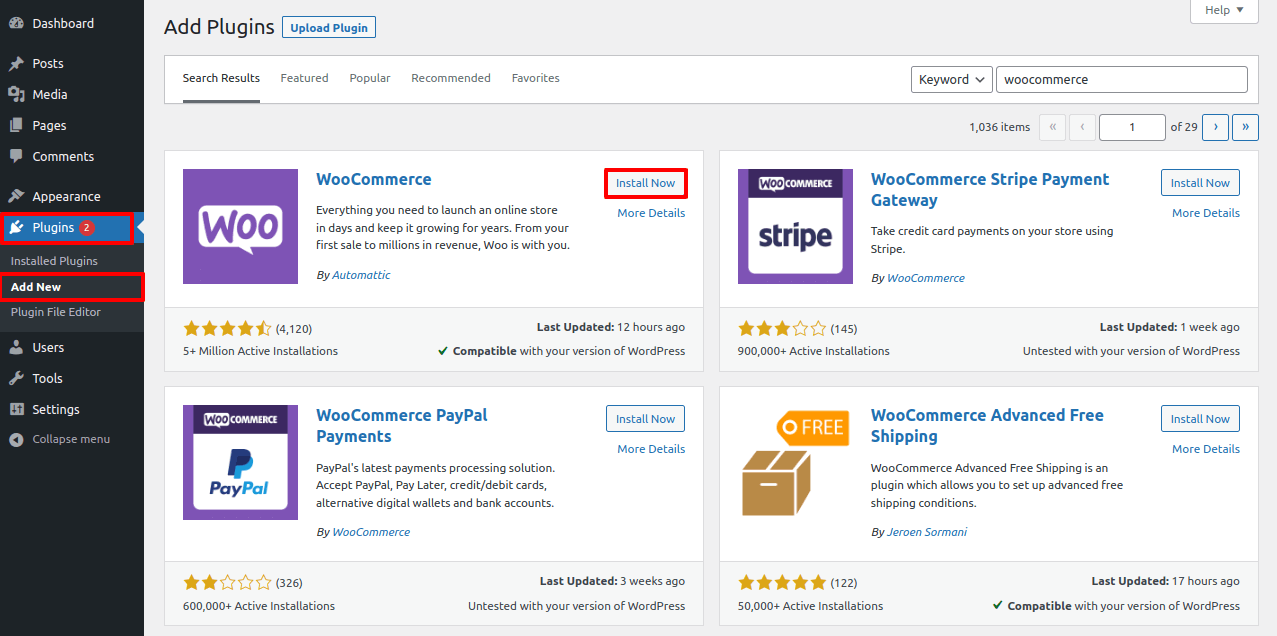
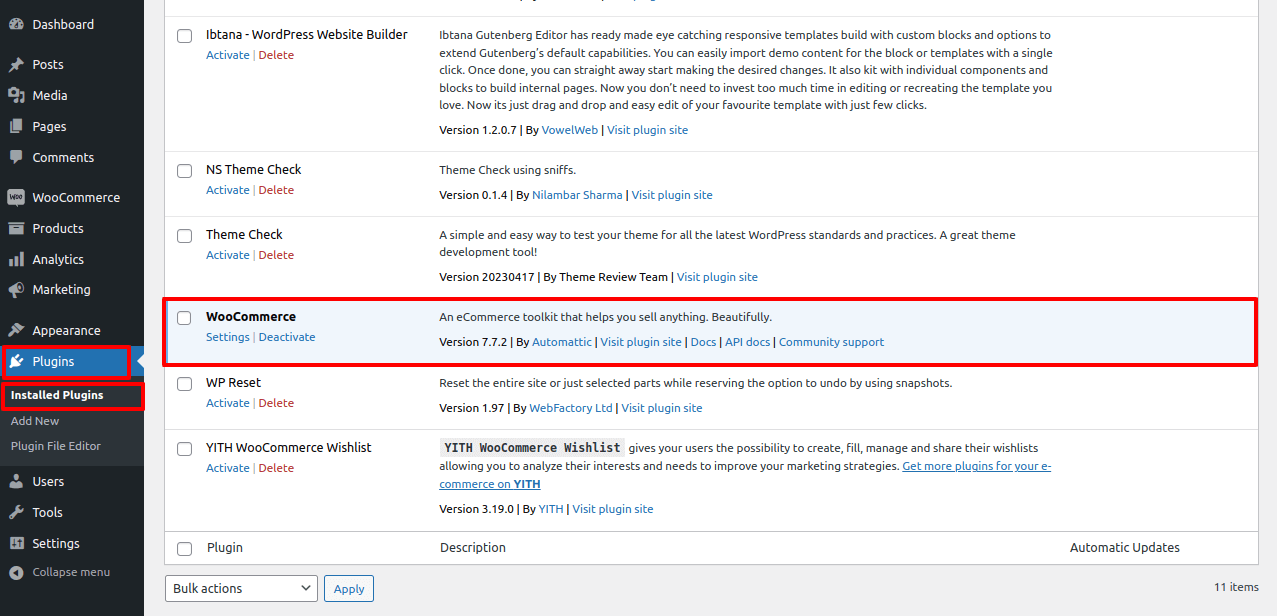
And activate the plugin.
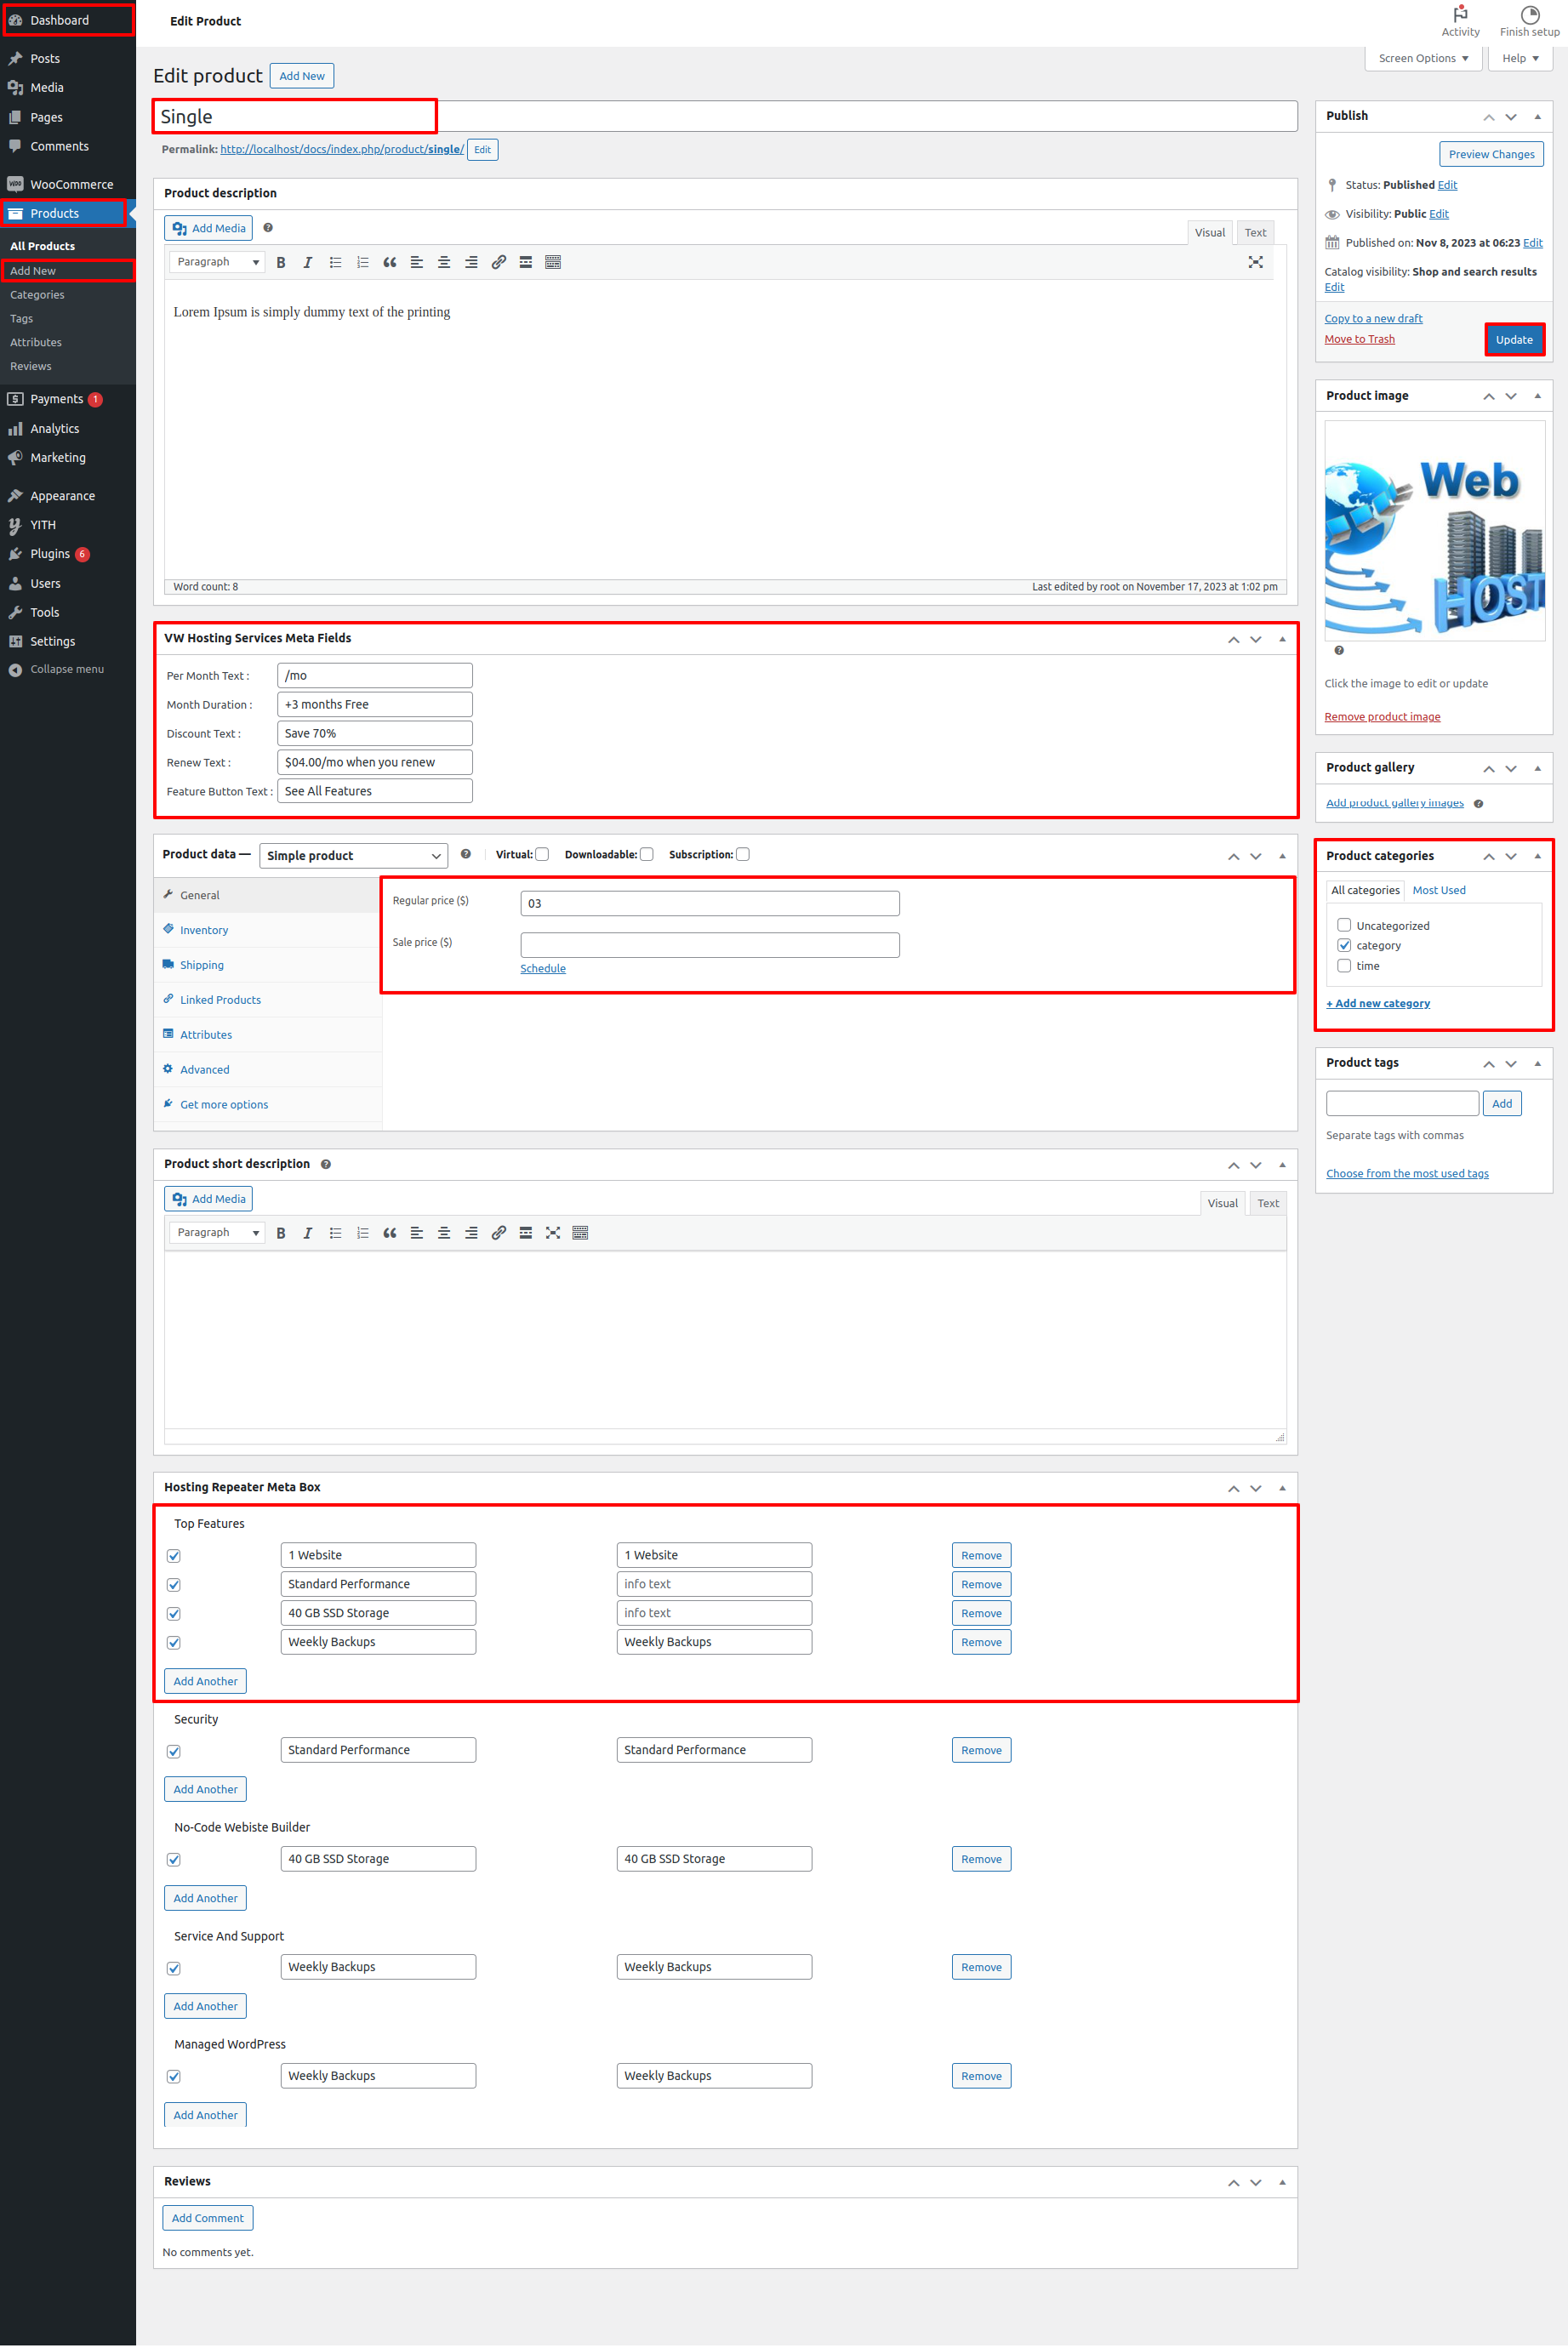
Now, you need to create the products.
Go To Dashboard >> Products >> Categories >> Add new category
Go To Dashboard >> Products >> Add New
Go To Dashboard >> Appearance >> Customize >> Homepage Setting >> Products Section
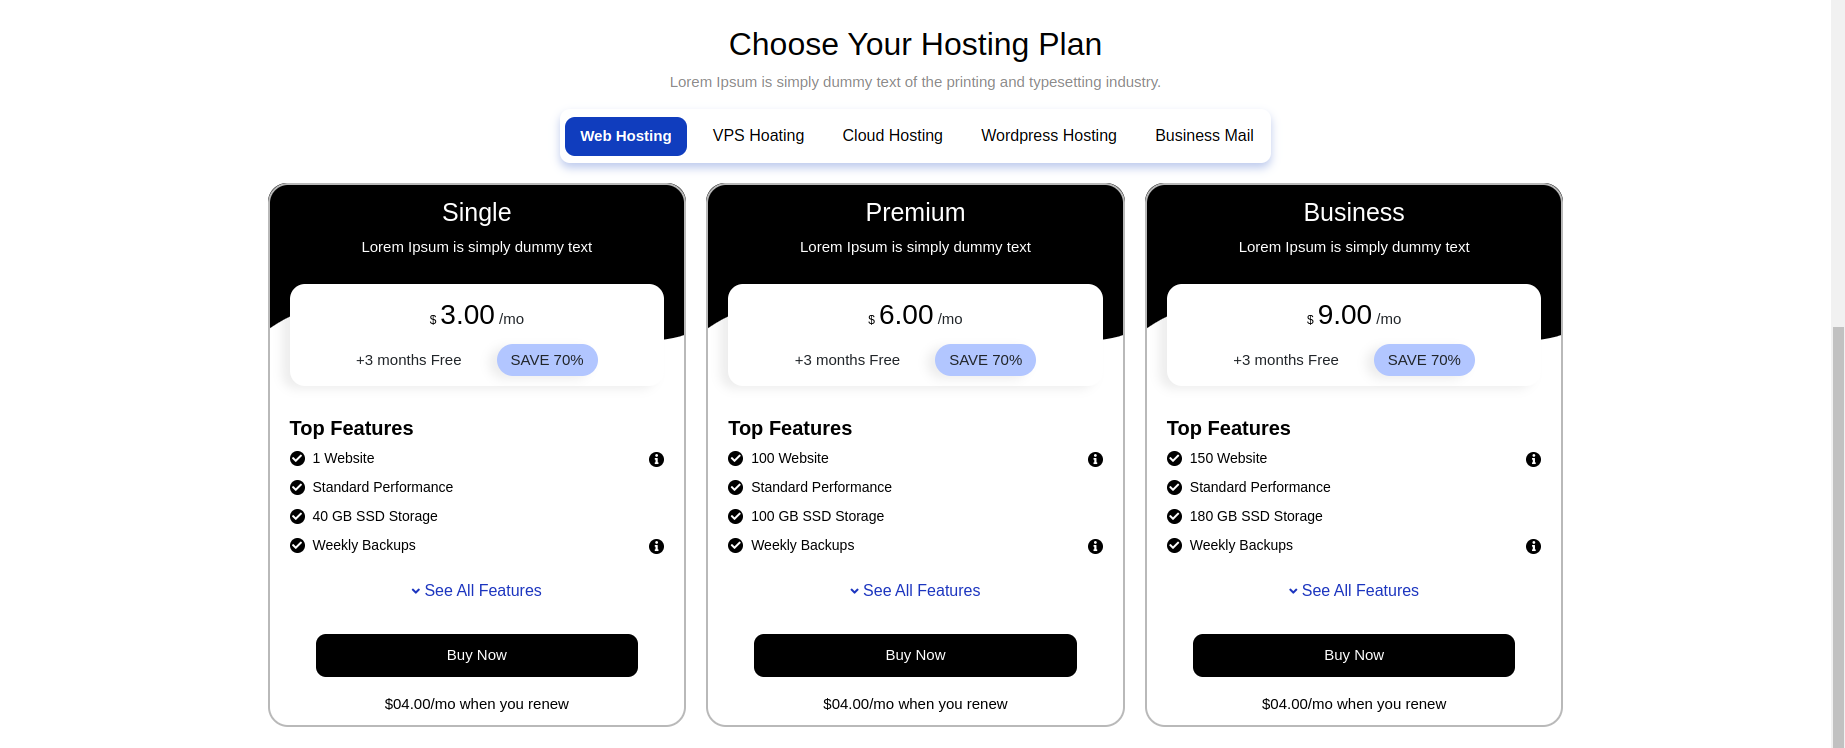
Select product page.
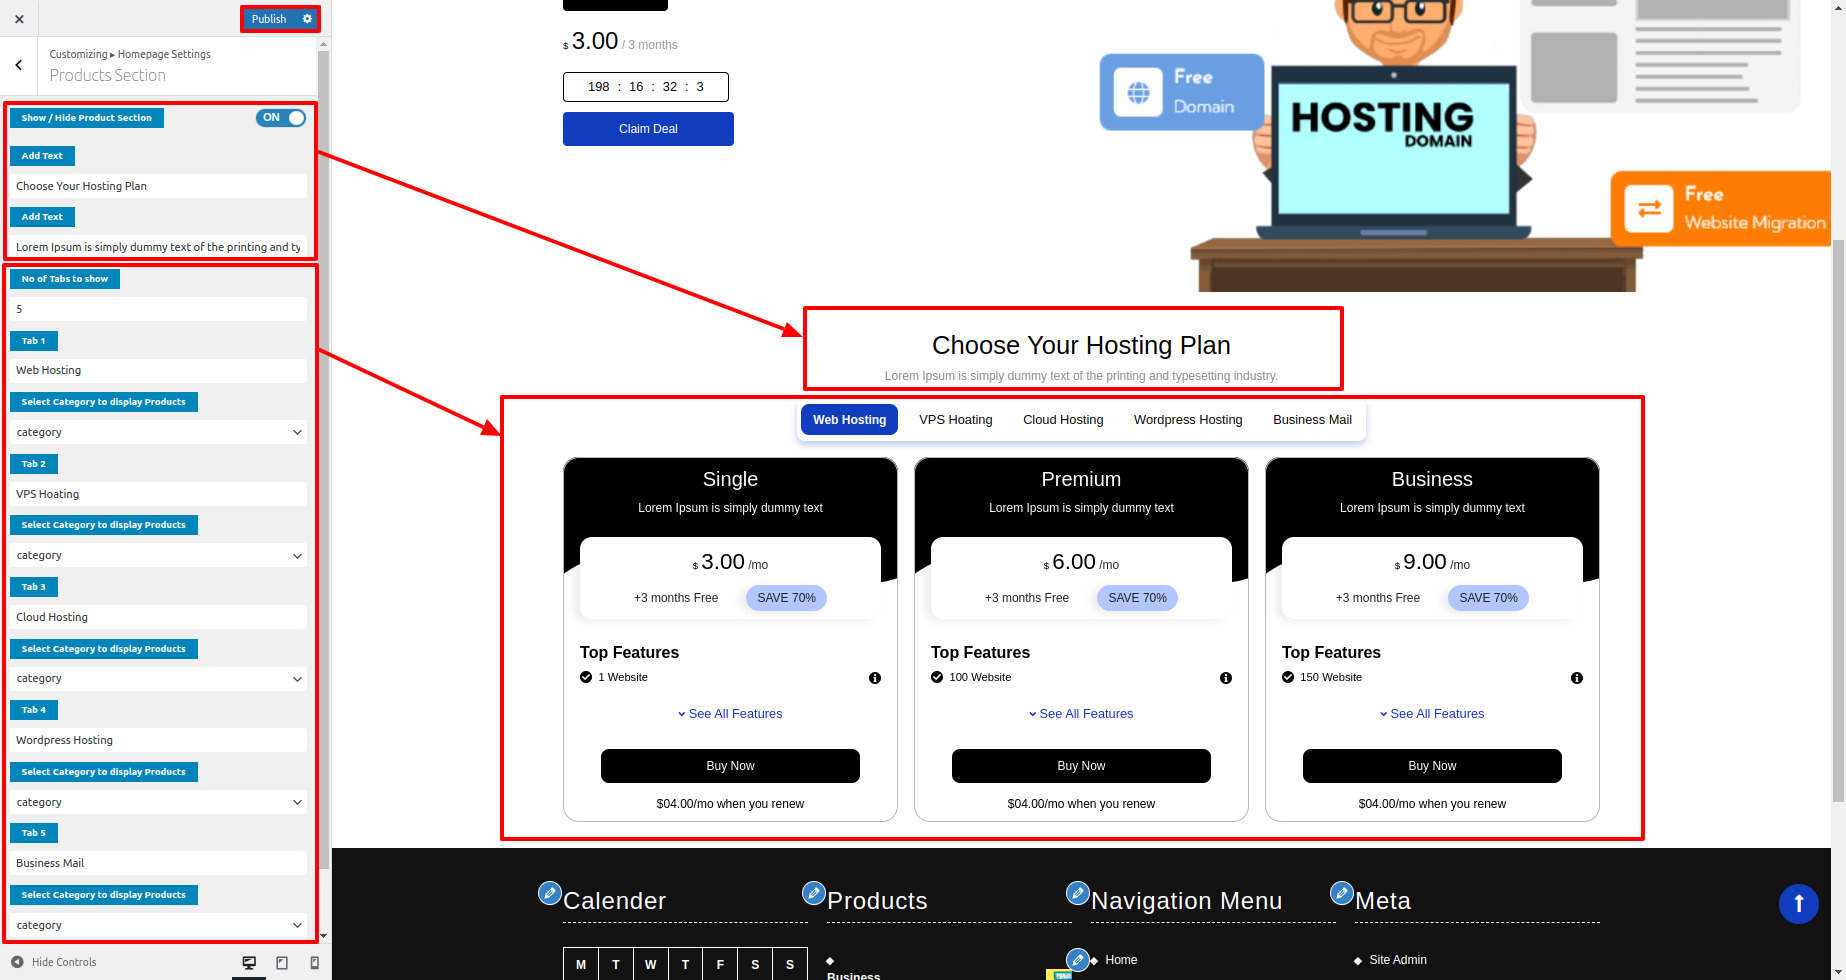
It will appear as such on the front end.
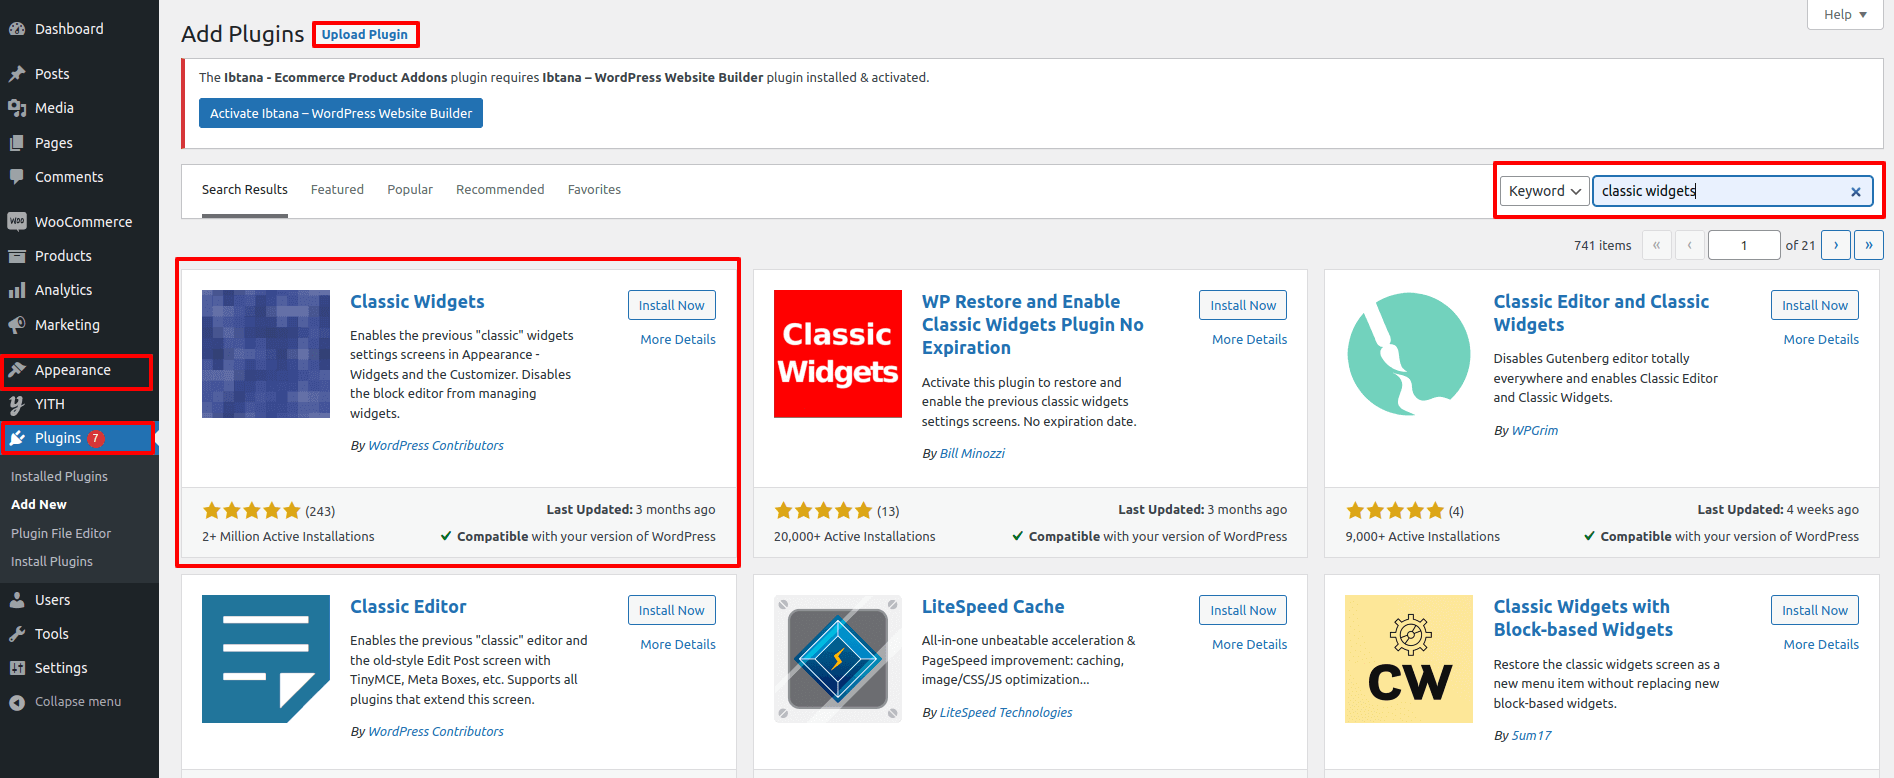
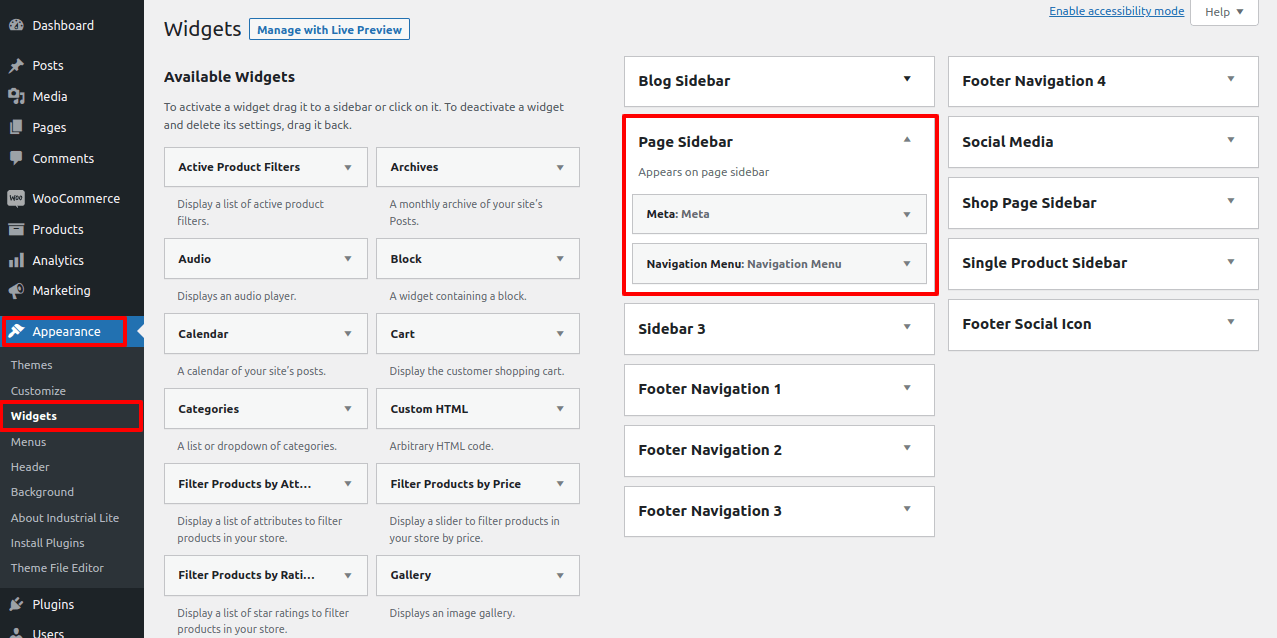
Footer Section Set
When setting up the footer section, proceed as directed below.
Upload the Classic Widgets plugins, install and activate it.
Go To Dashboard >> Appearance >> Widgets
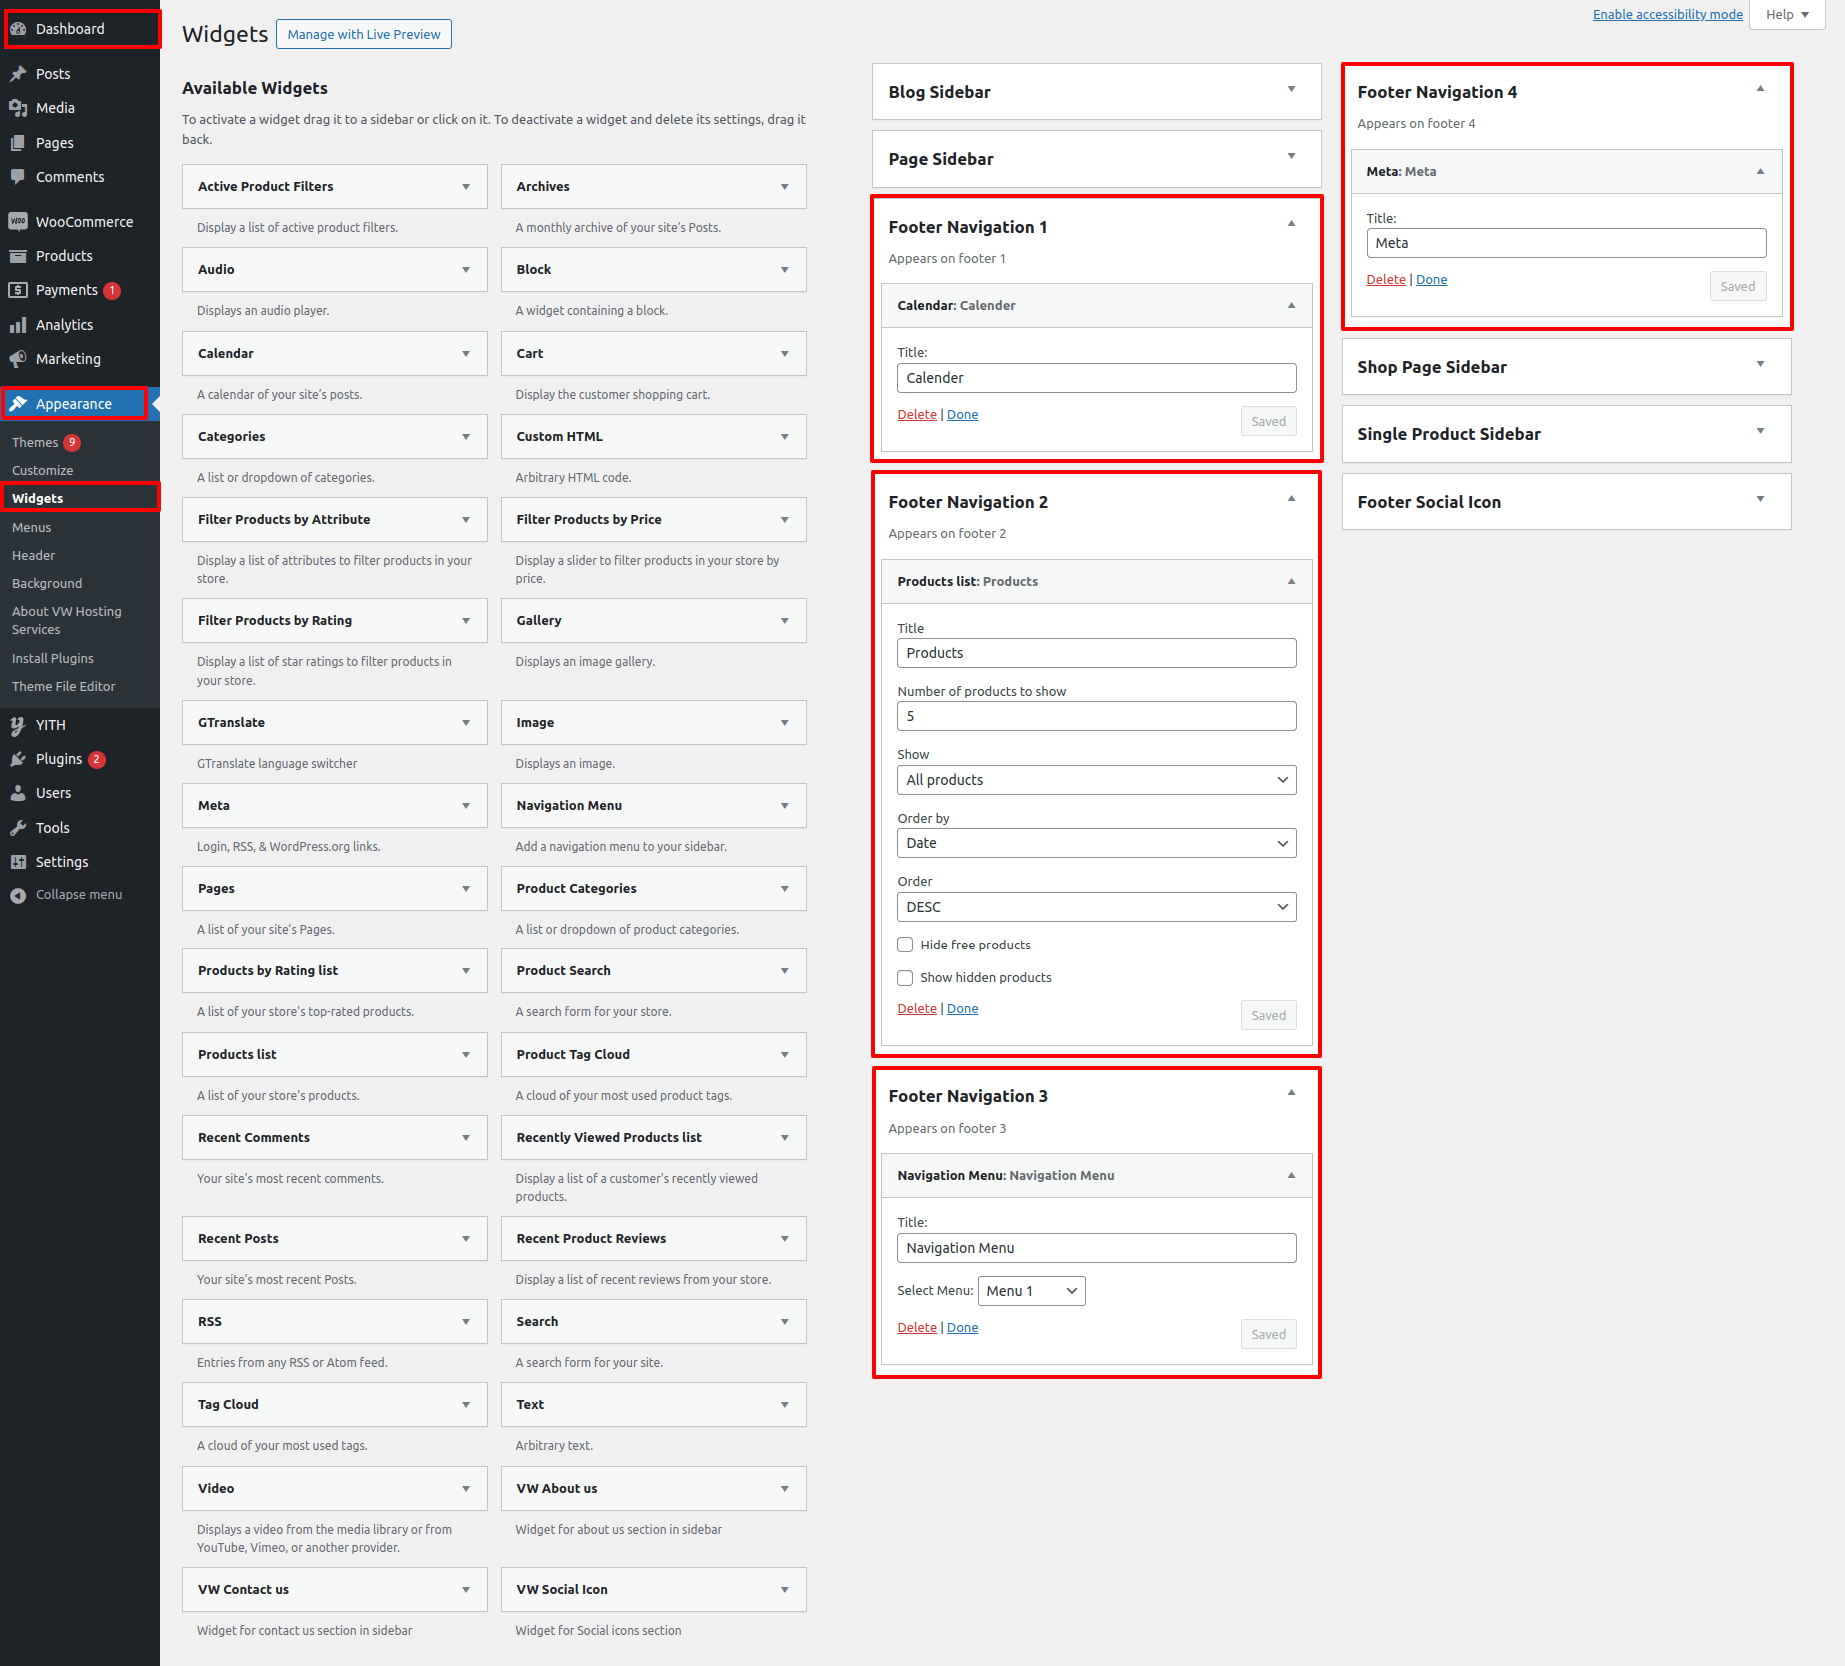
It will appear as such on the front end.
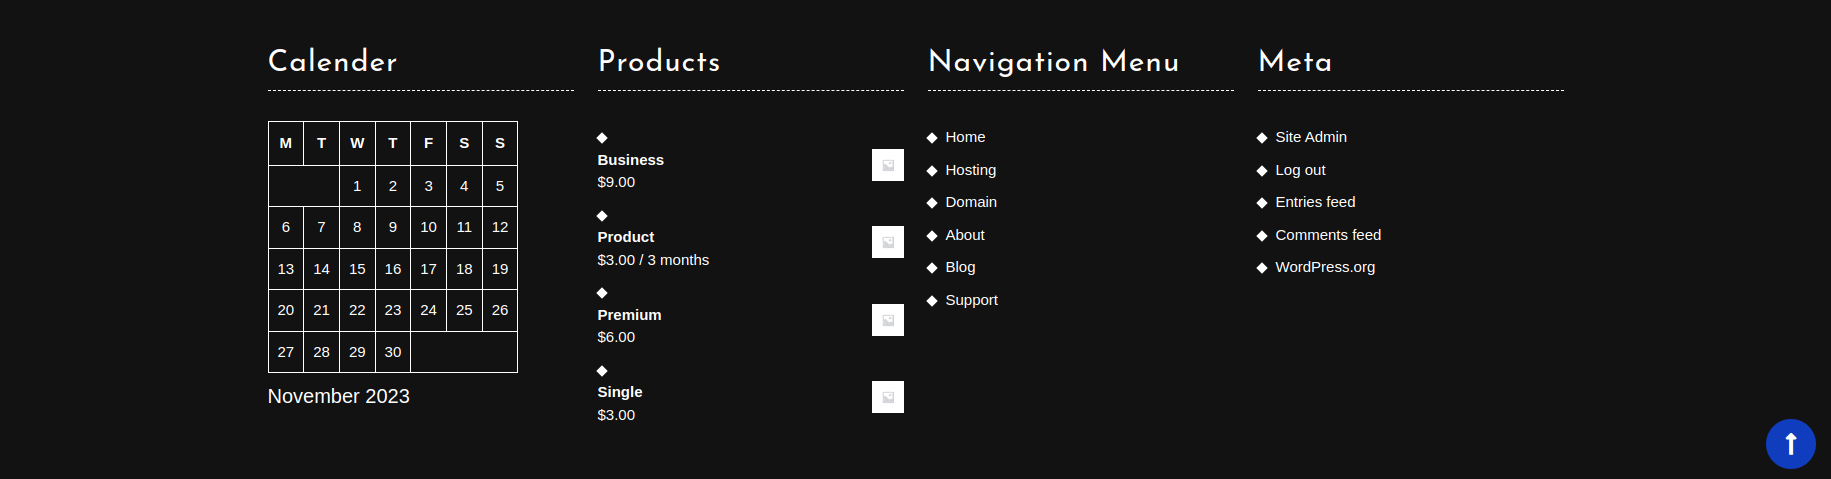
In this way you can configure the footer part.
Set Copyright Section
When setting up the copyright section, proceed as directed below.
Go To Dashboard >> Appearance >> Customize >> Homepage Setting >> Footer Setting
Here you can change the copyright alignment.
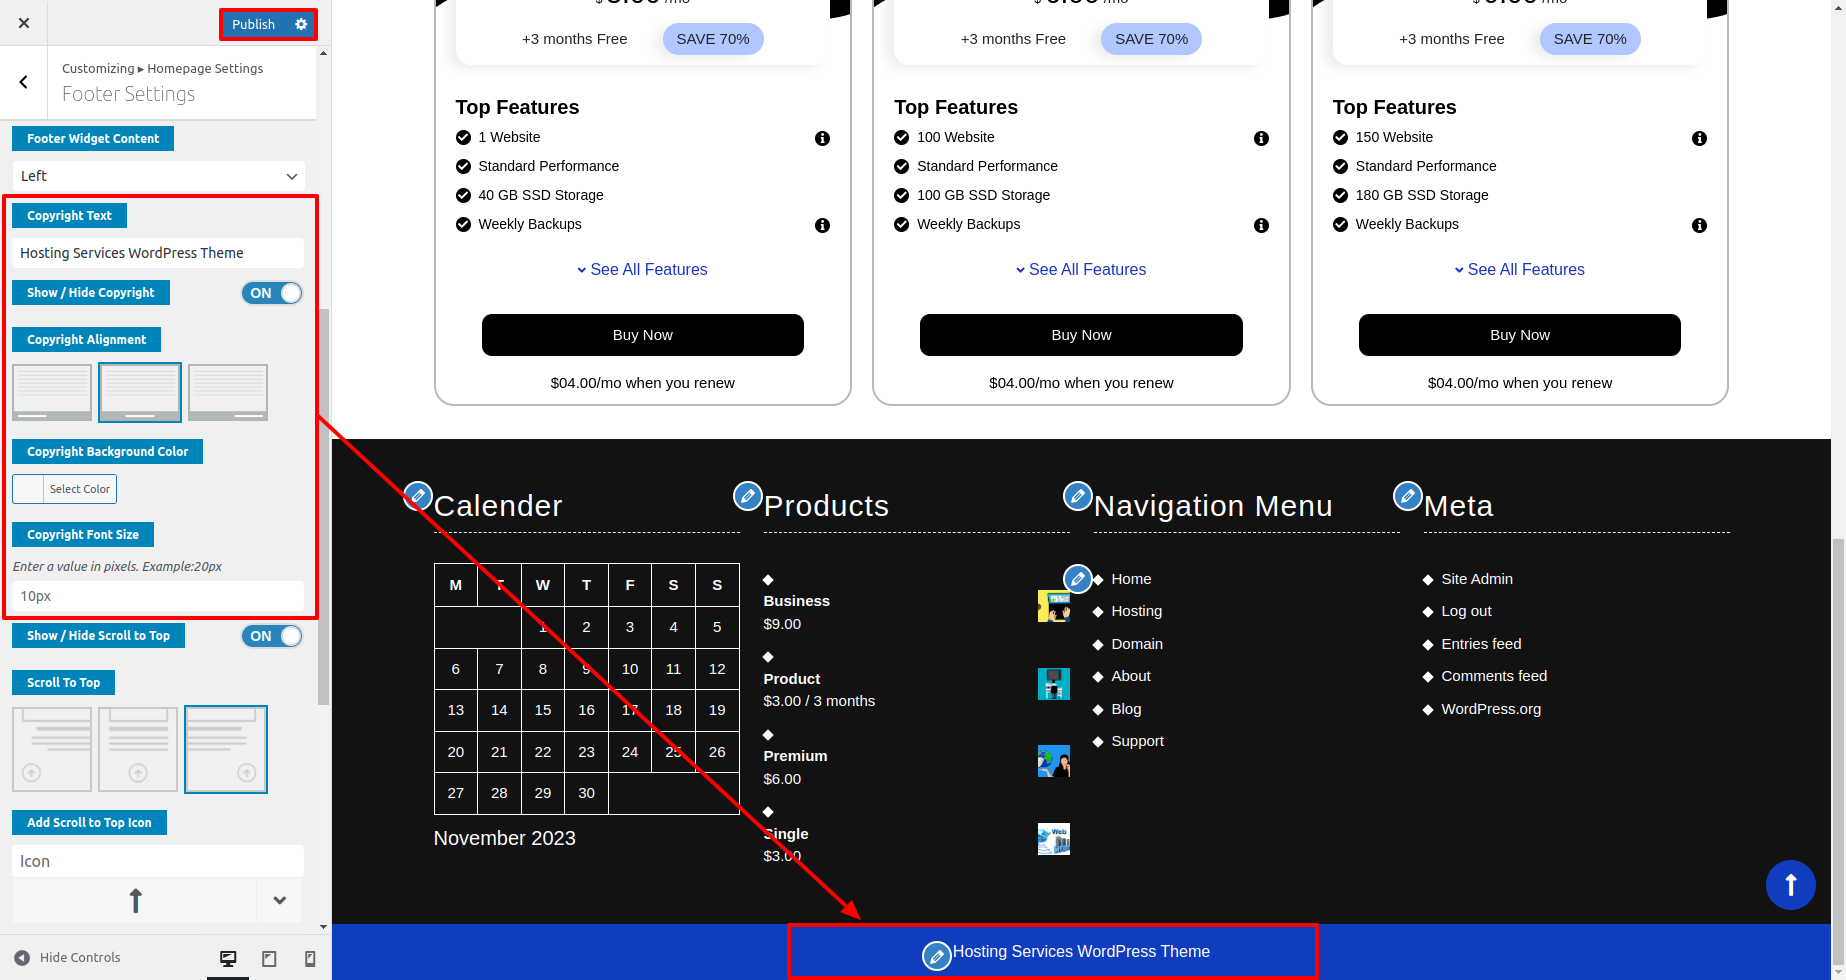
It will appear as such on the front end.

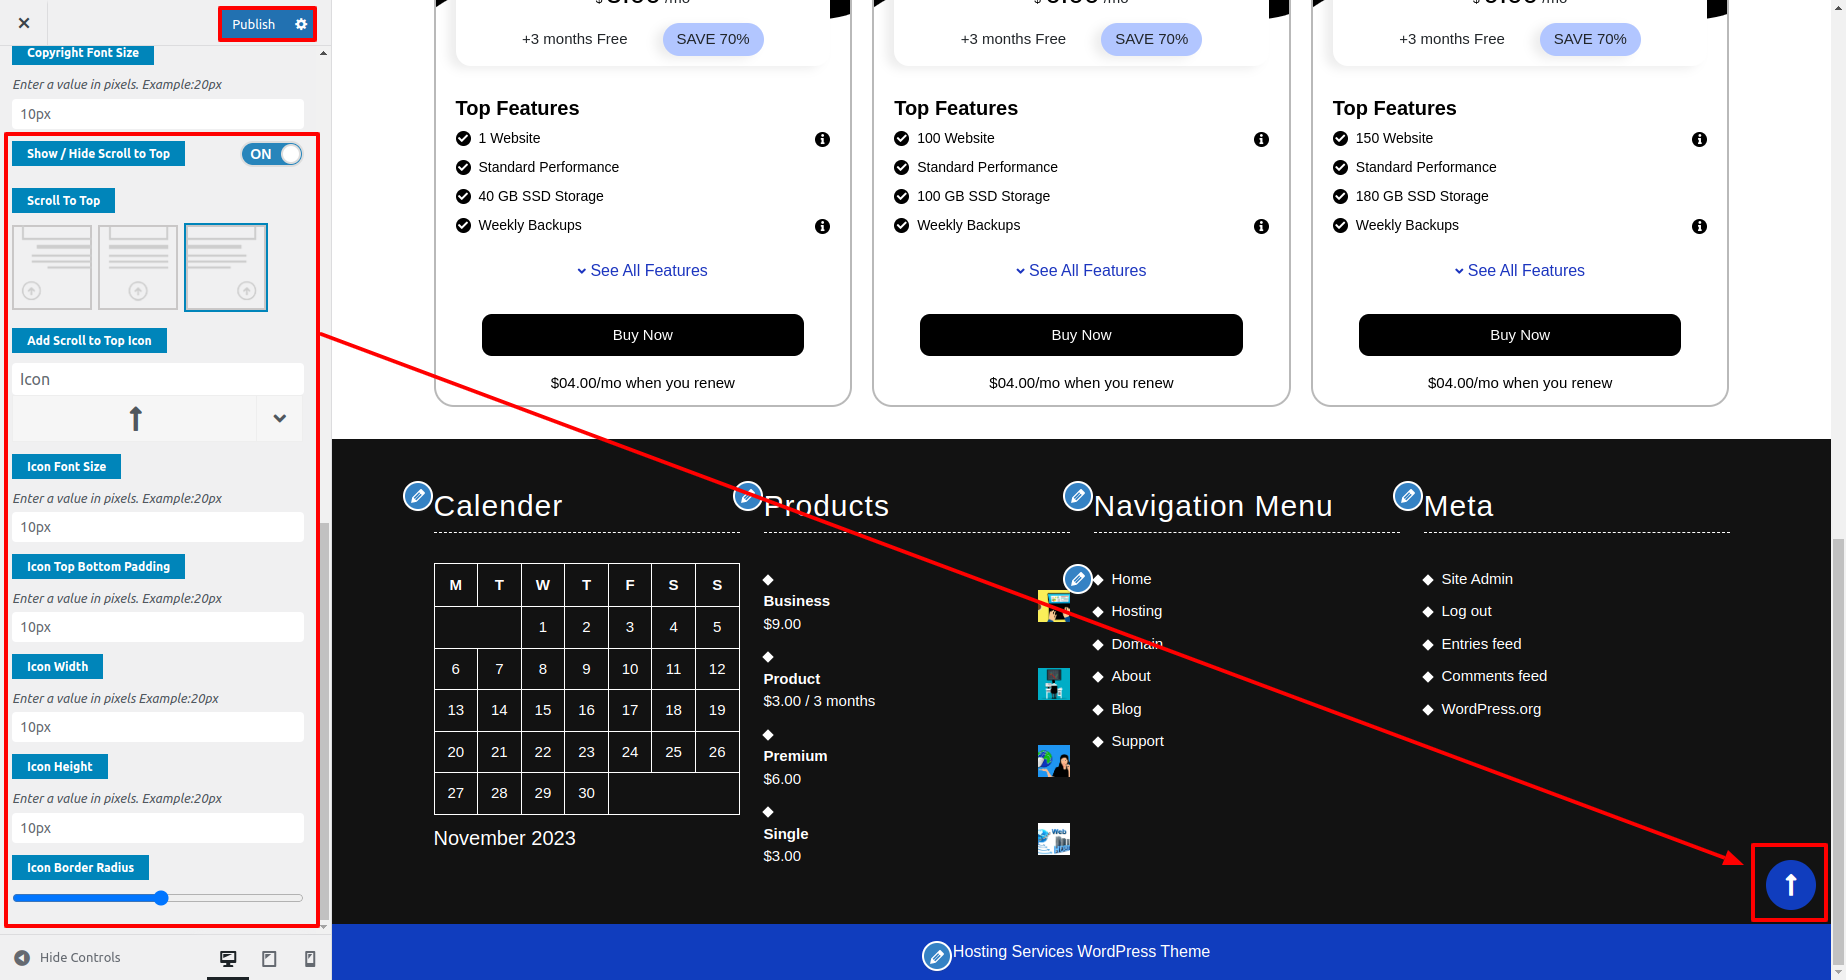
For Scroll To Top:
Here you can show / hide scroll to top, and you can change its position.
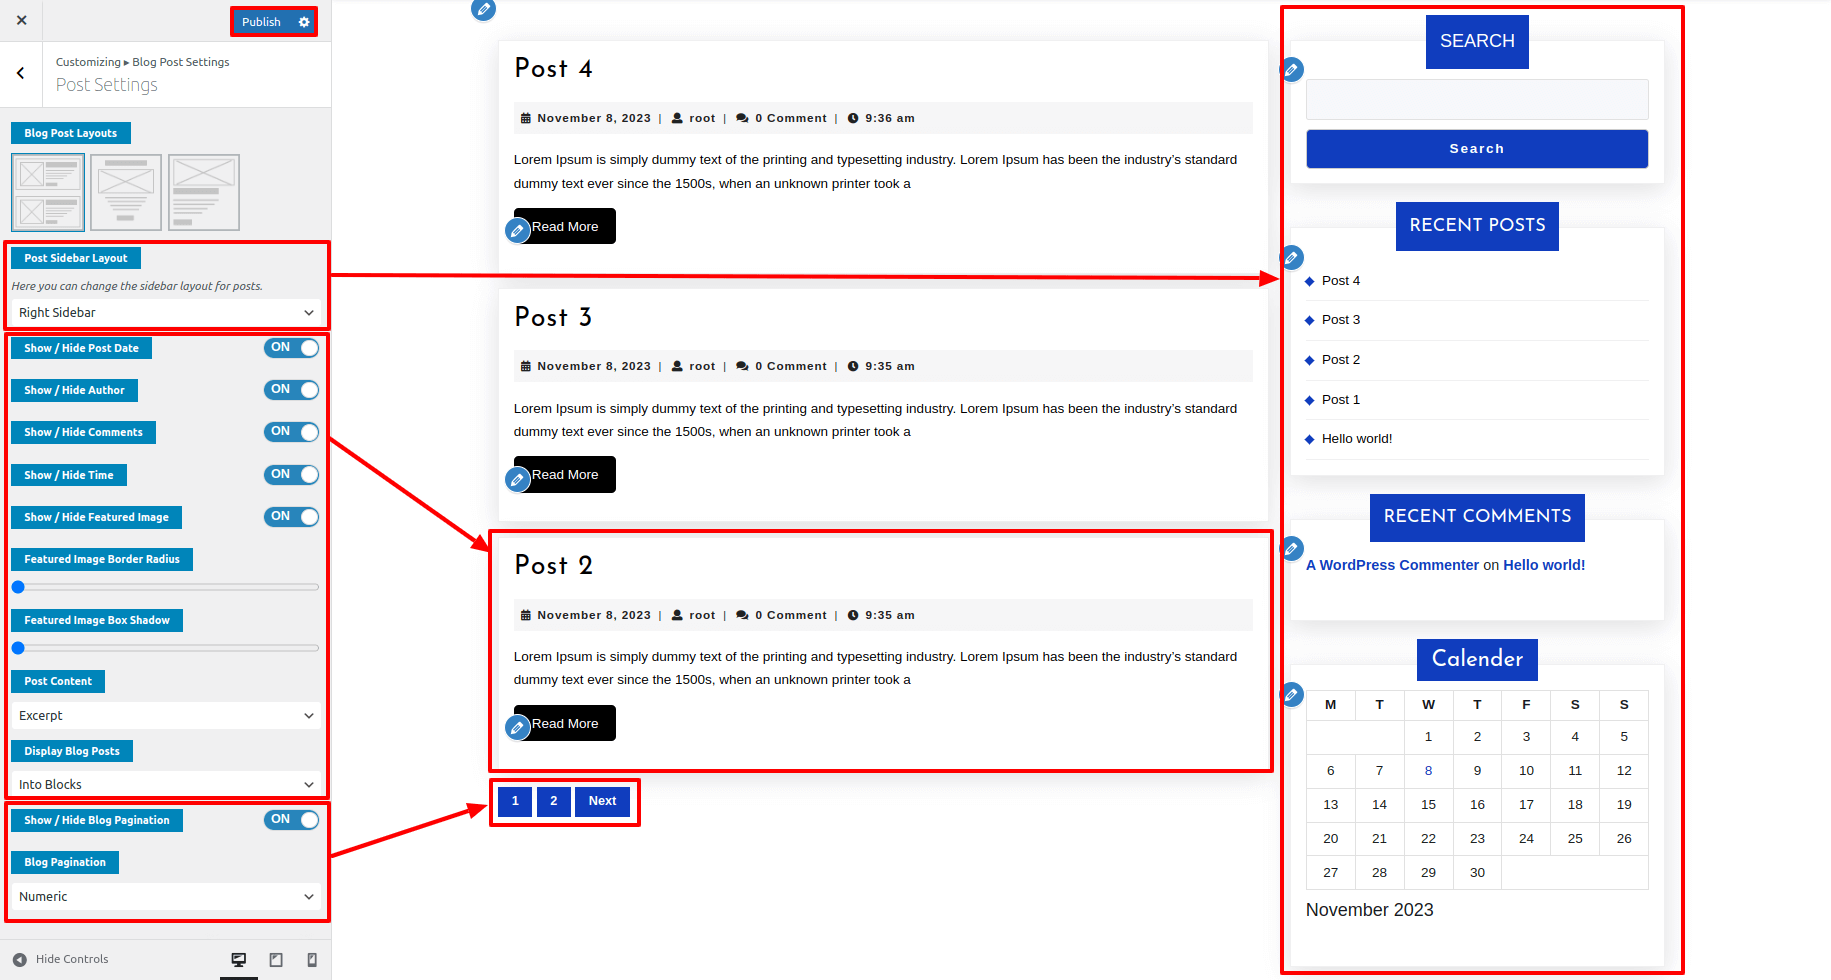
Blog Post Setting
1. Post Setting
When setting up the Post Setting, proceed as directed below.
Go To Dashboard >> Appearance >> Customize >> Blog Post Setting >> Post Setting
Here you have choices for enable/disable author, date, comments, time and featured image respectively.
2. Button Setting
When setting up the Button Setting, proceed as directed below.
Go To Dashboard >> Appearance >> Customize >> Blog Post Setting >> Button Setting
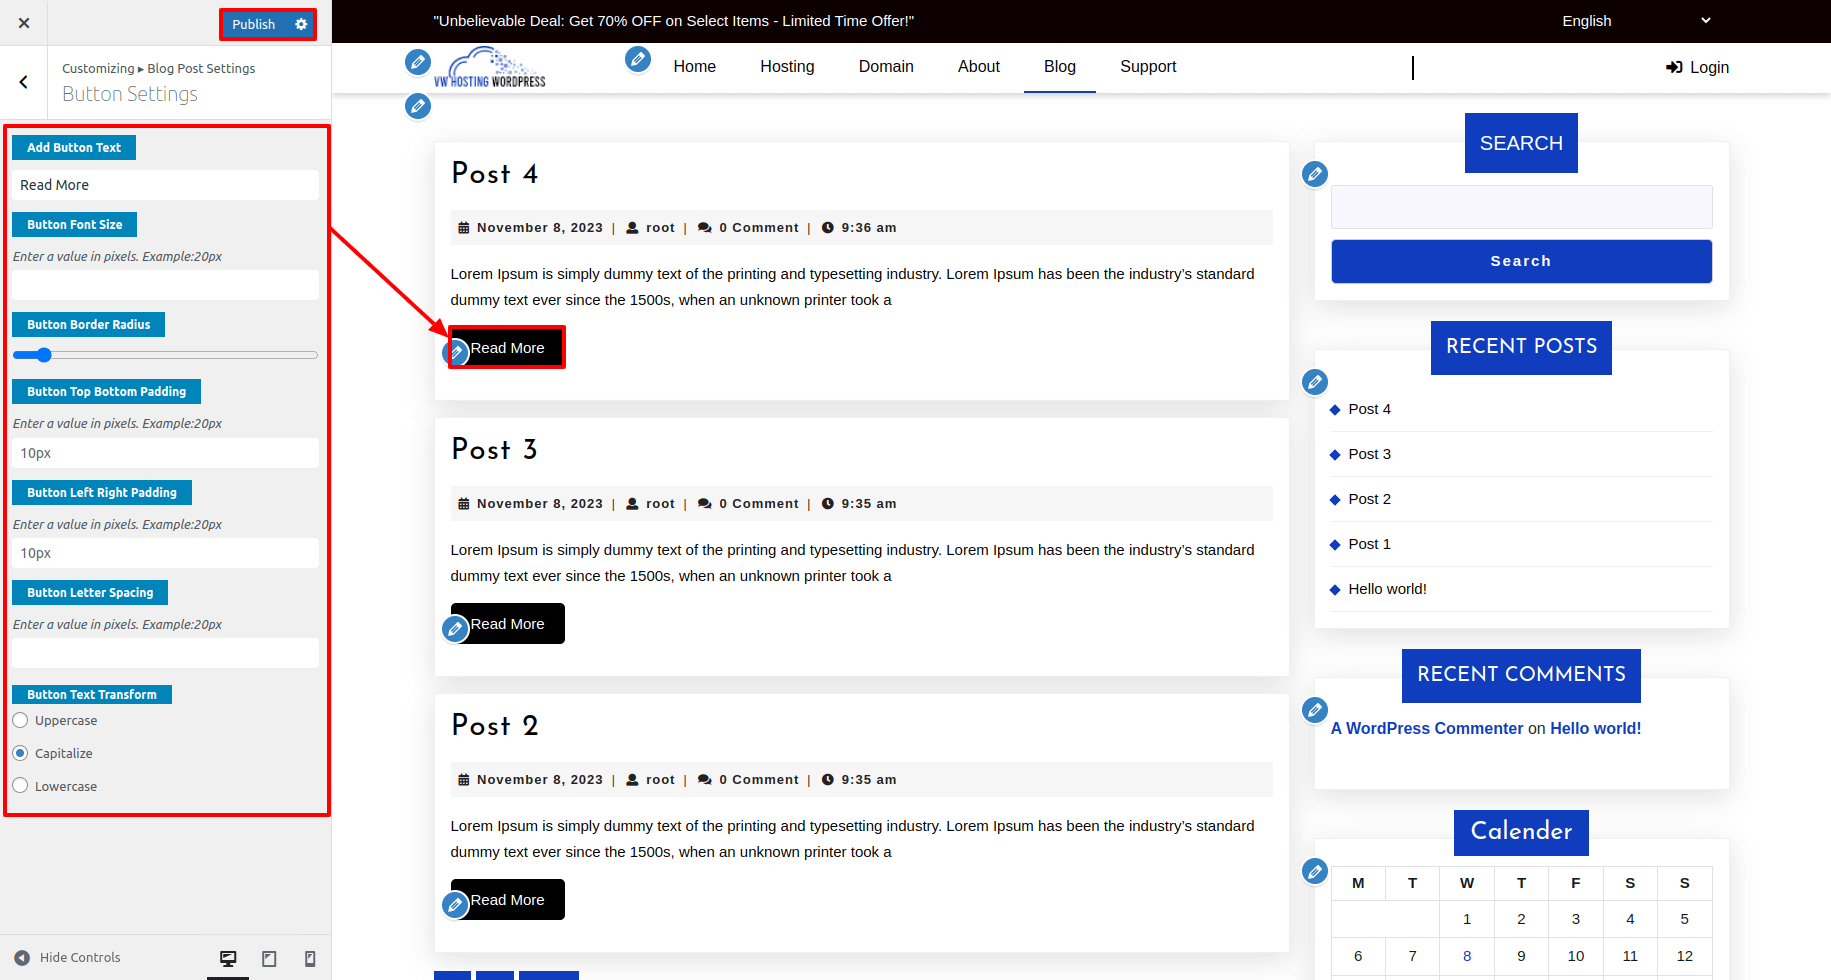
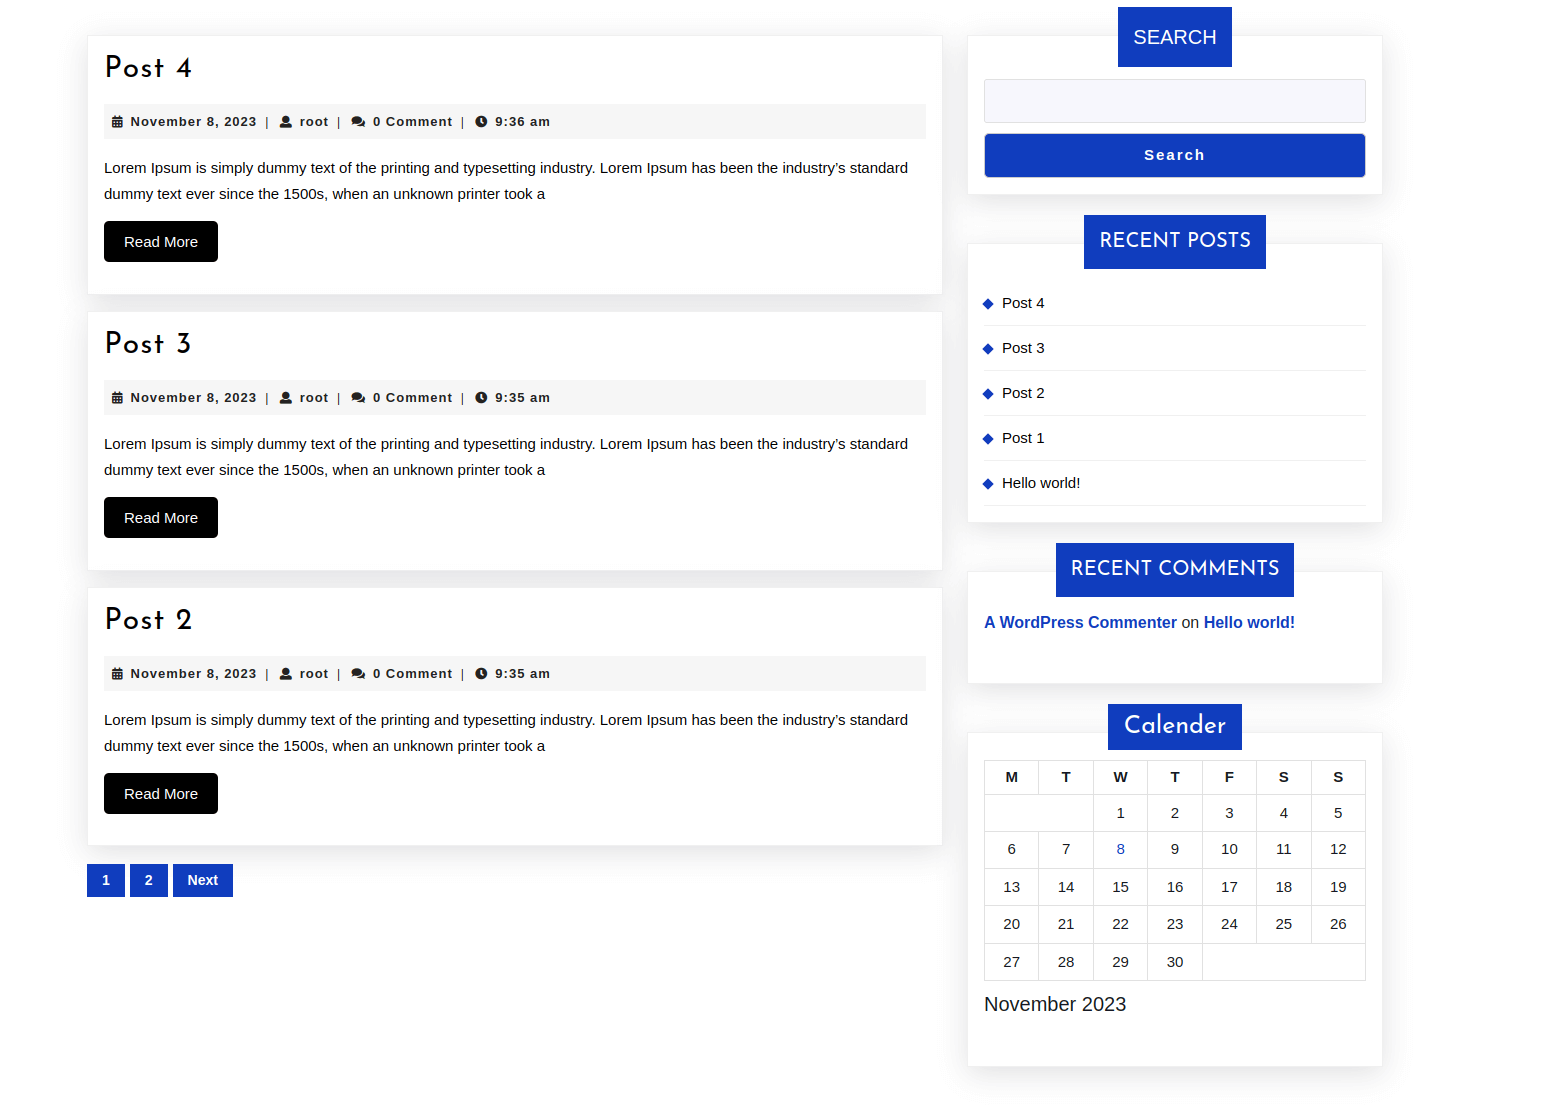
It will appear as such on the front end.
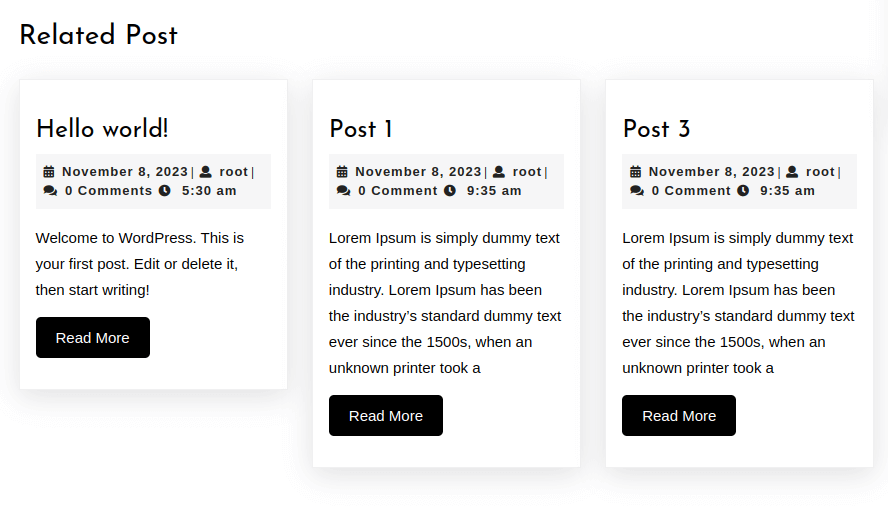
3. Related Post Setting
When setting up the Related Post Setting, proceed as directed below.
Go To Dashboard >> Appearance >> Customize >> Blog Post Setting >> Related Posts Setting
Here you have choices for related post title, Show/hide related post and related post count options.
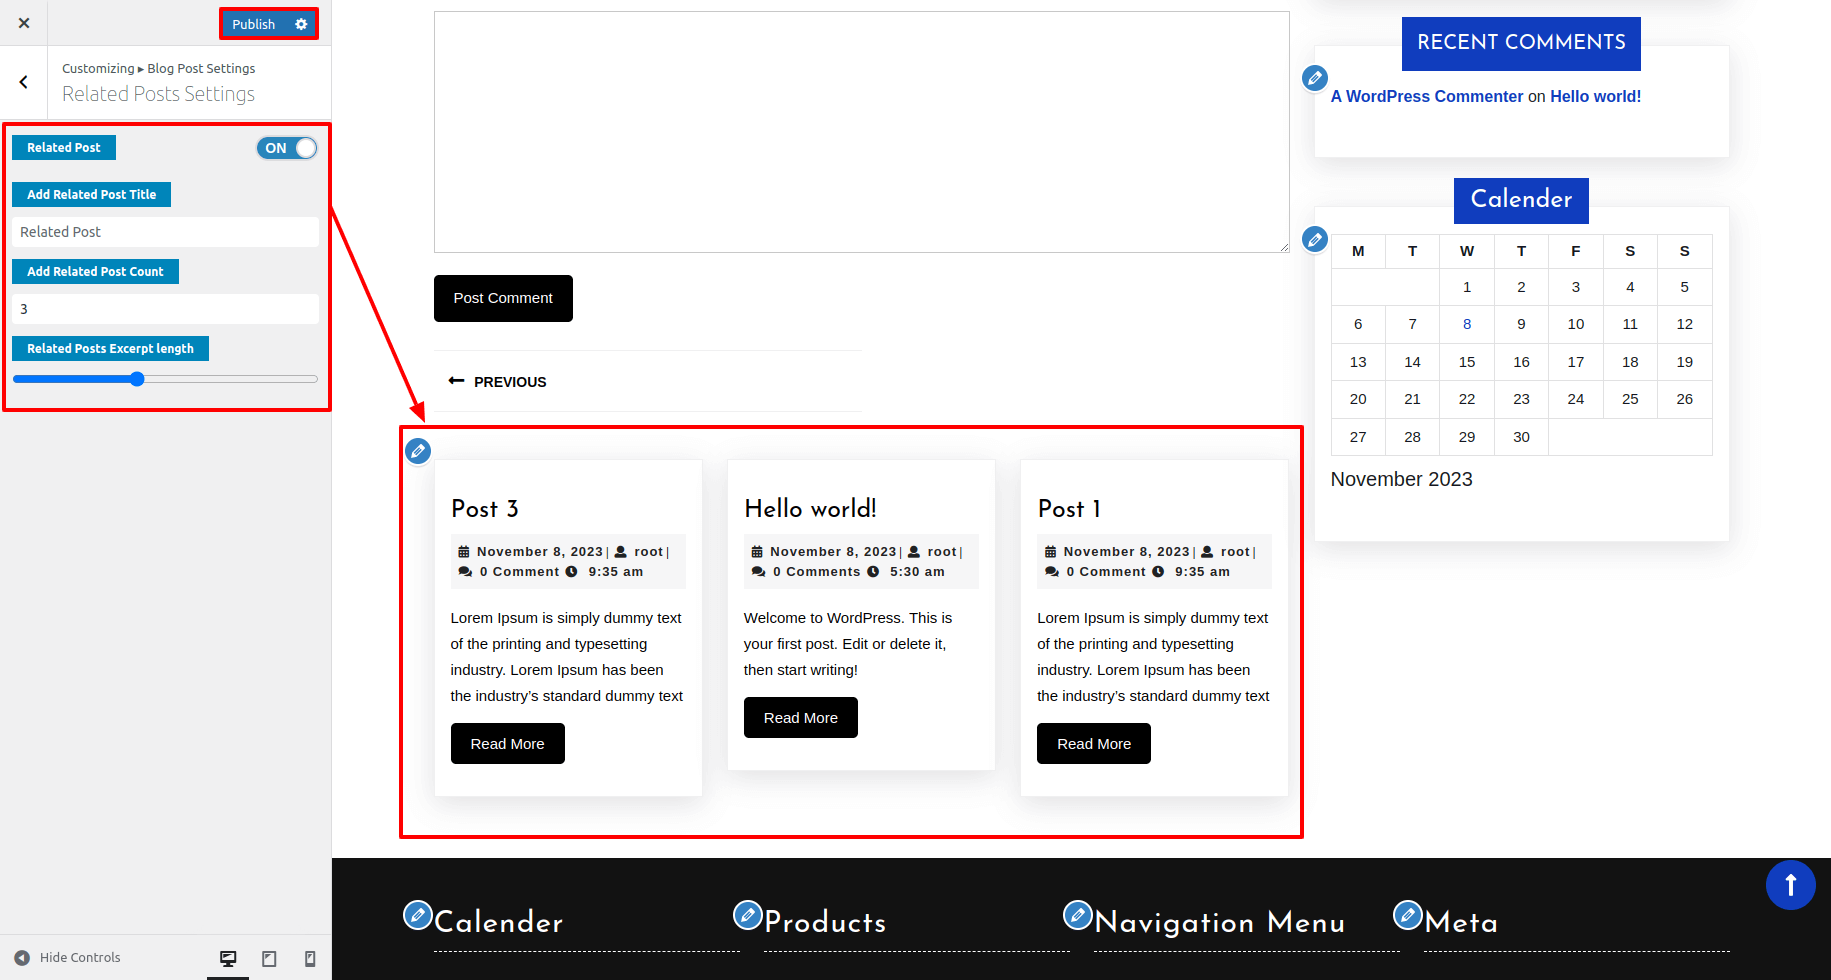
It will appear as such on the front end.
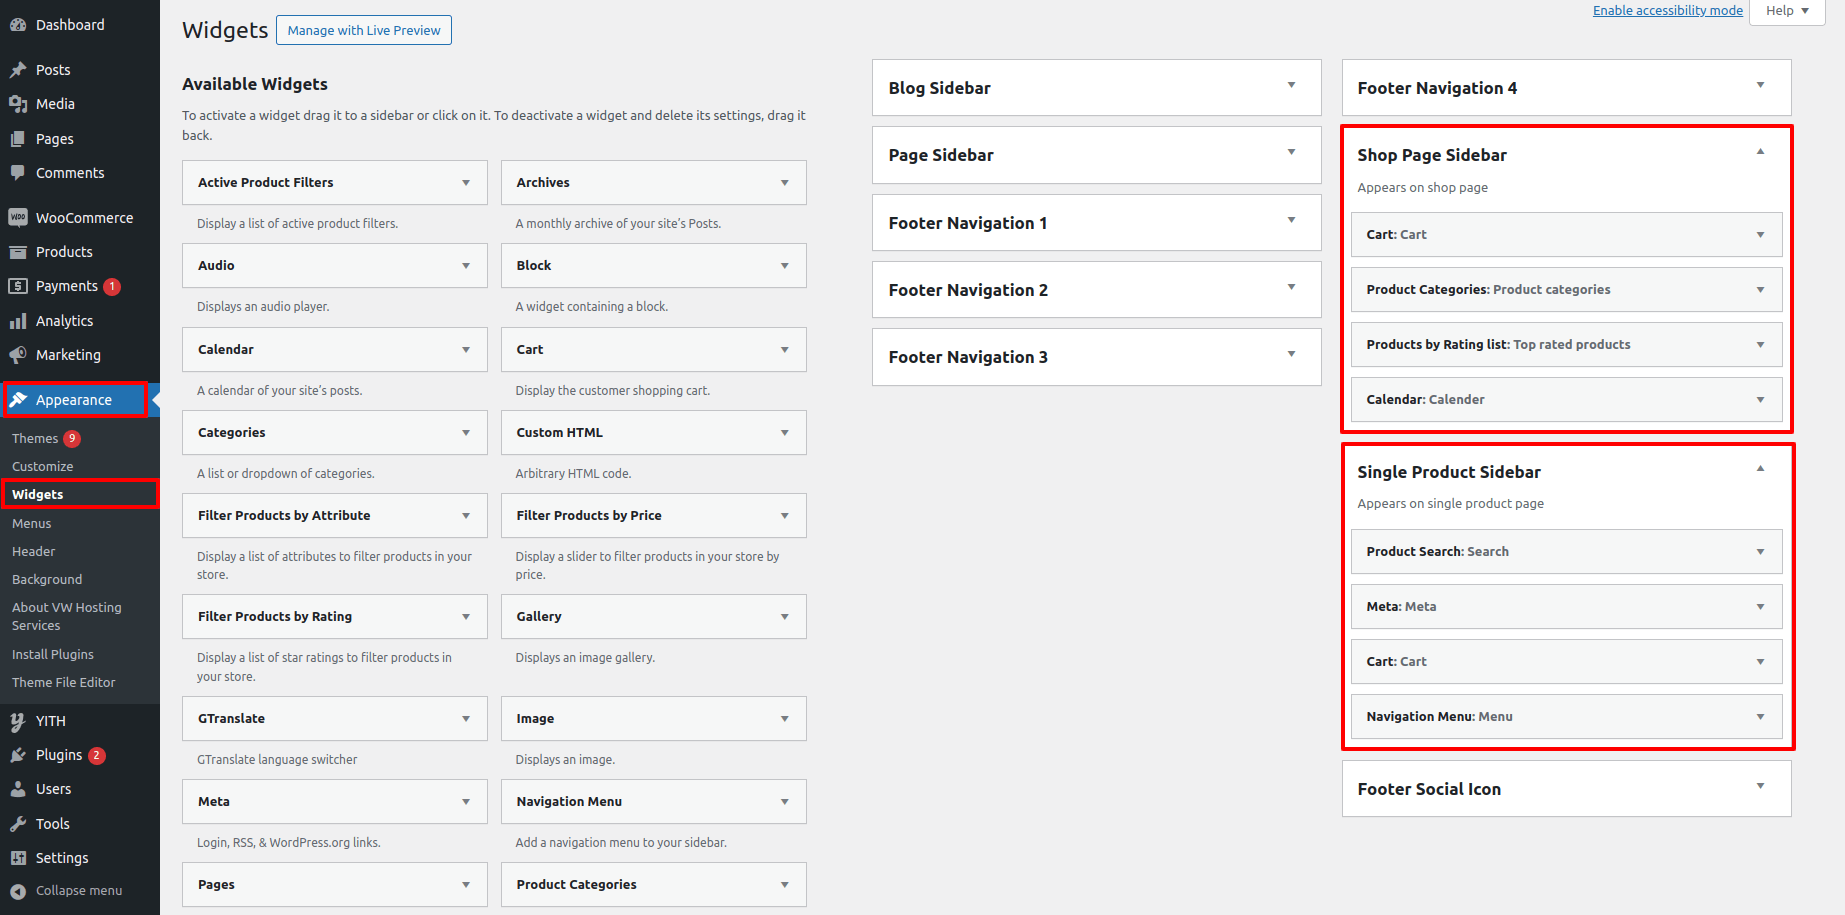
WooCommerce Layout Setting
When setting up the shop page and single product page sidebar, proceed as directed below.
Go To Dashboard >> Appearance >> Widgets
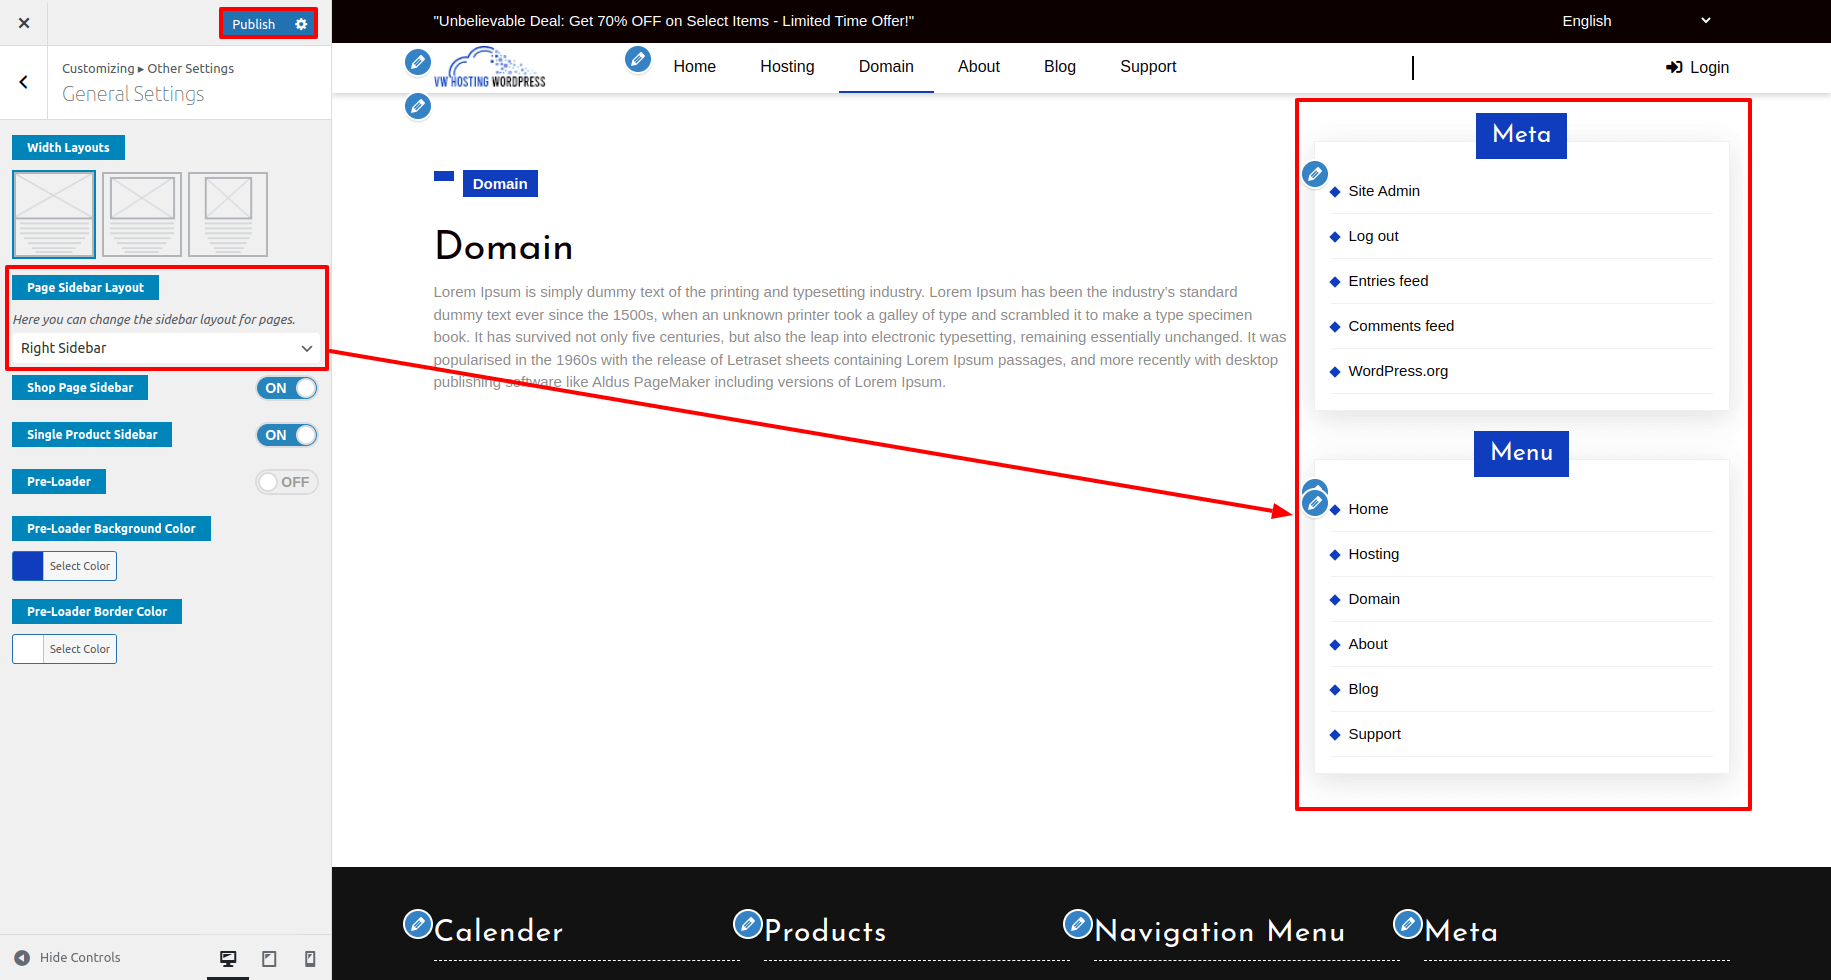
Go To Dashboard >> Appearance >> Customize >> Other Setting >> General Setting
Shop page sidebar layout.
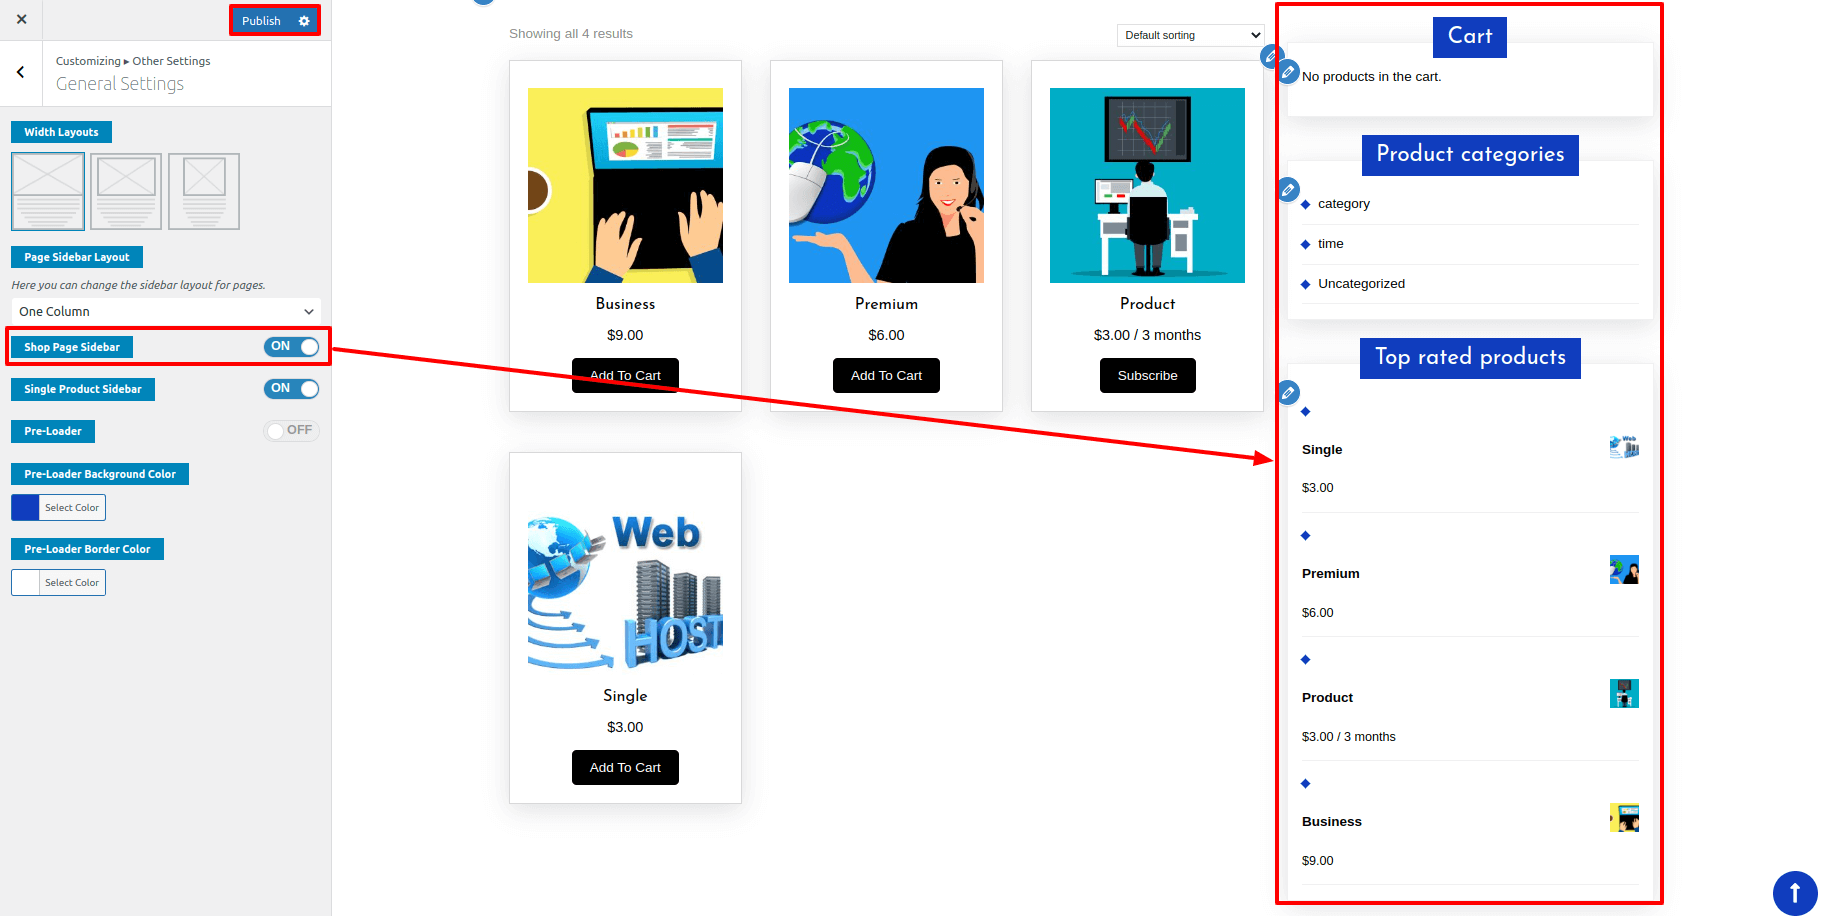
It will appear as such on the front end.
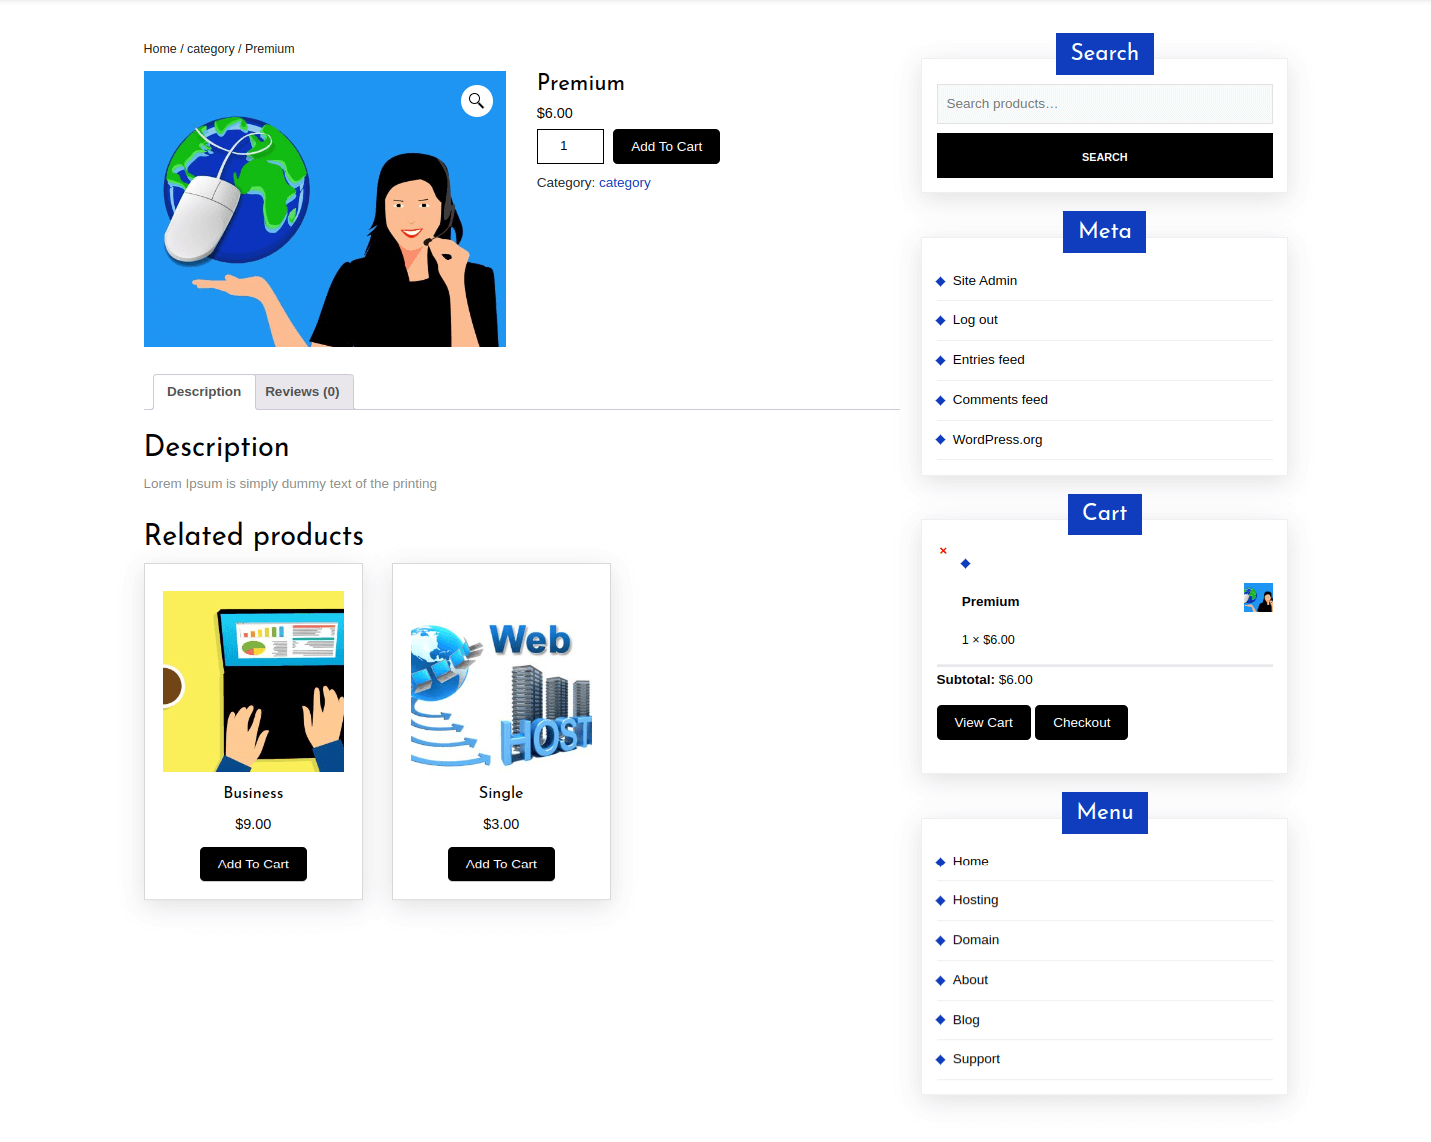
Single product sidebar layout.
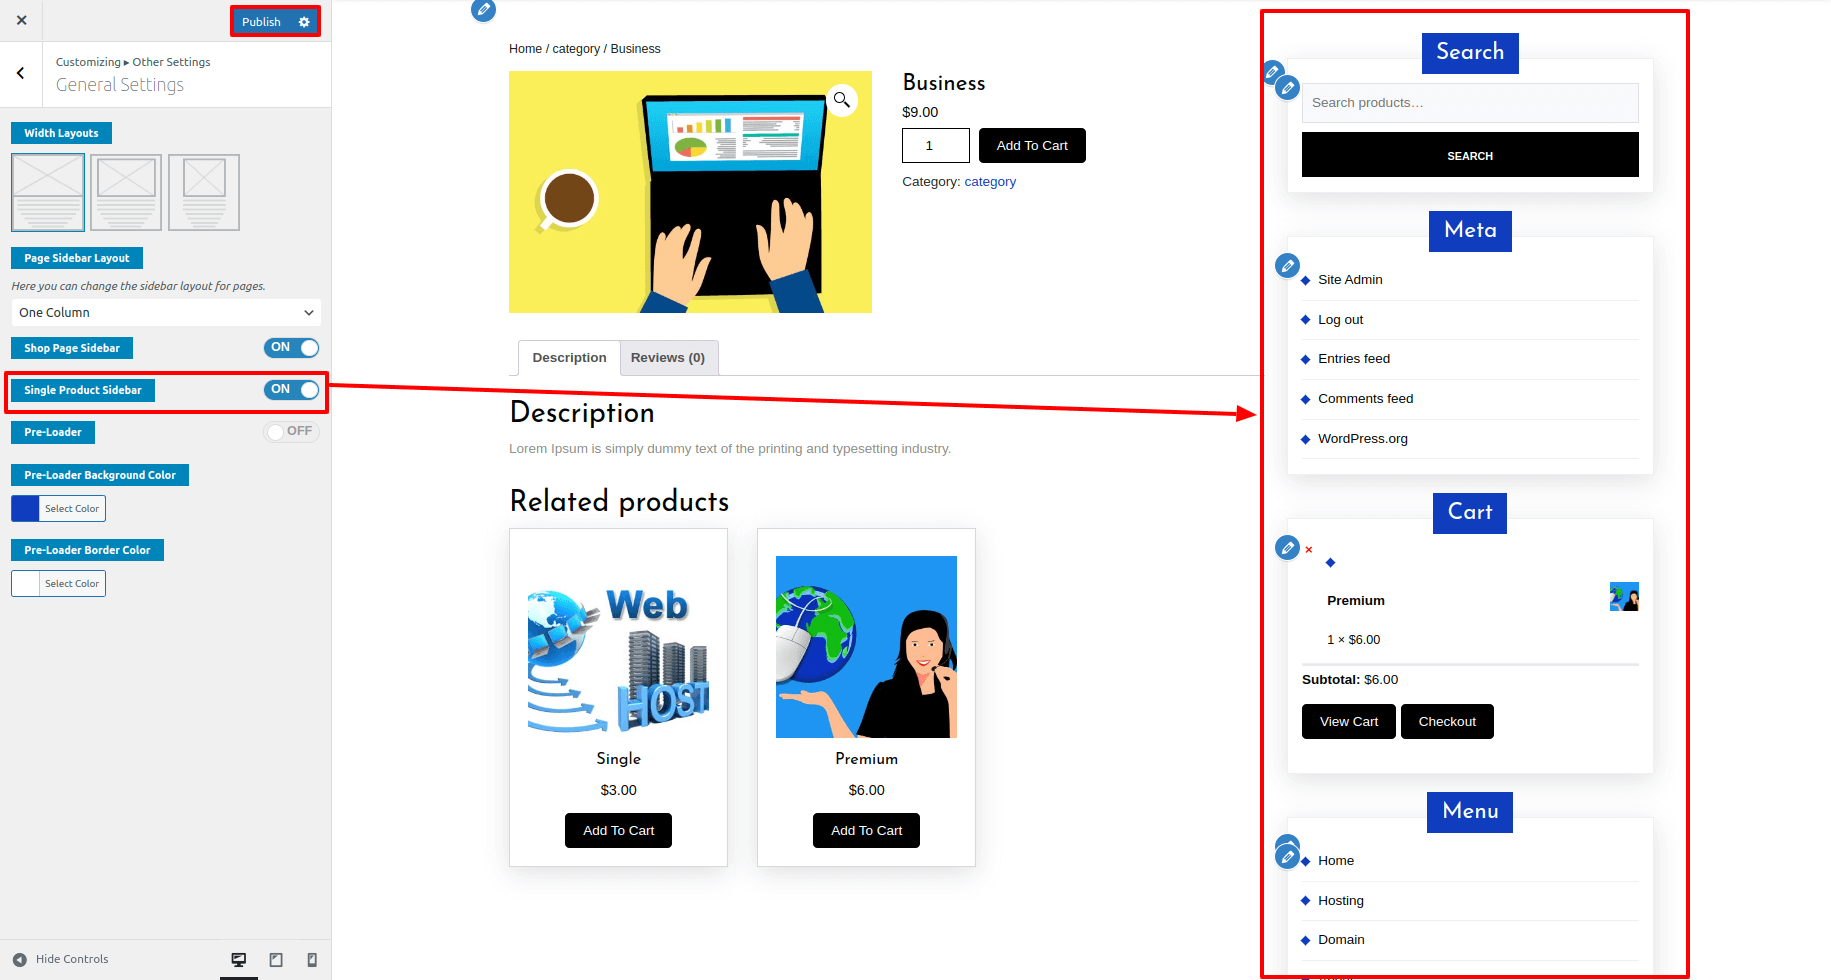
It will appear as such on the front end.
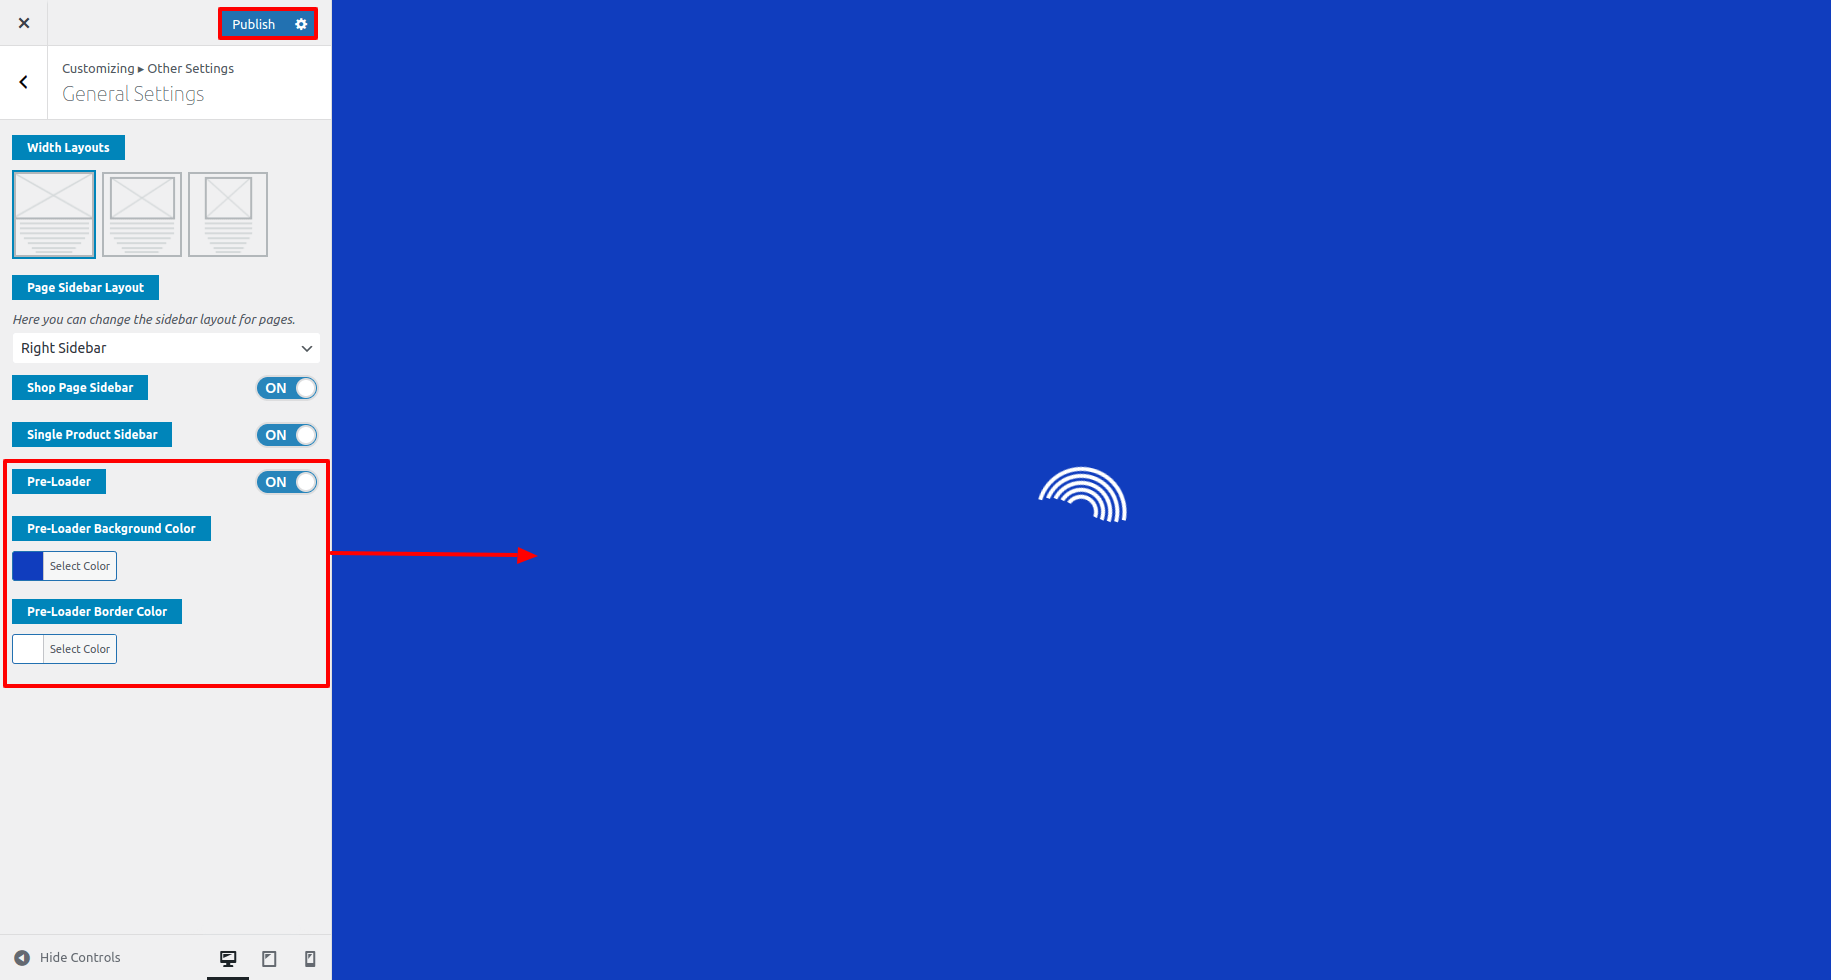
General Setting
Go To Dashboard >> Appearance >> Customize >> Other Setting >> General Setting
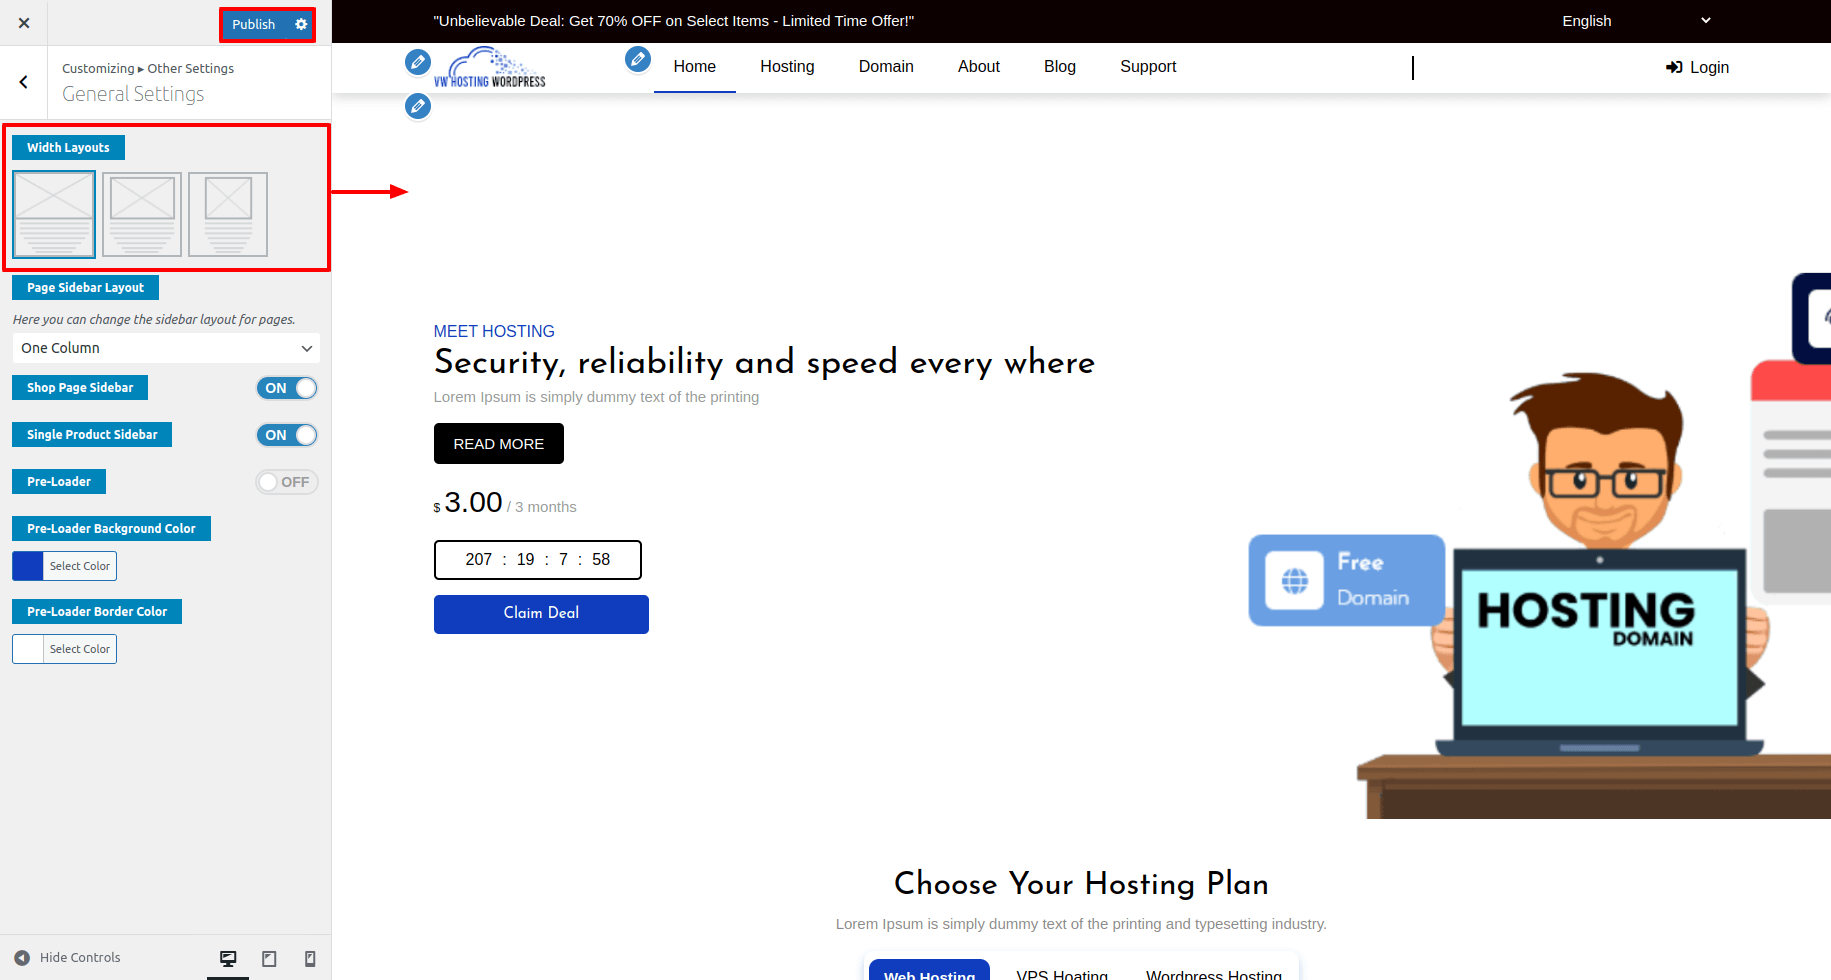
1. Width Layout
In Theme Width Layout there are three options
1) Full width2) Fluid Container width
3) Box container width
In Full width, the theme width will be default.
In Fluid Container width, the theme width will be in container fluid.
In Box Container width, the theme width will be in box container width.
Below Given Screenshot is for Full width.
Below Given Screenshot is for Box container width.
2. Page Sidebar Layout
Add Page sidebar as follows:
In this, you can change the page sidebar layout.
3. Pre-Loader: In this, you have option to show/hide the Pre-Loader in the theme and also have option for Pre-Loader type.
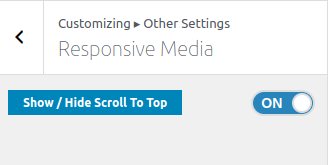
Responsive Media Setting
Go To Dashboard >> Appearance >> Customize >> Other Setting >> Responsive Media
Here you have choices to show/hide scroll to top.
Free Vs Premium
| Theme Features | Totally free themes | Superior Themes |
|---|---|---|
| Customised Themes | ||
| Flexible design | ||
| Upload a logo | ||
| Links to social media | ||
| Slider Options | ||
| Slides there are | 3 | 11 |
| Website Templates | 3 | 6 |
| Home page Template | 1 | 1 |
| Theme sections | 2 | 11 |
| Contact us Page Template | 0 | 1 |
| Blog Layout & Templates | 0 | 3 right/left sidebar, full width |
| Website Templates & Layout | 0 | 2. Right/Left Sidebar |
| Color Pallete For Particular Sections | ||
| Global Color Option | ||
| Section Reordering | ||
| Demo Importer | ||
| Allow To Set Site Title, Tagline, Logo | ||
| Enable Disable Options On All Sections, Logo | ||
| Complete Documentation | ||
| The most recent WordPress compatibility | ||
| Compatibility with WooCommerce | ||
| Support Third-Party Plug-Ins | ||
| Optimised and Secure Code | ||
| Exclusive Capabilities | ||
| Section Allow / Disable | ||
| Google Fonts in Section | ||
| Images | ||
| Mega and Simple Menu Options | ||
| Support for custom CSS and JS | ||
| Shortcodes | ||
| Custom Background, Colors, Header, Logo & Menu | ||
| Premium Membership | ||
| Budget Friendly Value | ||
| Priority Error Fixing | ||
| Custom Feature Addition | ||
| All Access Theme Pass | ||
| Seamless Customer Support | ||
| Upgrade to Pro |